


I love the beautiful embroidery work of Textile Artist Elizabeth Pawle and as I was looking at some of the supplies around the studio I started to wonder if we could create a giant embroidery out of paper for a party backdrop. I ordered some extra paper ribbon and we got started on a giant paper embroidery project!

There are pretty good colors out there of paper ribbon but we ordered extra white and did some spray painting to make a few more special colors like neon pink. Would you ever make an embroidered paper backdrop for a party?


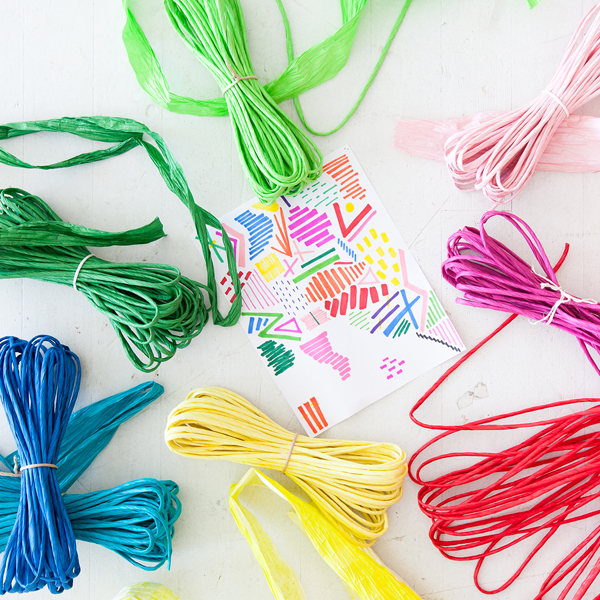
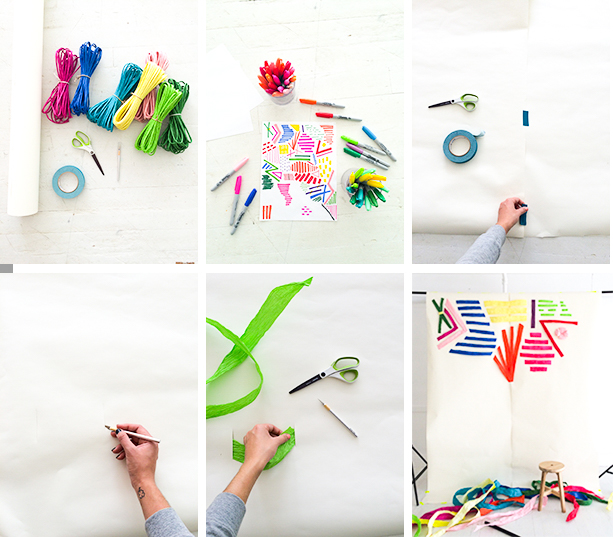
Materials: Twisted Paper Cord, Large Rolls of Drawing Paper, Exacto Knife, Scissors, Tape
Step 1: Choose your colors. This paper ribbon is easier but if you’d like a wider selection of color you can also use this twisted paper cord. The twisted paper ribbon takes a bit longer because you have to untwist before using.
Step 2: Draw a sketch of the design you’d like to do. You can always change it as you go, but it helps to map out shapes and colors.
Step 3: Create the base of the backdrop with two large pieces of drawing paper taped together. You can use any large paper, but it helps to use one that is thicker. This allows your backdrop to stay sturdy when you begin to weave the ribbon into it.
Step 4: Hang the backdrop in a doorway or taped to the ceiling in order to begin weaving. You’ll need to be able to access both sides of the paper.
Step 5: To begin weaving, use your exacto knife to cut a two slits into the paper. Slide one piece of ribbon through each slit, making sure you leave enough excess on each end so that it doesn’t slide out. The ribbon should stay in place on its own, but you can tape it on the back if needed.
Step 6: Repeat step 5 as you recreate your sketched design. Add variation by making some of the slits curved, placing the slits closer or further apart, and changing the how wide the ribbon is by cutting it or folding it in half.
Step 7: Hang on the wall and enjoy!

Photos by Alison Piepmeyer
Crafting by Mercy Favrow


Alexandra Adams
August 30, 2016
I love Elizabeth Pawle! I never would have thought to turn her work into a backdrop – love the textures.
Elizabeth Pawle
August 30, 2016
This is amazing, it looks so good! I’m happy you love my work x
Kari
August 31, 2016
Great photo backdrop!
Kari
http://sweetteasweetie.com/make-garlic-marinara-sauce-zoodles-15-minutes/