


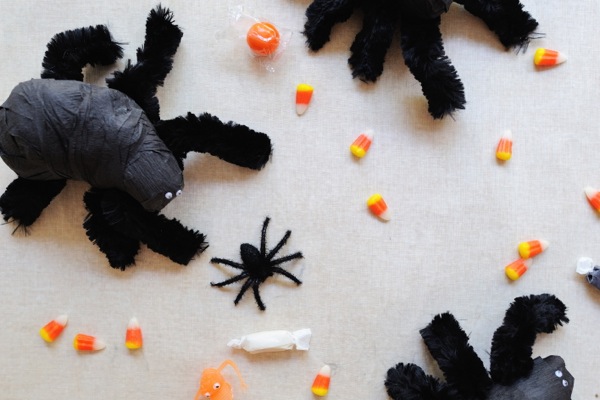
Who doesn’t love a surprise ball? Granted, these spider ones aren’t nearly as pretty as these, but they certainly are creepier -and just in time for Halloween. Boo!


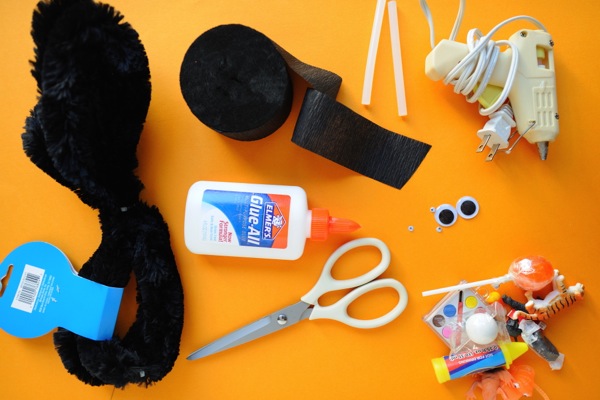
Materials needed: black crepe paper, white glue, scissors, googly eyes, hot glue gun, thick black chenille pipe cleaners, tiny treats and goodies.
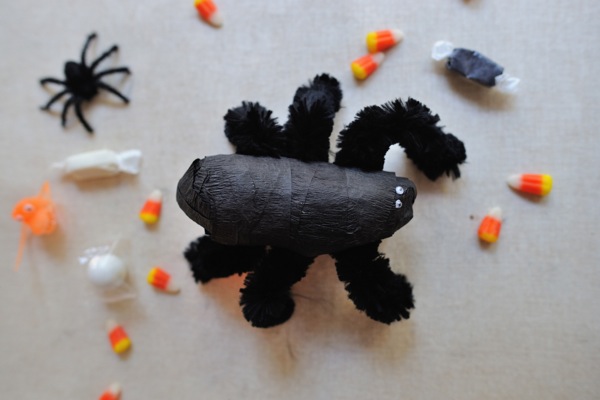
Step 1: Begin wrapping your treats in with the black crepe paper. Once one treat is covered, add another. Keep adding until you have a potato-sized ‘spider’ shape.
Step 2. Glue and secure the end of the paper.
Step 3. Cut the chenille pipe cleaners into four pieces, about 4 inches long each.
Step 4: Apply hot glue to the bottom of the spider.
Step 5: Attach the four ‘legs.’ Press and hold firmly against the hot glue, being careful not to burn yourself!
Step 6: Apply to beady eyes to the front of the spider.
Step 7: Let your recipient unwrap and discover, and unwrap and discover, and unwrap…….you get the idea!


Krystal
October 24, 2013
This looks awesome!
Kyleigh
October 24, 2013
Pinned! These are just the thing I’ve been looking for, for my Brownie unit’s halloween party next week. So cute and the kids will love ripping into them like presents!!
Thanks!
STEL STYLE
October 24, 2013
You are so creative!! This diy is so cute
http://www.thestelstyle.com
Heather HS
October 24, 2013
Um, these need eight legs!
Charmaine
October 24, 2013
These spiders are so cute
Paulette Leto
October 29, 2013
That’s a pretty neat idea, but Heather is right – I only see six legs in the picture! That poor crippled spider must have lost two legs in the war or something. 😛