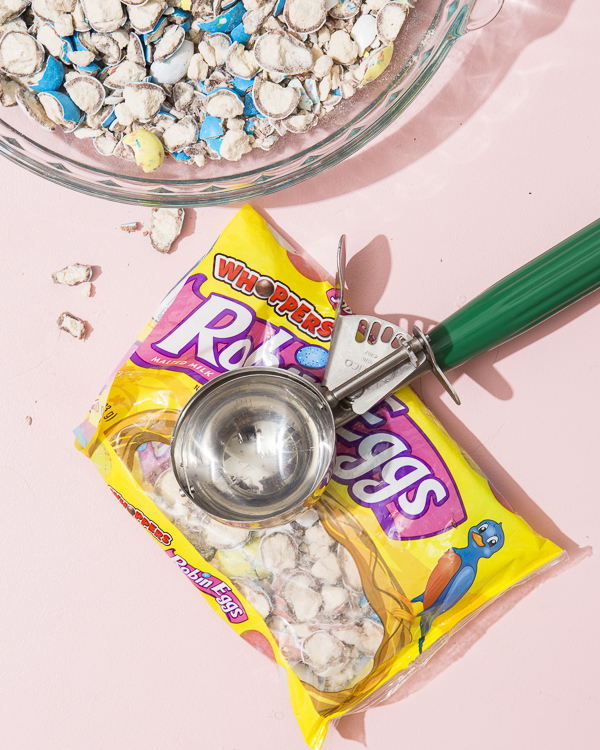
Every year, without fail, I see a bag of Robin’s Eggs for sale in the Easter candy aisle, tell myself it sounds delicious, buy the bag and end up eating it all by myself. Then, I say, “Why, whyyy did I do this?” as I lay in bed with a stomachache. This year, I thought I’d get a leg up by pouring the bag into a batch of cookies I was experimenting with. It was a total bust, because heat melts the candy, so I was just standing in my kitchen with a bowlful of robin’s egg pieces (that I think just made it easier to eat by the handful?) and nowhere for them to go. I got the idea then to press them into a cake to give sort of a terrazzo effect- perfect for gaining a couple cool points for the Easter festivities!
Robin’s Egg Terrazzo Cake
Makes a 4 layer 8″ cake
For the cake:
You’re favorite cake recipe that makes 2 8″ cake layers (I just used a box of devil’s food cake mix)
For the vanilla buttercream:
1 cup unsalted butter, softened
4 cups powdered sugar
Pinch of salt
1/4 cup heavy cream
1 teaspoon vanilla bean paste
For the malted Ovaltine Buttercream:
2 1/4 cup powdered sugar
1/2 cup malted chocolate Ovaltine
3/4 cup unsalted butter, softened
Pinch of salt
1/4 cup heavy cream
*if this isn’t your vibe then just go ahead and double the vanilla buttercream*
For the Decoration:
2 bags of Robin’s Eggs candy, not the mini egg size, you could probably get away with breaking up just one bag but it’s hard to say if you’ll get enough pieces to decorate so I’d grab 2 just in case
Bake off the cake in 2 8″ round cake pans and set on a wire rack to cool completely.
Make the vanilla buttercream by beating the butter in the bowl of a stand mixer fitted with the paddle attachment, then adding the powdered sugar, 1 cup at a time on low speed so you don’t get it everywhere. After all the powdered sugar’s been added, toss in the salt, heavy cream, and vanilla bean paste. Beat on low speed to combine then bump it up to high speed to get it nice and fluffy, about minute.
Transfer the buttercream to another bowl then make the ovaltine buttercream, no need to clean out the bowl.
Beat the butter, then add the powdered sugar, 1 cup at a time on low speed so you don’t get it everywhere. After all the powdered sugar’s been added, add the ovaltine with the salt and heavy cream. Beat on low speed to combine then bump it up to high speed to get it nice and fluffy, about minute.
Build the cake by removing the cake layers from the pans and carefully slicing them in half to get 4 layers of cake. If this stresses you out then just keep it a 2 layer cake, adding the ovaltine buttercream all to the center of the two layers. It’ll be our little secret. Place one layer down, apply about a third of the buttercream and smooth it out evenly, leaving a half inch naked around the edge. Repeat with 2 more layers of cake and the rest of the ovaltine buttercream then finish with the 4th layer.
Apply a thin layer of the vanilla buttercream to the outside of the cake to create a crumb coat then refrigerate the cake to set the buttercream. After about 30 minutes, remove the cake from the fridge and apply the rest of the buttercream in an evenish layer.
Now we get to decorate: Use a heavy spoon or an ice cream scoop to roughly break up the Robin’s Eggs directly in their bag then dump them out into a large dish, like a pyrex baking dish, and transfer whatever didn’t get broken up back into the bag and thwack it a couple more times. The goal is to have some larger pieces in there, so don’t get too crazy. You should have some tiny little pieces naturally and those are perfect for filling up gaps.
Start with the top of the cake and press (some pieces more firmly than others) the pieces of shell into the cake. I like to put a handful of larger pieces sort of all over then fill in with the smaller pieces to get the terrazzo tile effect we’re going for. After we apply it all over the top we can move onto the side with the same method of using larger pieces as anchors and equal color distribution then filling in with the smaller pieces along with even the tiny tiny guys. After you’ve covered the cake you can serve! ProTip: Transfer to the fridge to make it easier to slice and serve.


Colleen
March 23, 2018
You can press the pieces of candy into freshly baked cookies and brownies while they are still warm from the oven. This will give you the nice effect of the shape and colors staying intact while effectively decorating them 🙂
Great addition, nicely said.
Gemma
March 23, 2018
OH MAAAA GAAAAAAD!
Gemma
http://www.fadedwindmills.com
Sugar Mummy
March 23, 2018
Yummy! Great work… thanks for sharing such a great tip.
Katie
March 27, 2018
Wow, it looks very tasty, I have to make this cake.
Greetings! 🙂
lily
April 1, 2018
omg this looks amazing!! defo keeping this one safe! xo