It’s no secret that everyone on our team is a pretty big beanie fan (these ones from Urban Outfitters are our favorite!). Maybe it’s just the fickle San Francisco weather, but beanies always seem to be the perfect way to, quite literally, top off an outfit. Scroll down to see how we made over our favorite accessory!
Ribbon Tag Beanie
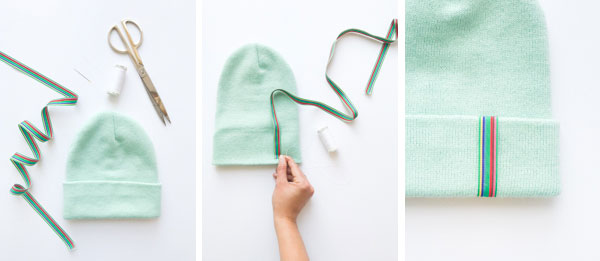
Materials: Beanie, ribbon, sewing thread, sewing needle, scissor
Step 1: Take a few inches of ribbon and place it on the beanie where you want it to be, attach it with a needle to keep it in place.
Step 2: Fold over the end of the ribbon and stitch onto the fold of the beanie. You’ll want it such that you don’t see the end of the ribbon when wearing it.
Step 3: Fold the other end of the ribbon so you get a nice edge. Attach the ribbon onto the inside of the beanie doing the same thing with a few stitches.

Patch Beanie
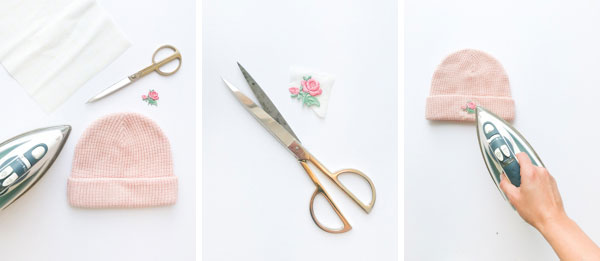
Materials: Beanie, patch, double-stick fusible web, scissor, iron
Step 1: Select a patch you want on the beanie. If it doesn’t have adhesive on the back, you can attach the double-stick web by iron it to the backside of the patch first.
Step 2: Take the patch and place it in the middle of the beanie and attach it by iron it on, using the directions from the fusible web. Easy!

Iron-On Letters Beanie
Materials: Beanie, 1” iron-on embroidered letters, iron
Step 1: Decide what you want it to say.
Step 2: Lay out the letters on the beanie to make sure it fits.
Step 3: Attach the letters on the beanie with the iron by following the instructions for the letters.

SHOP THIS POST: Beanie, Stripe Sweater (similar), Dress (similar)
Photography and styling by Sarah Kate Pric


transplantation cheveux tunisie
March 29, 2018
This is fantastic! So cute , thank you
Briana
March 29, 2018
Oh my goodness, so fun! I always love to wear my favorite beanies!
Briana
https://beyoutifulbrunette.com/
Jacqueline
March 31, 2018
These are fantastic!
Belle
April 3, 2018
It’s all in the details!
http://www.thislifeisbelle.com/