


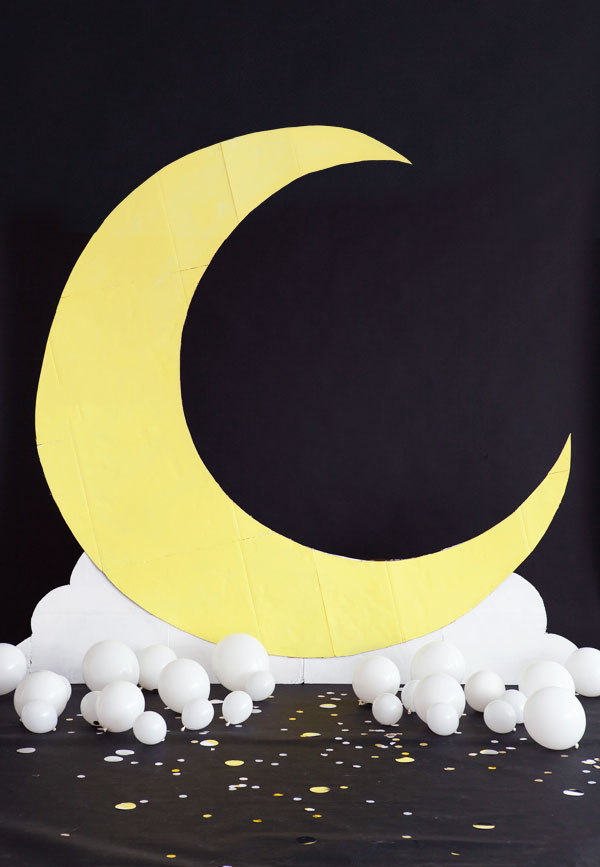
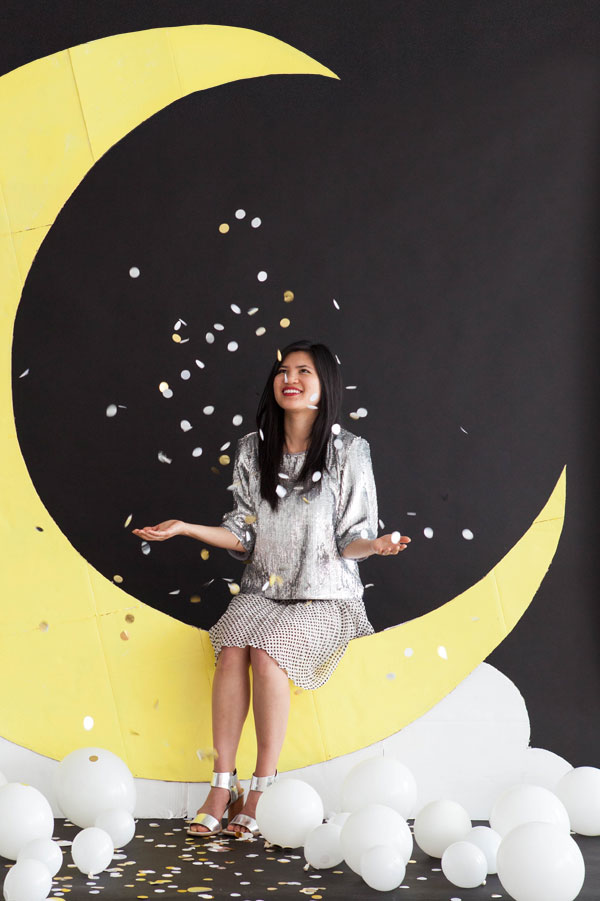
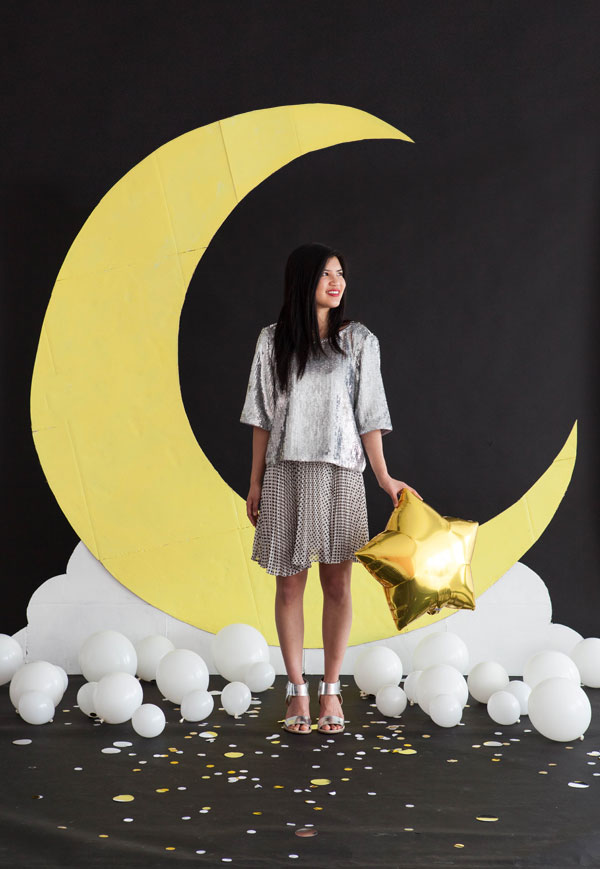
I’ve always loved those classic giant moon photo backdrops. So we decided to make one ourselves. They are so classic and when you turn them black and white they look fantastic. Whether you are making it for a prom or a Starry Starry night party the materials used are very simple.

Possible Themes: Moons Over My Hammy, Outer Space, Starry Starry Night, I love you to the Moon and Back. We added white balloons on the ground to make it more “cloudy” and designed a gold and silver tablescape to make in feel shiny and celestial. See how to make it below!


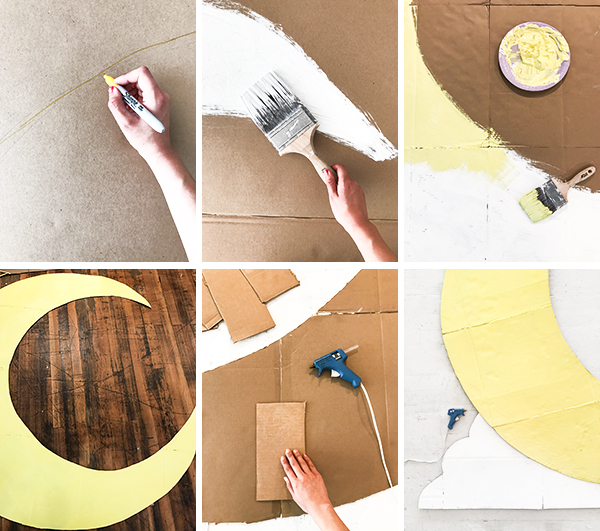
Materials needed: A large piece of cardboard, pencil, gesso, yellow acrylic paint, paint brush, x-acto knife, hot glue gun, long bench, gaffer’s tape
Step 1: Paint a general moon shape onto the cardboard with gesso and let dry completely. Then, paint pale yellow.
Step 2: Sketch a large round shape on the cardboard with pencil. Draw in the inner arc of the moon, keeping the height of your bench in mind. The height should allow someone to “sit” on the moon with the bench hidden behind.
Step 3: Cut out the moon shape with an x-acto knife.
Step 4: Reinforce the moon by hot gluing additional cardboard to the back in areas where extra support is needed.
Step 5: For the cloud base, get a piece of cardboard that is wider than the width of the moon and paint it white. Let it dry.
Step 6: Draw a large cloud shape on the white cardboard in pencil. Lay the moon shape over the cloud. Trace along the inner arc of the moon, so that the height of that portion of the cloud beneath the moon is equal to that of the inner arc. Use an x-acto knife to cut out the cloud.
Step 7: Hot glue the moon to the cloud base, leaving three inches of cloud exposed at the bottommost point of the moon so that the moon looks like it is hovering.
Step 8: Apply long cardboard tabs to the back of the moon the width of your bench. Mount the moon and cloud structure against the bench and tape the tabs to the bench with gaffer’s tape.
SHOP THIS POST: Silver Top, Star Balloon, White Balloons, Metallic Confetti, Star Plates, Star Cups, Metallic Straws, Gold Cutlery, Star Garland, Silver Star Garland, Mini Moon Balloons, Gold Dot Napkins, Metallic Party Horns, Star Sparklers
Photography & Styling by Sarah Kate Price
Crafting by Justine Pon


Peppermint Dolly
March 16, 2017
Great job!!
Rebecca
xx
http://www.peppermintdolly.com
Paige
March 16, 2017
This is so cute! You guys did an amazing job!
Paige
http://thehappyflammily.com
Michelle
March 16, 2017
It looks so great, would be perfect for a theatre performance!
https://www.makeandmess.com/
Jacqueline
March 16, 2017
Absolutely stunning! This is maybe the best backdrop I’ve ever seen, so pretty!
– Jacqueline
http://jackieomy.blogspot.ca/
Sophie
March 16, 2017
This is a show stopper! I love it.
http://goldclutter.com
Debra
March 17, 2017
I have a picture of myself taken at a county fair sitting on a moon like this from the fifties. I think I was 7 or 8 years old, it is one of my favorite childhood photos.
Jessica
March 26, 2017
Love this! But where on earth do you find such big pieces of cardboard?!
Laura R
March 29, 2017
I can totally see this at a prom or lucky child’s room. Great job xoxo
Come check out your link today lovely!
https://bellalights.blogspot.com