


Yes, I am old enough to actually remember these.
I was an 80’s baby and therefore privileged to witness the halcyon days before our communication technology provided a convenient way to avoid actually talking to friends and family while awaiting a meal in a restaurant.
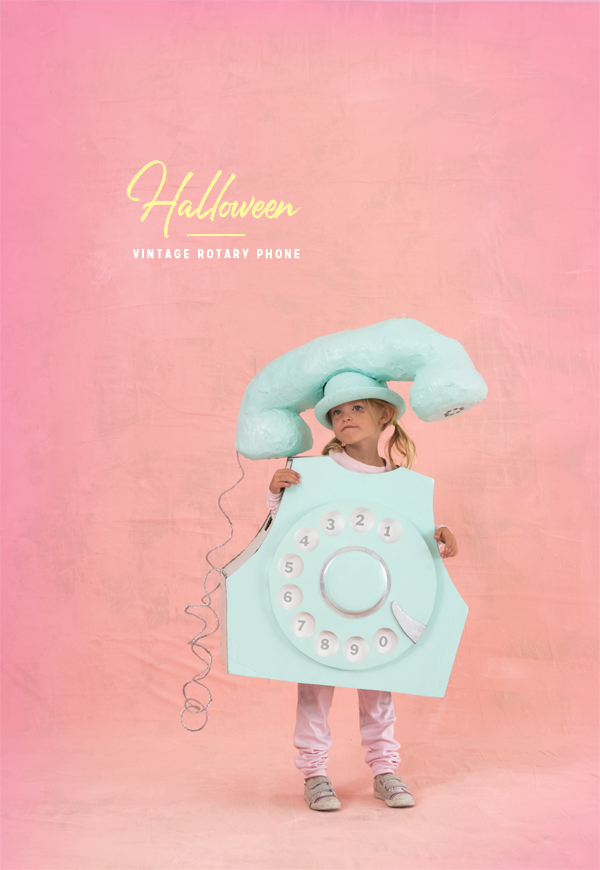
It’s definitely my favourite costume so far this year on account of the colossal cuteness!
Read on for the details…


Materials: Kraft paper, bubble wrap, packing tape, flour, water, mixing bowl, newspaper, paint brush, white paint, spray paint (mint, silver), round black stickers, blue felt, derby hat, x-acto knife, hot glue gun, measuring tape, cardboard, ruler, poster board, small paper plates, adhesive numbers, pipe cleaners
Step 1: To make the handset, crumple kraft paper into a stick, 2-1/2′ long. Wrap with bubble wrap and tape to secure. Form matching half-sphere shapes and tape to the ends of the bubblewrapped stick. Fine tune the shape, using packing tape to keep things in place.
Step 2: Paper mache the form, using a 1:1 mixture of flour and warm water. Let dry for 24 hours. Then, paint a white base layer.
Step 3: Spray paint the handset mint green. Once dry, stick round black stickers on the flat ends of the handset.
Step 4: Cut into the handset with your x-acto, using the hat for reference. Glue strips of felt along the opening to prevent further breakage. Then, glue the hat in place.
Step 5: Cut two matching pieces of cardboard in the shape of the rotary phone’s face. Cut pieces of cardboard for the straps and the sides of the body, using the wearer for reference. Cut arm holes into the side panels. Roll the armhole panel to get a curved shape.
Step 6: Spray paint all of the pieces mint and let dry. Assemble with hot glue.
Step 7: Cut two big circles from poster board, one slightly larger than the other. Spray the larger circle mint. Then, cut ten circles along the curve of the mint circle.
Step 8: Glue the smaller circle to the costume body. Stack and glue cardboard spacers to the back of the mint circle to give the rotary some depth. Add glue to the spacers on the back of the mint circle, and place on top.
Step 9: Stick adhesive numbers counterclockwise in each window of the mint circle.
Step 10: Spray the back of one paper plate mint. Then give the plate a silver lining by trimming another plate, and using it to cover the center as you paint the edges. Let dry completely, then glue the two-toned plate to the center of the dial.
Step 11: Cut a piece of cardboard roughly in the shape of a comma. Spray paint silver and glue to the edge of the dial.
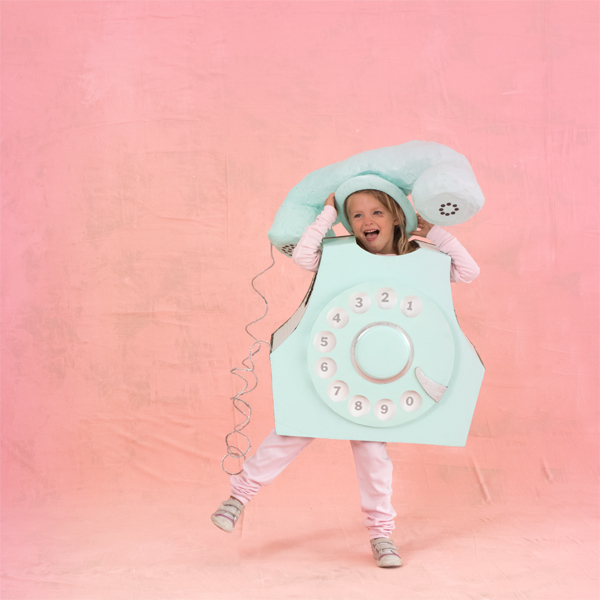
Step 12: Twist a bunch of pipe cleaners together, end to end. Coil the cleaners into a spiral (you can use a cardboard roll for shape). Glue one end to the body, and the other to the handset. Tada! You’re all done!
Under the costume, we recommend wearing solid pants/shirt in a coordinating color. For kids, Primary has great basics in a rainbow of colors!


Photography by Paul Ferney for Oh Happy Day
Art Directed by Irene Yu
Styled by Amy Moss
Produced by Alison Piepmeyer
Crafting by Naomi Julia Satake
Special thanks to little Maggie from JE Models!


Zoe-Lee
September 19, 2016
The photography for this is amazing. Love the costume idea!
Kari
September 19, 2016
What a super cute, retro idea!
kari
http://sweetteasweetie.com/cheesy-stuffed-shells/
Michelle
September 19, 2016
This is so adorably cute!
https://www.makeandmess.com/