


Every year I FALL in love with the gorgeous autumn leaves scattered on the ground. I love these Fall leaf cookies just as much as the real thing because they are so easy to make and each richly-colored cookie is different from the next. Making them is more about spreading icing around than piping them, and icing colors running together is 100% ok! It’s oddly satisfying to play and watch the vivid colors swirl together. Enjoy!

Materials needed: small leaf cookie cutters, sugar cookie dough, prepared, chilled and rolled out, royal icing (I use this recipe), food coloring, parchment paper or disposable plastic pastry bags, #1 pastry tip, several medium paint brushes and small bowls and spoons for mixing the colors.


Step 1: Make the cookies:
Using the leaf cutter(s) cut out as many cookies as desired and place on a parchment lined cookie sheet ¾ inches apart. Bake at 350° until the edges are golden, about 9-12 minutes. Let cool.
Step 2: Make icing colors and ice the cookies
Place equal amounts of uncolored icing in each of 4 bowls. Dye each batch of icing with a different fall leaf color. I used classic bright Autumn colors, red, yellow, orange, and green. Stir each mixture well and then add egg whites drop by drop to loosen, until the icing is a consistency between maple syrup and honey. Cover each bowl immediately with plastic wrap or damp paper towel to keep it from crusting over!!!
Dip a brush into one of the bowls and load some colored icing onto your brush. Gently dab it onto the cookie spreading it up to, but not over the edge of the cookie in just one area of the cookie. Next take another brush, or wipe off the one you just used, and do the same with another color. Where the colors meet let them swirl into each other, creating a pretty effect. Again, be careful to not put too much icing near the edge of the cookie. You will get the hang of this quite easily. Continue to use the different colors until you have covered the surface of the cookie, swirling and blurring the colors as you like. Make each cookie different , just like real fall leaves. Allow to set for at least an hour or overnight, depending on how thick your icing was applied.
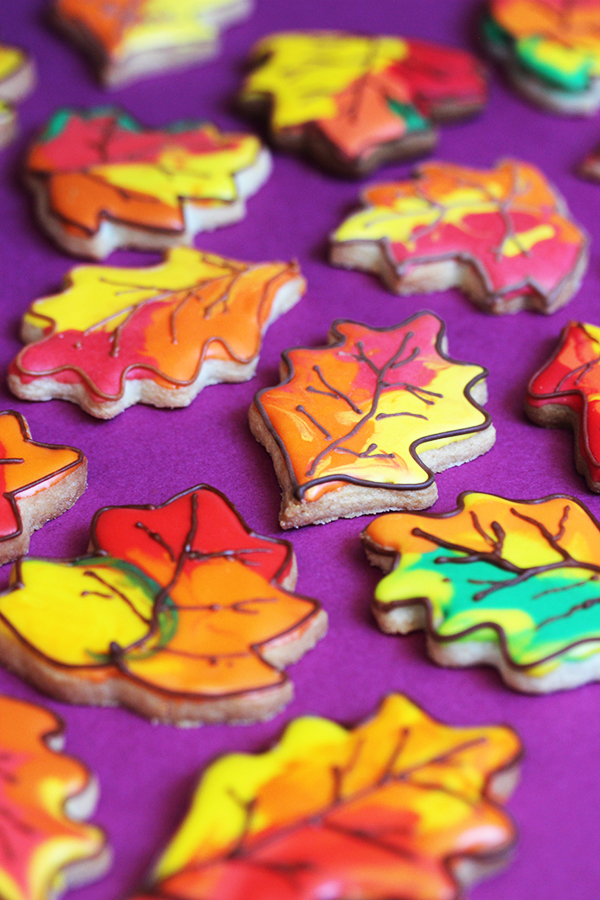
Step 3: Make the brown icing, outline and add the veins
Place a small amount of uncolored icing in a bowl. Mix in some brown food coloring to achieve dark brown color for the veins. The icing should be consistency of tooth paste. Put the icing into a pastry tube bag fitted with an number one (or smaller) tip. Outline the cookie to define the shape and pipe on the veins.


Tracy Klemens
September 26, 2016
My version would be a Pinterest fail! yours is amazing – your cookies look like art
Michelle
September 26, 2016
They are beautiful, I love the colour swirls!
https://www.makeandmess.com/
Maria
September 26, 2016
I love these fall cookies so much! They are like little pieces of art.
Pinata
September 26, 2016
Amazing! I love your cookies. It’s art! Wonderful 🙂
Kali
September 26, 2016
They really look awesome in the photos, I admit I would never do such a thing. Here in Europe we do love plain cookies, no food colouring please:-) Check out my natural cookies on my blog: http://www.idimin.berlin/kokos-preiselbeer-kekse-coconut-cranberry-cookies/ maybe you like them too;-)
Kali
Emma
September 27, 2016
These are gorgeous and your photography is amazing!
Melissa @ Putney Gardeners
October 3, 2016
Great idea! Autumn is my favorite season because of the beautiful colors in my garden, the falling leaves, the warm temperatures … these cookies will definitely make it perfect!