


To be honest, Easter was never a favorite holiday of mine. At least until I realized just how ridiculously CUTE bunnies are. Once I joined the ‘I Heart Bunnies’ fan club, it soon became apparent to me the what I needed most in my life was a GIANT ORIGAMI BUNNY. And maybe not just one but perhaps a whole freakin’ army of them!
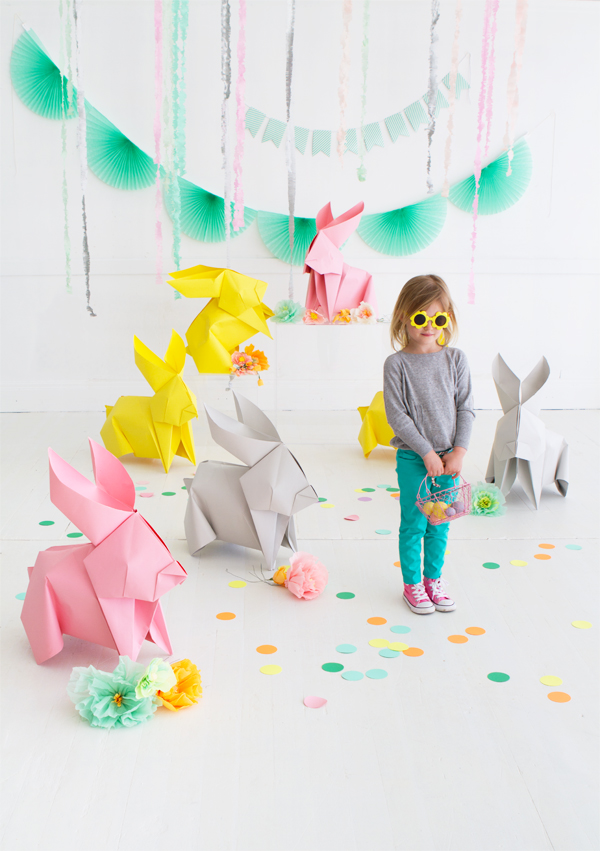
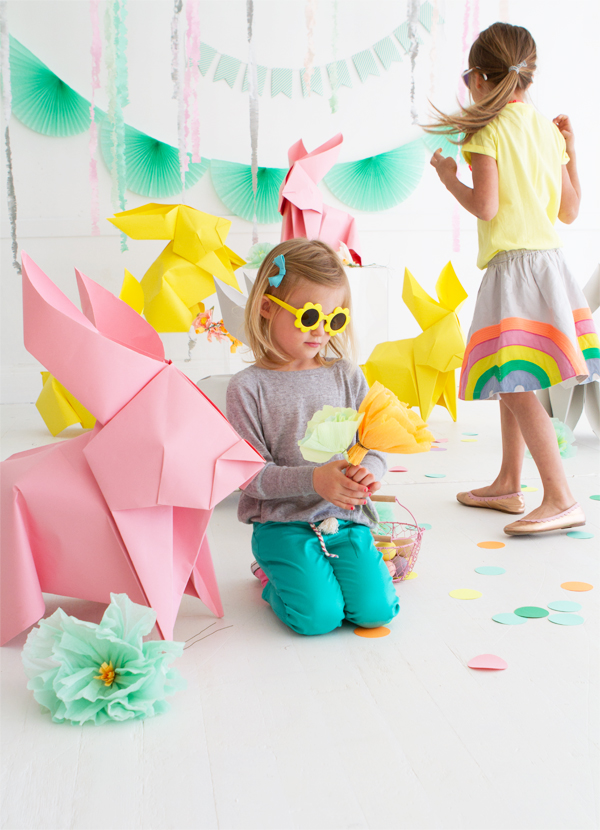
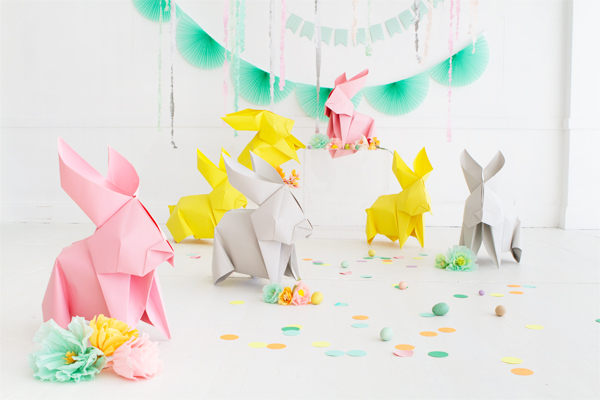
Yes, origami on a large scale is not exactly easy-as-pie, but the results are sooooo worth it. I mean, GIANT BUNNIES!! Wouldn’t they be a beautiful feature at a kid’s Easter egg hunt?


Tool and Materials: 53” seamless paper backdrop (Savage sells these in so many colors!), self-healing mat, a long ruler, x-acto knife, bone folder (for hard creases), pencil, hot glue gun
*This project uses Tetsuya Gotani’s design. Before starting, it may be helpful to review the original instructions here.
Step 1: Roll out the paper backdrop on a large flat surface. You may need weights to prevent curling.
Step 2: Fold one of the free corners in to create a triangle. Using the self-healing mat, long ruler, and x-acto knife, cut the paper from the roll. Unfold. You should have a perfect square.
Step 3: Fold in half to create a rectangle. Unfold. Fold in both sides to meet at the center crease.
Step 4: On the left-hand side, fold the edges in to create a triangle. Unfold.
Step 5: Using the pre-folded lines, do a squash fold. It should look a diamond. Fold the right-most end of the diamond over to meet the left.
Step 6: Fold in half. Flip.
Step 7: Fold the corners of the remaining rectangle edge. This doesn’t need to be precise! We went with a rough 30 degree angle from the center fold.
Step 8: Fold in half, again. Flip. Rotate the paper as photographed.
Step 9: Fold the top-right corner in to create a triangle (this is when you’ll start needing that bone folder!). Unfold.
Step 10: Using the pre-folded lines, do a squash fold. It should look like a larger triangle. Fold the left-most corner of the triangle over to meet on the right.
Step 11: Open the fold you made in Step 8. You should see a pre-folded triangle on the right. Using your ruler and pencil, mark the mid-point of the triangle.
Step 12: Create a pre-fold crease from the top right corner to the penciled mark. Repeat with the lower right corner.
Step 13: Using the pre-folded creases, pop the top portion up to create a reverse L shape.
Step 14: Separate and fold the triangle down from the top-most point. It should look like a larger triangle.
Step 15: Say, “Hi!” This is your bunny’s face!
Step 16: Open up the flap on the right. Bisect using the inner crease as a guide. Close the flap. Repeat on the other side.
Step 17: Z-fold the top-most part using the pre-folded crease. The sharpness of the angle is up to you — these are your bunny’s ears. Repeat on the other side.
Step 18: Open the flap on the right, again. Looking at the backside of the z-fold you just made, fold the side in, making a small squash fold. Apply hot glue and hold until cool. Close the flap. Repeat on the other side.
Step 19: Using the right-most point, z-fold ⅓ of the way into the face. This is your bunny’s nose!
Step 20: Using the left-most point, fold another z-fold. Let the point stick out a few inches. This is your bunny’s tail!
Step 21: Looking into the interior of the bottom-fold, you’ll see a flap on the right-side. Fold this over so that it peeks out beneath the bunny’s face.
Step 22: Pinch-fold paper under the bottom-right point (the front paw). Approximately ¼ of the way up the paw, apply hot glue, and hold until cool. Repeat on the other side.
Step 23: Approximately ⅓ of the way into the body from the left-hand side, create a loose pinch-fold. This is your bunny’s back legs. Apply hot glue and hold until cool. Repeat on the other side, being careful to make sure both of the back legs are even.
Step 24: Apply hot glue ⅔ of the way down the fold created in Step 21. Hold until cool.
Step 25: Create a small, triangular pinch-fold on the face, using the pre-folded crease as a starting point. Apply hot glue and hold until cool.
Step 26: Stand your bunny up and adjust as necessary! Don’t forget to fluff his ears!
Using the 53” wide paper backdrop will get you a two foot bunny. Amazon sell these rolls in smaller and larger measurements, too.

We’ve had some feedback that Step 13 was a little hard to follow so we made a quick video of this step (using a smaller origami bunny) to hopefully make it clearer!
Crafting by Naomi Julia Satake
Special thanks to little Sophie & Maggie from JE Models!


Olga
March 18, 2016
That´s a nice idea, I love this bunnies. Your blog is very beautiful, thanks.
Emily
March 18, 2016
Holy cow these are adorable! I love origami, but I’ve never tried it on a large scale like this. It looks a bit intimidating… My first thought on seeing these was that I wish there was a way to make these with thin wood and then seal it so that they could be all spring long yard decorations.
Jessica
March 18, 2016
The paper backdrops you suggested are over $40.00 each!
Hey Jessica, yes, unfortunately paper on that scale is not cheap but you do get a lot of paper in the roll. To save money, you could just make them all in one color so that you don’t have to buy multiple rolls. Hope I’ve been helpful!
Michelle
March 18, 2016
Wow, this is amazing! I love taking things a bit further and play with the proportions of something, never thought about doing this with origami! Great work!
https://www.makeandmess.com/
Vicky
March 18, 2016
Ohhh! love, love, love, beautiful post, lovely diy 🙂
Amanda
March 18, 2016
Ok, shush. These are amazing! In love.
http://www.theartfulscavenger.com/#!ROYGBIV/cmbz/56a668a40cf22a61cccc6f90
Daphne @ Be Frenchie
March 18, 2016
Dear Amy,
I’m really impressed and even if paper isn’t cheap in that size, it’s such a statement that you could keep long. Thanks for this DIY.
Aura Oriano
March 18, 2016
Going to try on a roll of IKEA paper before I spring for the $40 kind. Love it – thank you!
Crushing on that rainbow skirt too!!
Teresa
March 18, 2016
These are super-cute! I think I’m going to try making them slightly smaller with colored butcher paper (my local Beverly’s has 36″ rolls of it that you can cut from at 33 cents per foot). Thanks for sharing!
Cintia - Sol de Noche {deco crochet}
March 18, 2016
Amazing idea!!!!
http://soldenochedecocrochet.blogspot.com.ar/
Alice
March 18, 2016
Love this! My daughter now wants a bunny birthday!
Kari
March 18, 2016
These are amazing! I love how big they are!
Kari
http://www.sweetteasweetie.com
Kathy
March 18, 2016
This is so cute!! Yours turned out so well 🙂
Kathy xx
http://www.alongcamekathy.blogspot.co.nz
Julie
March 19, 2016
These are SO cute!
Valerie
March 19, 2016
Dear Amy
I ❤️❤️ your blog!
May I publish – of course referring to your blog – these wonderful bunnies on our Swiss blog for children?
All the best Valerie
Rebecca Sanchez
March 19, 2016
Do you think wrapping paper or brown craft paper would be good? I know it would be smaller but I was concerned about the thickness of the paper.
Franni
March 20, 2016
We’ve just ordered a toll of red craft paper from Amazon to try it out !
Marta
March 20, 2016
I just want it!
Pat Schwab
March 20, 2016
So stinking adorable! The kids are cute too.
Paige Flamm
March 21, 2016
These bunnies are adorable! i love how big they are!
Paige
http://thehappyflammily.com
Melissa
March 21, 2016
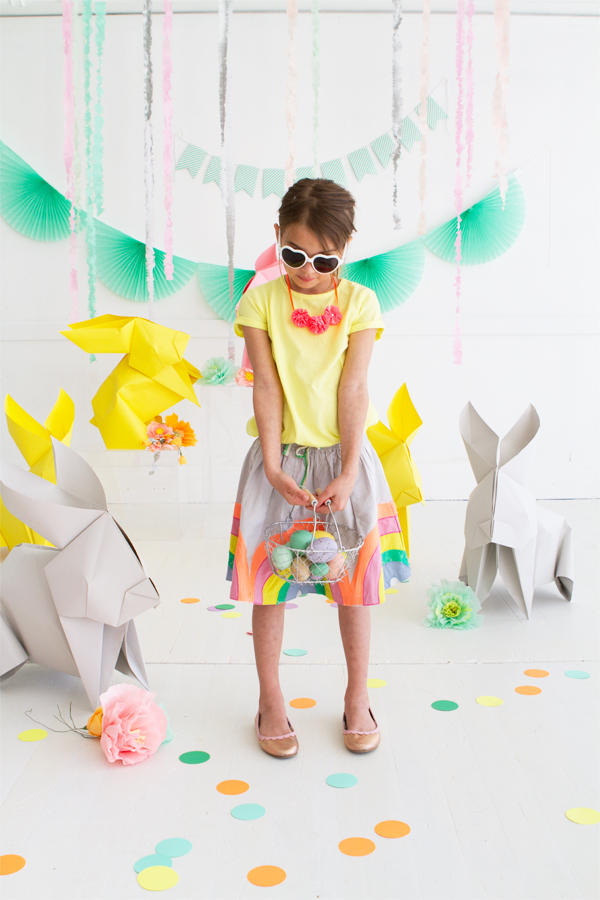
What a great idea. Fashion question. Where is the darling skirt with rainbows available? Thank you.
Hi Melissa! The skirt was from Mini Boden. Available here: http://www.bodenusa.com/en-us/girls-1h-12yrs-skirts/applique-skirts/32700-lgy/girls-1h-12yrs-light-grey-rainbow-rainbow-skirt
creativejewishmom/sara
March 22, 2016
These look amazing, and interestingly enough, I’ve also been thing giant origami! Check out my giant origami clowns, which I made with wrapping paper, and are quite simple. Of course they are for hanging on a wall not freestanding, but fun and quick to make: http://www.creativejewishmom.com/2016/03/giant-origami-clowns.html
Anna
March 23, 2016
These are so lovely!
I’ve been attempting to make one, but it seems I can’t get the hang of the folding past Step 17… if you ever make a video, that would be awesome!
mary thomas
March 24, 2016
Silly question I know, but how did you do the hanging strands of colored paper in this post? Is it crepe paper? I don’t know anything about crafts, obviously! And then where did you get the circled paper on the floor?
Thank you!
KANN
March 25, 2016
Love your colour pallet!
Cheers!
Kann
kanncollective.com
Matt S.
March 26, 2016
Thanks a bunch for the bunnies! Really like ’em.
annie
March 28, 2016
Love that you used lots of bunnies in 3 different colors to really make a statement…..i don’t
think that only 1 paper bunny would really do it…..however, @ $40 a shot that makes this
grouping of bunnies quite impossible. Of course, one roll in one color would make several bunnies and perhaps that would be satisfying but again, as is, the project is unreasonably expensive and wonder if another paper source could have been figured out….after all, there is also the aspect of space and delicacy in terms of storage so something this “temporary”
needs to be reasonable cost wise….. In spite of all this, I still love them in terms of
INSPIRATION