


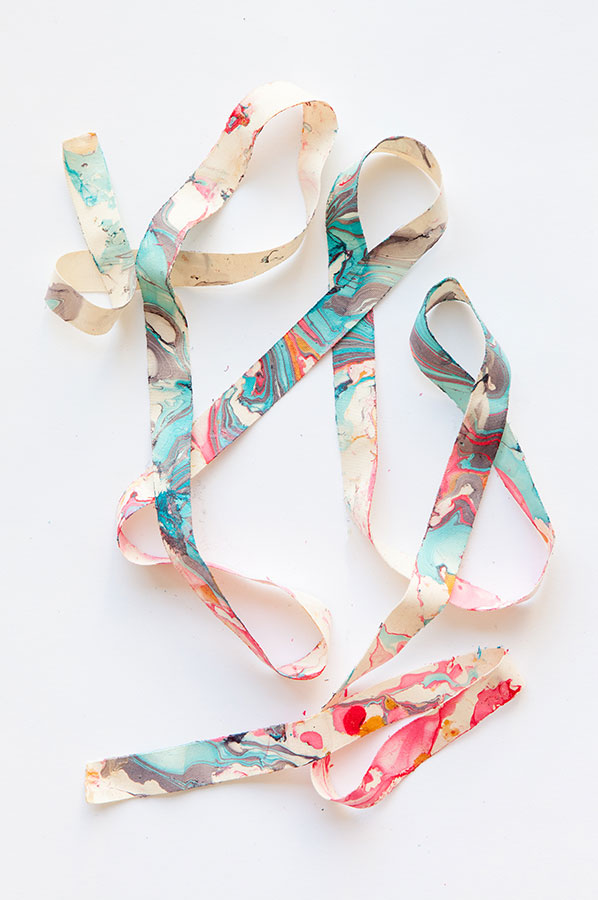
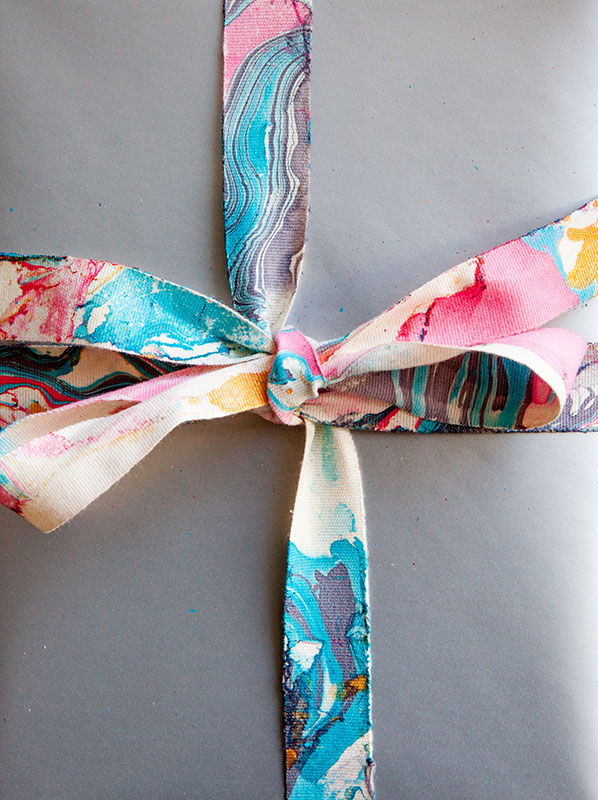
We’ve been playing around with marbling (it’s addicting!) And today we are sharing a project on how to marbleize ribbons. Click through below for all the details! (PS – Marbleized party hats!)

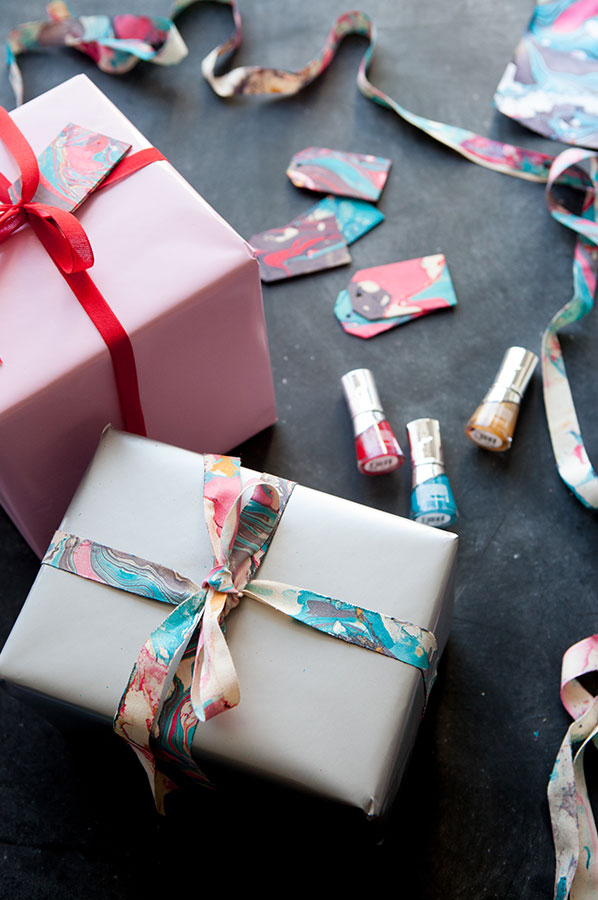

Materials: Water, large tub, at least 4 colors of new nail polish (ours is from the dollar store,) cotton ribbon, skewers
, scissors
, acetone nail polish remover
(for clean up), optional: gloves
(so you don’t get nail polish all over your hands)
Step 1: Set up your workspace. Make sure you’re in an area that can get a little wet. You also may want to put down some kraft paper or newspaper to prevent the nail polish from getting on anything around your workspace. Make sure you open lots of windows and have good ventilation (nail polish is stinky!) We also set up stools around the space where we could dry the ribbon once it had been marbled. Fill the tub with 2-3 inches of water.
Step 2: You’ll need to move really quickly when marbling with nail polish. So make sure you have everything ready to go before you start. Open the bottles of nail polish you’re planning to use and set them close by so they’re easy to grab (We found that 4 colors is a good amount.) Make sure you have a long strand of ribbon that’s nearby as well.
Step 3: Pour the nail polish into the water. We did 2 colors at a time. The nail polish starts drying once it hits the water, so make sure you move fast! You want there to be enough color so that it basically covers the surface of the water.
Step 4: Quickly pull a skewer through the nail polish colors to blend them together. We did a few lines horizontal and a few lines vertically.
Step 5: Gently place the wide side of the ribbon directly onto the surface of the water so that the pattern transfers to the ribbon. We snaked the ribbon around so that it covered as much for the surface as possible.
Step 6: Gently submerge the ribbon under the water so that the leftover nail polish can cover the backside of the ribbon. Then, pull the ribbon out. (It’s ok if a few stringy pieces are hanging on, these will crumble off once the ribbon fully dries.)
Step 7: The ribbon will be ready to use after a few hours of drying. For clean up, use nail polish remover to scrub away any leftover particles.


Photos by Paul Ferney for Oh Happy Day


Melanie
April 15, 2015
These are awesome! I have quite a few showers coming up over the next couple weeks- I’m going to have to try this out!!
-Melanie-
http://www.theseblankwalls.com
Rose of Then Comes Color
April 15, 2015
what a beautiful way of jazzing up your gift wrapping. Really love the idea!!!!
Lisa
April 15, 2015
OMG!!! Brilliant!
Spring
April 15, 2015
Love this! Thanks so much for sharing — I am absolutely going to try this out.
Huma
April 15, 2015
This looks amazing!!
chiara
April 15, 2015
just beautiful! I love this project so much!
Hannah
April 15, 2015
The ribbon looks so stunning – the colour combo is gorgeous!
http://crafternooncabaretclub.com
Kayse
April 15, 2015
Marbled ribbon is a great idea! These are so so so gorgeous!!! I’m going to have to try it!
Amy W
April 15, 2015
These are so stunning, I can hardly take it!!!
Katha
April 15, 2015
So unique! I love it! Marbling is going on everywhere, I have to catch up.
Paige
April 16, 2015
This is so fun and gorgeous! Thanks for sharing!
Paige
http://thehappyflammily.com
Kreetta
April 16, 2015
wow. This is great idea. I have to try it – now! Thanks for sharing! Pinterest is so cool – you find things like this 🙂
Jennifer
April 17, 2015
Easy and fun idea! I can’t wait to try this! I feel like the possibilities are endless! Thanks for the share!
Poupette
April 17, 2015
This is beautiful! I think I am going to give it a go!
Marta G (A Bilingual BAby)
April 17, 2015
What a beautiful project! I love the result and I’m doing it asap!
cgw
April 18, 2015
What do you do with the water and left over bits of nail polish after? Just dump them in the drain? Or is there a better way to dispose?
Patricia
April 19, 2015
hello,
this is so great that you ‘ve made a post about it!
I have made this so much as a child, and since it’s been forgotten.
And what you can do with it. great ideas!
I’ll relife it!
Thank you so much!
best, patricia from http://blog.fancythoughts.de
Abbie
April 19, 2015
This is so pretty! I had never thought to do this on ribbon, I’ve only done it on my nails. I MUST try this!
Corner Story
April 20, 2015
These would make lovely apron straps
https://cornerstore.net.au/corner-story/
Jessica
April 27, 2015
I want to do this now! It’s seriously lovely!