by Sally J Shim
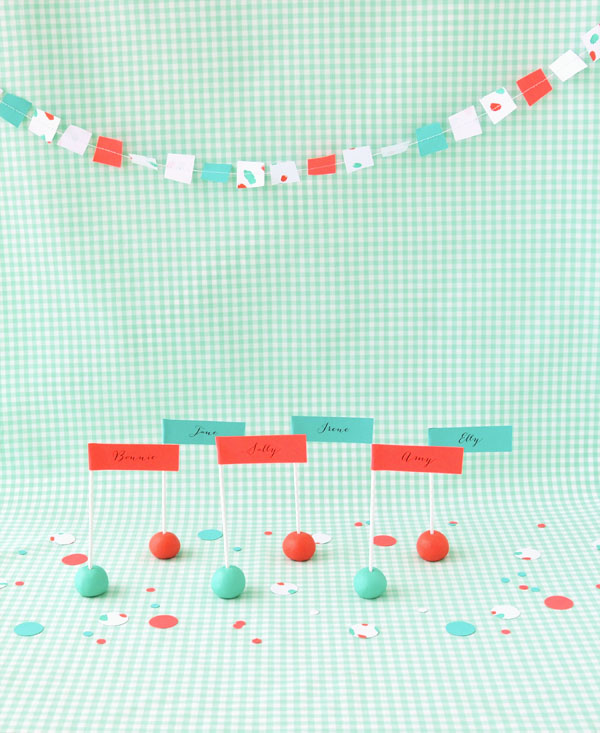
When hosting a small party or dinner it is nice to set up the seating arrangement so guests can meet new friends. In lieu of traditional place cards, try making these fun pop up flag place cards. You can make them in any color to coordinate with your favorite color palette. Your guests will love the handmade touch and it will be sweet reminder of your time together.
Click through for instructions…
Materials: Air-dry clay, toothpicks, acrylic/craft paint
, paintbrush, parchment paper, color text-weight paper, pen or printer, X-acto knife, cutting mat
, ruler, glue stick
Step 1: Roll the clay into a ball.
Step 2: Use your thumb to press on the top of the clay to create a flat surface. Test to make sure the bottom is flat by setting it on a flat surface.
Step 3: Use a toothpick to poke a hole ¾ deep through the top of the clay ball. Let the clay ball dry for 24 hours.
Step 4: Place a toothpick in the hole and use acrylic/craft paint to paint the clay ball. Place the painted clay ball on parchment paper and let the paint dry for 24 hours.
Step 5: Use acrylic/craft paint to paint toothpicks. Place the painted toothpicks on parchment paper and let dry for 2 hours.
Step 6: Cut strips of text-weight paper (approximately ¾” x 4 ½”).
Step 7: Write names on text-weight paper. If you are using a printer, first print names onto text-weight paper and then cut in to strips.
Step 8: Place glue on the entire back of the paper strip.
Step 9: Wrap paper strip around toothpick and press down to secure in place.


Maryam @ www.softandcosy.com
September 10, 2013
Think I might have to arrange a dinner party just so I have an excuse to make these! I used to loooove playing with clay back in the day, so this is right up my street.
Amy Guest
September 10, 2013
These are lovely!
Rhonda Jenkins
September 10, 2013
Ahh! So cute!! I love a good DIY, especially adorable place cards!! 🙂
Rhonda
http://www.theskinnyarm.com
juni
September 10, 2013
oh I love this. so cute!! great color choices
Paulette Leto
September 10, 2013
This looks like a cool idea, and not very complicated to do. Even someone like me who is not very skilled at DIY craft projects should be able to pull this off without too much difficulty. I will have to try this one!
Hi Paulette! This is definitely an easy and fail-proof DIY (my favorite kind)!
Shelley @ThatGirlShelley
September 11, 2013
Those are really cute and creative! I in ‘Project Brownstone’ mode and this will be a great idea for our housewarming.
Kateri
September 11, 2013
This could be a great idea for place cards at my wedding!
It would be perfect for place cards at your wedding (and a fun little gift for your guests)!
Sian
September 11, 2013
Hello Sally. I found your blog on Amazine. This project is gorgeous and I’m liking the look and feel of your blog. Hope you don’t mind if I share your blog on my Facebook page.
Thank you, Sian! Please feel free to share my blog on your Facebook page.
Emma
September 11, 2013
I love this idea! It is so original. I cannot wait to try it out for my next party.
Maria G.
September 12, 2013
We were making similar arrangements for our guests at our wedding. They were a little bit different. These are really nice. I think that they will suit to any décor and it is quite easy to make them by yourself.
lyndsay // coco cake land
September 17, 2013
cute, simple, stylish (of course!) nice post, sally… love the matching garland, too.
Thanks, Lyndsay!