


by Amy Moss
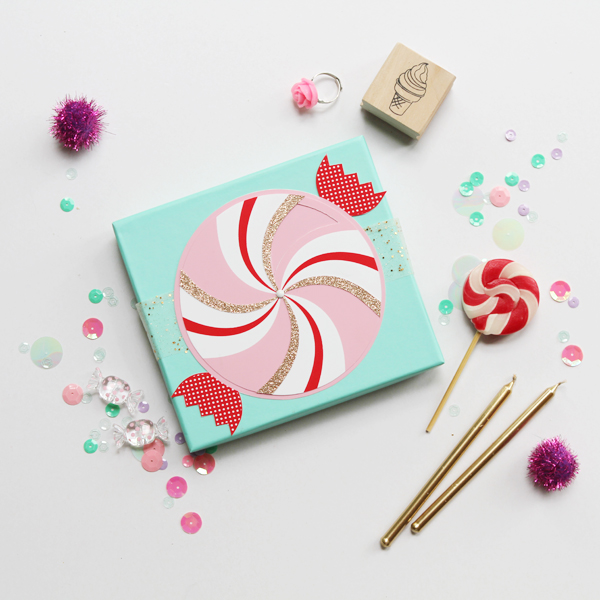
In the midst of an ongoing addiction to all things sugary and sweet, I designed these delightfully twee candy-shaped paper wheel greeting cards. A pretty eye-candy substitute while I attempt to kick this oh-so-nasty habit. Besides, who wouldn’t love receiving Candy? Even it’s only made out of paper!
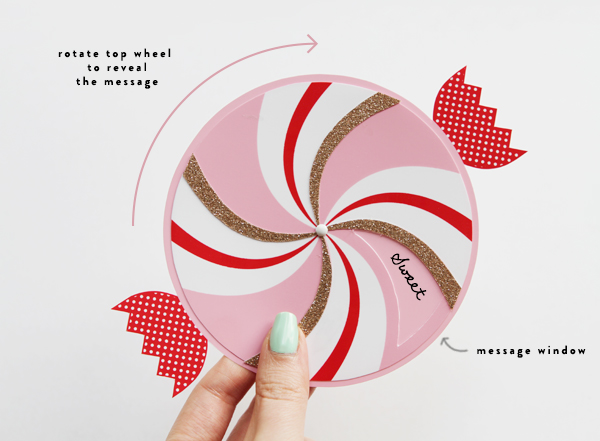
Print out the design, construct your Candy Paper Wheel and write your own personal greeting. The recipient simply has to rotate the top wheel to uncover the hidden message underneath!
Perfect for birthdays, Mother’s day, anniversaries… any sweet occasion.


Click through for instructions…
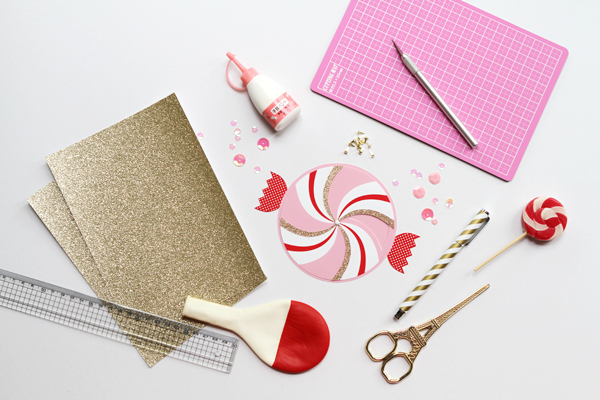
Materials; Colour printer, Adobe Reader (free download), Thick glossy photo card stock (I’ve used Canon 275gsm Photo Paper Plus Glossy II), Glitter paper, Ruler, Cutting board, X-acto knife, Pencil, Pen, Scissors, Glue, Mini craft brads (paper fasteners).
Step 1: Download the PDF at the bottom of this post and print out onto thick, glossy photo paper. Note: Do not use Mac Preview to view or print the PDF, as colours may come out completely wrong. Use Adobe Reader instead.
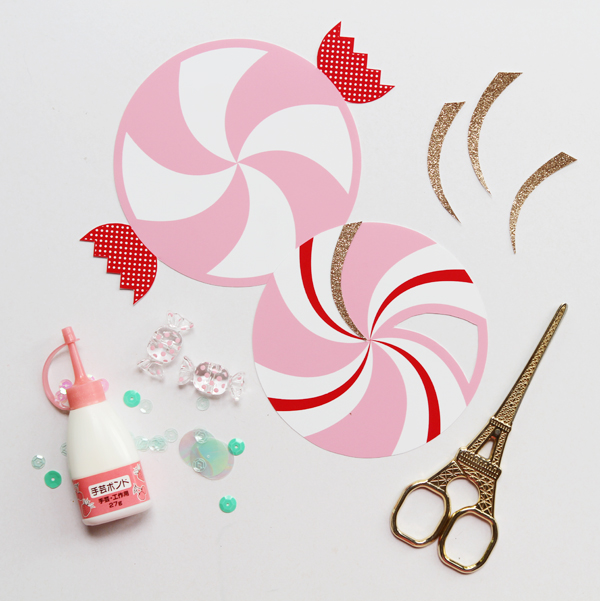
Step 2: Using scissors, carefully cut around the two parts of your candy card and the template for your glitter slices. If you have a circle cutter at your disposal you can use this to cut out the smaller circle (4.5 inches in diameter). If not, scissors will suffice.
Step 3: Using an x-acto knife, very carefully cut out the message window on the smaller circle. (Admittedly, this takes a bit of practice but once you’ve done it a couple of times it actually becomes quite easy!)
Step 4: On the back of your glitter paper, place the glitter slice template face down and trace around it with a pencil. Draw 4 of these. Use scissors to cut them out.
Step 5: Use glue to attach your glitter slices to the smaller circle (the top part of the wheel). See my photos for a guide on placement.
Step 6: Place the smaller circle on top of the larger circle and center it. Using your x-acto knife, create a tiny hole exactly in the centre of both circles and attach them using a mini brad.
Step 7: You should now see that you can rotate the top wheel and the message window will reveal different segments. Write your own message in the allotted spaces.


Birdy& Bambi
September 17, 2013
That looks yummy and so sweet.
Over here at http://lasagnolove.blogspot.de/, we’re trying to live vegan and also overall superhealthy, so real sweets are hardly an option. A paper wheel therefore looks brilliant.
Greetings from rainy Germany,
Birdy and Bambi
maggie
September 17, 2013
Too freakin’ cute. If only I had the patience to make these! Maybe one day…
lyndsay // coco cake land
September 17, 2013
oh my. that is crazy cute, amy! lovely DIY and the photos are so cutely styled!
Michela
September 17, 2013
absolutely amazing!! thanks to share this incredible DIY with us!
hugs from Italy
Mariah
September 17, 2013
OHD, you’ve done it yet again 🙂 This is just too cute for words!
YoungMild&Free
September 17, 2013
Interactive cards are kind of my obsession, so I love this! Thank you so much for sharing this printable with us.
xx
youngmildandfree.wordpress.com
Michelle @ Full Belly, Worn Soles
September 17, 2013
What a cute idea for a child’s card. I’m loving the gifs you’ve been using in your posts lately.
http://www.fullbellywornsoles.com
Jill Mansfield
September 17, 2013
LOVE this.
somehappenings
September 17, 2013
Love this idea!! One question though, where did you buy your eiffel tower scissors? ‘Twas love at first sight!(: Hope to hear from you. Thanks!
Mel
September 17, 2013
I love it! How fun making it spin too! Gotta get me some gold glitter paper!
http://www.mockeri.com
Séco
September 17, 2013
Thanks for the lovely printable. you are sooooo sweeet!
jessie
September 17, 2013
that is preety sweet and a nice inspiration! things that are simple often the best!
happy wednesday,
jessie
http://www.freaktvblog.de
Carmenpol
September 18, 2013
Wonderful idea ! Thanks a lot !
Tiffany
September 18, 2013
I love this!
Where did you get those adorable polka dot candies?
Hi Tiffany- The polka dot candies are baubles from a hair tie- I just cut the band off! They were bought locally (Melbourne, Australia) from Daiso- a really cute (and cheap!) Japanese store.
Maria G.
September 18, 2013
These postcards are so creative and unusual. I should never have thought that they can be done by yourself. Today I`ve made them by myself and I managed to do that. They look very nice. But I`ve made them for the guests on my birthday party.
holly
September 18, 2013
I think you just inspired my daughter’s third birthday party theme!!
Linea
September 19, 2013
Hi!
I LOVE your DIY. I work as a studenthelp in a little copy shop in DK, and everytime I don’t have anything to do, I make your cool prints!
but I can’t seem to make these, I have no idea what a mini brad is. Where do you buy them?
Hi Linea- Mini brads can be used to fasten multiple papers together. A quick image search in google will show you what they look like. They should be available in craft and paper shops. I hope I’ve been helpful 🙂
Paulette Leto
September 30, 2013
This is neat! It reminds me of a little star chart I had when I was growing up, that would rotate just like that!