


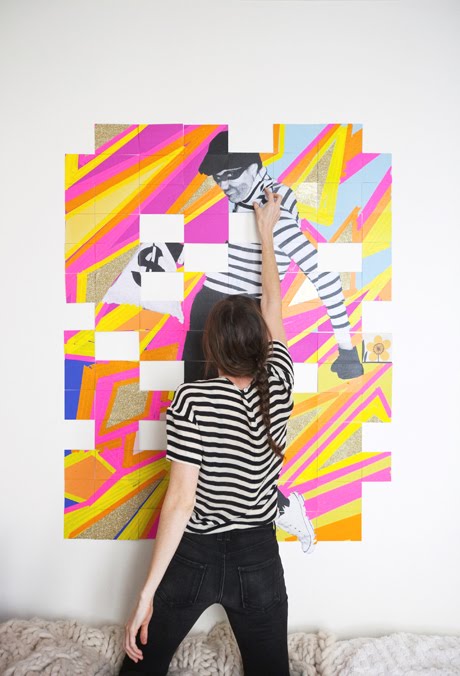
As promised here are the directions for the Birthday Surprise in the Mail. This project does take some time and planning but it is totally doable.
Supplies Needed
Photo
Spray Mount Glue
A trip to Kinkos
4 posterboards
Exacto Knife
Ruler or Straight Edge
Cutting Mat
4×6 Envelopes
5×7 Envelopes
Lots of Postage Stamps
Things to decorate like tape and glitter!
1. Addresses take the longest to collect, so get going on those. I had some friends help me with this part (thanks Blake, Fergi, and Char!)
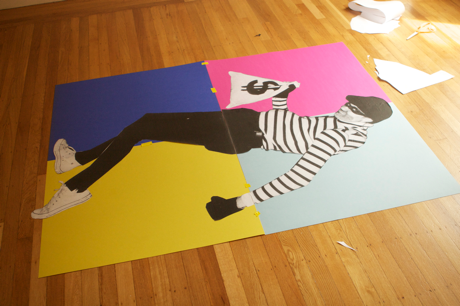
2. Decide what picture you are going to use and scan it in to a computer. (A picture of when they were a little kid would work great.) It will need to be a hi-resolution scan. Then take the image to Kinkos and have them print it out on their large black and white format printers. I had the photo printed on two pieces so I could get it really big. That cost me about $15.


3. Next cut out the black and white image and spray mount it two the 4 poster boards. Decorate it if you want.
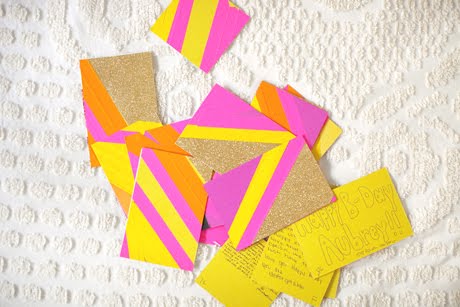
4. Then cut the poster board down into cards. We cut ours into 4×6 cards and then did 4″ squares on the end columns.

5. Number each card so the recipient can put them together again. There should be 112. I considered sending out the cards as post cards to save on postage but I was a little worried the post office wouldn’t let them through (since I wanted to use glitter and other things to decorate.) So we opted to use envelopes. I used these vellum envelopes because I think see-through letters are more fun than opaque ones.
6. Print out a sheet or two of labels of the recipients address. On the returning envelopes put the address label, a stamp, and your return address label. When you are dealing with this many people its best to leave the least amount of room for human error. (Don’t take the chance that they’ll have time to scrounge up a stamp.)
7. Print out a small piece of paper with instructions so the people will know what to do. On mine I explained the project, gave three detailed steps of what they needed to do and put my contact information in case people had questions.
8. Put one or a few of the cards in the 4×6 returning envelopes. As you decide which card or cards goes to which person, write down the numbers next to their name so after it is over you will know where the missing or forgotten went.
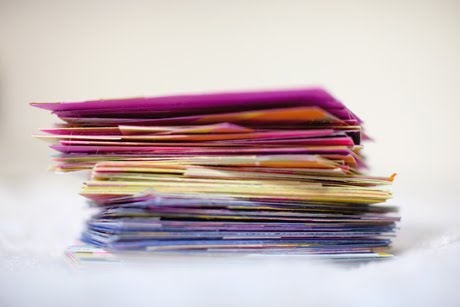
9. Stuff the instructions and the stamped envelope and cards in the 5×7 envelopes. Address them to each person on the mailing list. Stamp them and drop in the mail.
If you have any questions put them in the comment section and I’ll do my best to answer them.


georgina
May 10, 2010
Good Grief How do you come up with this stuff… so clever.
*b*
May 10, 2010
I love how creative you are Jordan, your ideas always amaze and inspire me.
J.J. Killins
May 10, 2010
What an awesome surprise! About how far out did you need to drop them in the mail to ensure they'd get back in time for the birthday?
Damaris
May 10, 2010
no questions just compliments.
bom trabalho!
jordan
May 10, 2010
@JJ Killins
I put them in the mail 4-5 days before her birthday. The first one arrived on her birthday and then the rest trickled in the following week or two.
Karlie
May 10, 2010
A.w.e.s.o.m.e.
Anonymous
May 10, 2010
Did you have the recipients mail it back to your friend and then she assembled the collage? Or did you assemble it for her and give it to her? How is she displaying it now? I would think she'd want to be able to view both sides. Awesome idea! Love it!
jordan
May 10, 2010
@ Anon 2:04 The envelopes were mailed to her and then she assembled it.
I'm not sure how she is displaying it. It is less about the giant photo and more about people sending funny thoughts and happy wishes.
Anonymous
May 10, 2010
What did you do with the 4" squares on the end columns? Were they postcards, too?
jordan
May 10, 2010
@anon 2:09 Yes since they were mailed in envelopes I just treated them like regular cards.
Kelley Moore
May 10, 2010
What a fantastic idea! So great, especially for those of us who are far away from some of our dearest friends and family. Inexpensive but immensely personal, and something they can have forever! Wonderful!
Lady Grey
May 10, 2010
Truly AMAZING!!!
Dina
May 10, 2010
wow, that's pretty cool
lingismyname
May 10, 2010
I love this idea! It is genius =) Just curious: what was the resolution on the photo you blew up?
Shannon @ What's Up Whimsy
May 11, 2010
I love this idea! I will be doing this for my son one day…once he knows how to put together a puzzle.
Taylor Sterling
May 11, 2010
Wow I love this! So bright and colorful! So inspiring!
Leni
May 11, 2010
this is such a cute idea. i am totally going to do something like this one day.
Sara E. Cotner
May 11, 2010
So inspiring! Hooray!
Jamie
May 11, 2010
Am I the only one who wants to know the back story on the photo?
jordan
May 12, 2010
@Jamie It is a photo of her Halloween costume last year and I thought it was rad.
Nik
May 13, 2010
I am thinking this would be perfect as engagement present too! I need to find a perfect photo of the couple. Great idea, thanks!
Kristi
May 13, 2010
Any idea on the total cost? A rad idea all around. Creativity + Thoughtfulness = I can't wait to do it!
Meg
May 13, 2010
Was it difficult to figure out 112 people that she knew to send these to?
Wendy
May 13, 2010
fabulous! just fricken fabulous!
Sara
May 13, 2010
This is seriously brilliant. And where do you come up with these ideas? Do you sleep at night?!
The Beso Team
May 14, 2010
How cleaver and creative. I enjoy reading all of your blog posts.
GAN
May 15, 2010
hey jordan,
this is a genius idea! and i am gonna do it for my loved ones. Thank you for your inspiration! Btw, i decided to share this entry with my readers at my tumblr, http://www.heyawesome.tumblr.com
check out! thanks 🙂
cheers,
fangs!
Anonymous
May 25, 2010
Can you please share the insturctions you sent to the recipients? Thanks!
Komal-Nishka
June 14, 2010
Hey Jordan, this is awesome. But I have a question – how does this get on the wall – I mean you have picture on one end and messages on the other – so how did she stick it on? Thanks
Jess
June 23, 2010
This is wonderful, Jordan. Can you please tell me the size of the original four poster boards (before you put them together)? I'm working on a variation of this project, and it looks like my address list is going to be closer to 130, so I'll need to figure out how many poster boards to use so that I can get enough cards out of it. Thanks for the inspiration, Jordan!
jordan
June 23, 2010
@Jess They were standard sized poster boards. I can't remember the exact measurements.
allikpeters
August 17, 2010
My brother, Dad, and I put together a copycat project for my mother's 65th birthday. Thanks so much for the idea! My mom cried tears of joy with every letter she opened and loved putting the pieces together to discover a picture of herself under a rainbow at Bryce Canyon in Utah. She says it is one of the best b-day presents she's eveer received! However, we have yet to receive 10 of the 72 puzzle pieces. Did you have this problem and was it resolved?
Anonymous
September 28, 2010
Jordan, this is fabulous and I would like to try this for an upcoming birthday! Can you tell us what you enclosed as instructions in the mail? That'd be such a help! Thanks for the great ideas!!
Becky
January 4, 2011
I loved this so much. I used the idea for my Grandma's 91st birthday. I had a picture of her at 16 blown up and had my family send her pieces of it. She was surprised and loved it. Thank you.
celebrator
January 27, 2011
Jordan,
Do you have any idea how your recipient stuck all the postcards to the wall?… double-sided tape? It would be nice to equip the birthday recipient with the right tools to create the image.
thanks!