


The world is all abuzz with the eclipse just around the corner: this Monday, August 21st! So, we put together a favor kit for those who are super excited, like us! To observe the eclipse (if, say, you’re in San Francisco and not along the path of totality) you’ll need a viewer to see it without damaging your eyes…
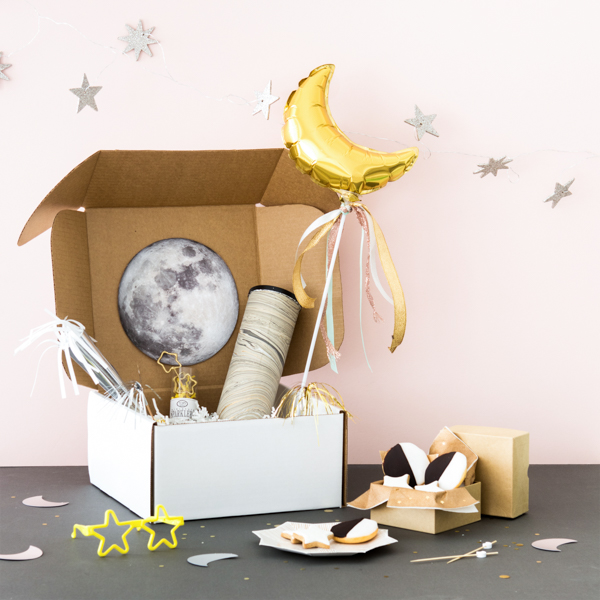
For this care package kit, we turned a simple Pringles can into a pinhole camera with swirling milky way-inspired wrapping paper (DIY instructions included below)! This particular viewer is great for kids, thanks to it’s ability to thwart their instinct to stare directly into the sun!
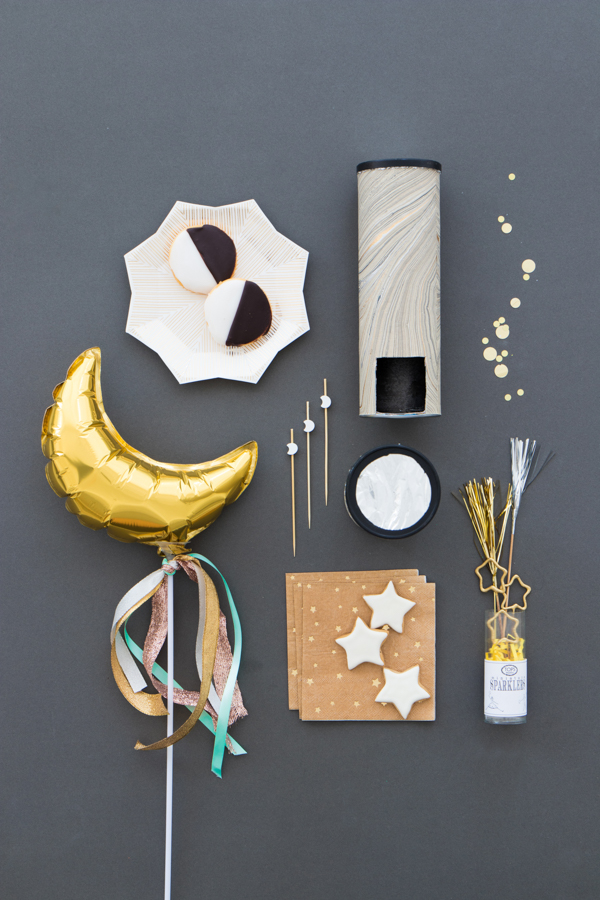
The moon’s journey across the sun is due to take a little over an hour, so we packed sparklers and a moon-shaped balloon stick to distract the little ones if they get a little overwhelmed by the dark. We also included star-shaped favor glasses (with the lenses punched out!), black and white cookies, and a few extra sweet knick-knacks.
Go, science!
Eclipse Viewer
Materials needed: Tall container of Pringles, spray paint (in black), marble paper (in light gray), cardstock (in white), pencil, scissors, ruler, x-acto knife, aluminum foil, sewing needle, Aleene’s
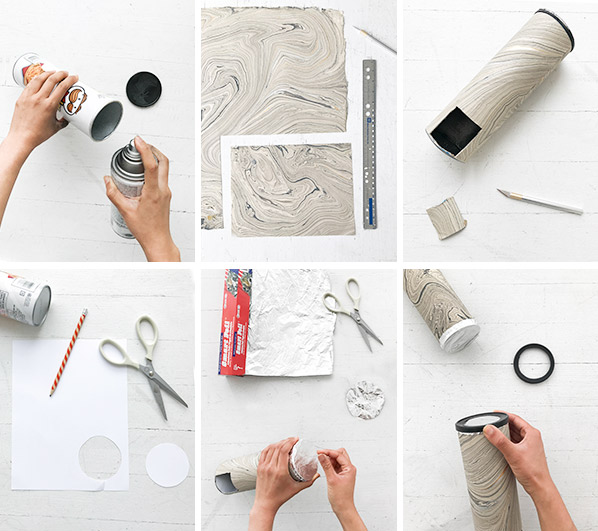
Step 1: Empty and wipe down the Pringles can. Spray paint both the lid and the inside of the can black and let them dry completely.
Step 2: Measure and cut an 11 ½” wide by 8 ¾” long rectangle out of the marble wrapping paper. Then, apply a thin layer of Aleene’s down the length of the outside of the Pringles can, and affix the marble paper. Continue adding and spreading the glue evenly before tightly wrapping the paper around the can. Let the glue dry completely.
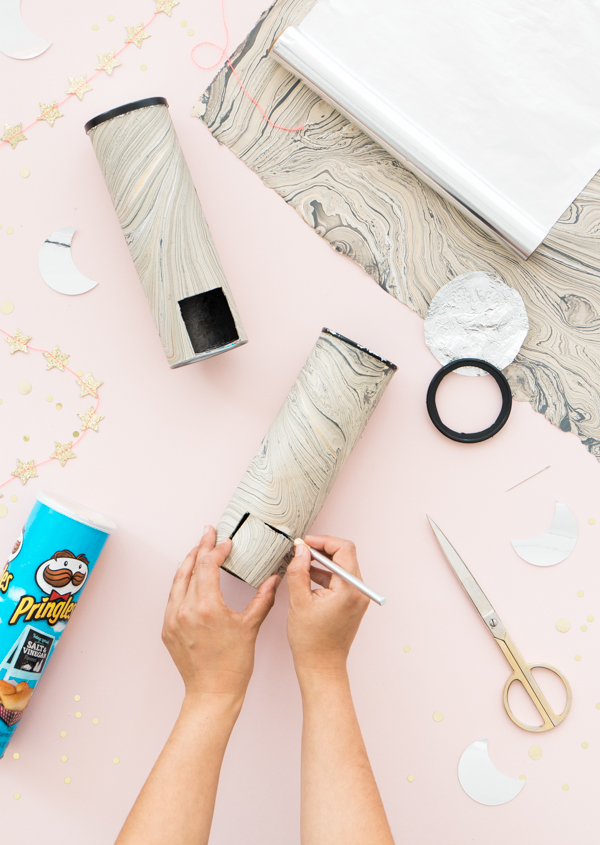
Step 3: Use an x-acto knife to cut out a 2” by 2” square piece from the side of the can, along the bottom edge.
Step 4: Trace the lid onto a sheet of white cardstock and cut out with scissors. Insert the circle through the 2” by 2” square hole. Trim until it fits snugly at the bottom of the can.
Step 5: Cut a 4” circle from aluminum foil. Place the foil over the opening of the can and press down the sides. The foil over the opening of the can should be as taut as possible.
Step 6: Once the spray paint on the lid has dried, cut out the center with an x-acto knife, leaving a ¼” circular border. Snap the lid onto the can to secure the aluminum foil in place.
Step 7: Use a sewing needle to carefully poke a hole through the center of the aluminum foil. Your eclipse viewer is complete!
Step 8: With your back to the sun, hold the can so the foil-covered end is facing the sun. Cup your hands around the square hole and peer in. You should see a reflection of the outside world on the white cardstock inside the can.

Crafting by Justine Pon


Michele
August 18, 2017
I love this idea, so creative! Definitely going to have to try the viewer.
Cate
August 18, 2017
This is such a cute idea, I love it xoxo
Sarah Wilson
August 19, 2017
Such an out of this world & creative package. We are so excited for the eclipse here in Nashville on Monday!
http://thewanderingrumpus.com/
Belle
August 20, 2017
This is such a clever way of teaching kids about the universe and making it fun and exciting 🙂
http://www.thislifeisbelle.com/
katie
August 21, 2017
Probably too late…but I found it much easier to add the cardstock to the inside of the plastic pringles lid and poke a hole in the metal bottom of the can…
But the marble paper on the oustside of your viewer is DREAMY
Michelle
August 21, 2017
This is so cool and stylish! I wish I could see the eclipse from Europe…
https://www.makeandmess.com
Albalù
August 22, 2017
And we’re ready fo’ da party! 🙂
Greetings from Italy
Run 2
August 30, 2017
This is awesome… Definitely going to have to try the viewer.