


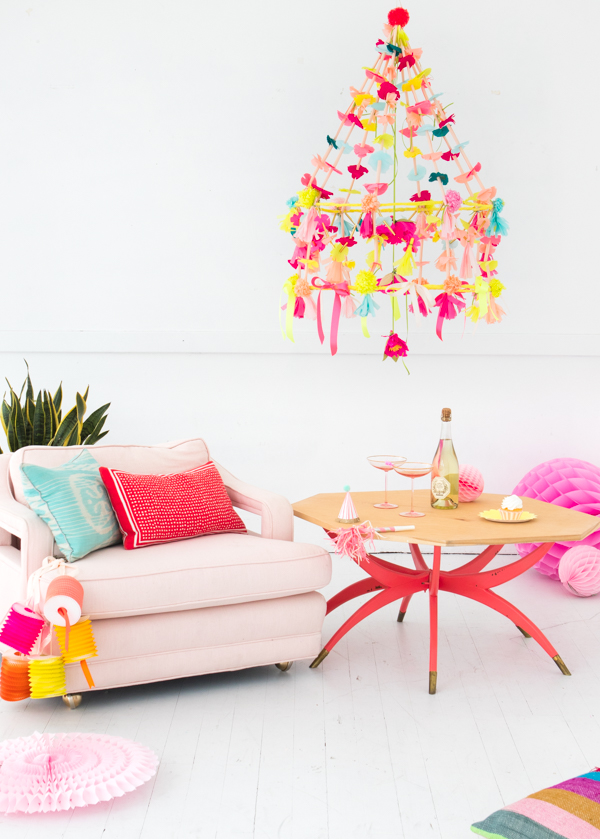
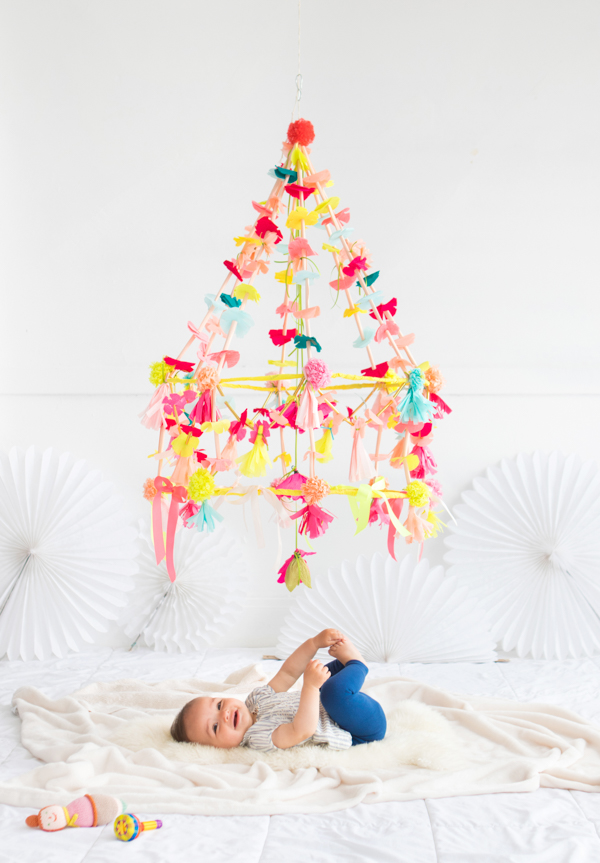
I did a DIY for a Polish Chandelier over six years ago but I was inspired by one I saw the other day and thought it was time for a refresh. These paper chandeliers are beautiful for a party but I love them for something more permanent as well, in a baby or kids room or even above a desk. We’re going to make a few versions of these over the next few months.

Pajaki are a traditional Polish folk craft, “Pajaki” means “spider of straw” and traditionally have 8 strings coming down. They are usually made of straw, paper and foil. I love them because they are so detailed and pretty and you can make them out of any color. They are stunning when you walk in a room. Find all the details below on how to make them.


Materials needed: Wire, wire cutters, gaffers tape, crepe paper, scissors, twine, tissue paper, cardstock, hot glue gun, ribbon, plastic sewing needle, gold straws, floral wire
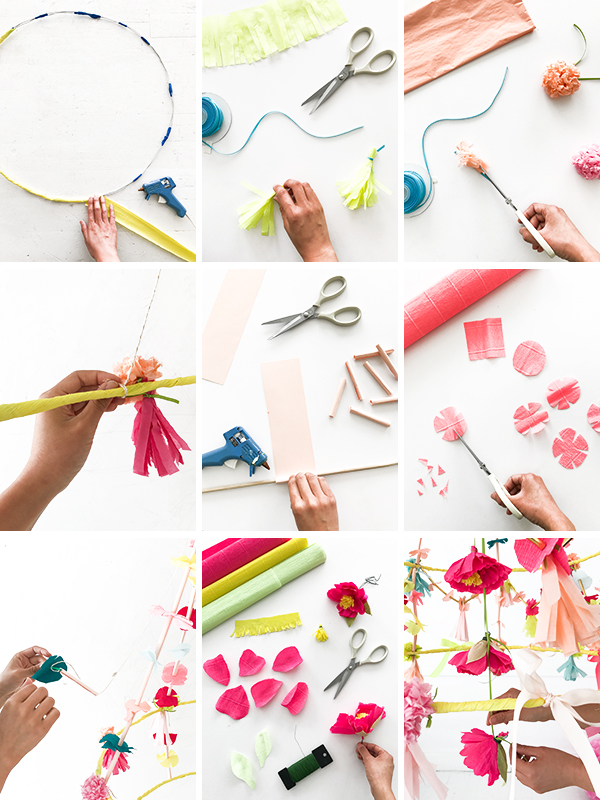
Step 1: Create a 24” diameter hoop out of wire. Cut the wire with wire cutters. Have the beginning and end of the wire overlap and use gaffers tape to secure the hoop shape. Repeat to create a second hoop.
Step 2: Cut long strips of crepe paper. Hot glue the beginning of one strip of crepe paper to the hoop and wrap until the entire hoop is covered. Cover the second hoop.
Step 3. Cut 8 long strands of twine. Attach all eight long strands evenly around the hoop and bring them all together at the top in a knot. Then, hang the chandelier from a doorway while you finish the assembly.
Step 4: Cut 8 shorter strands of twine and tie them to the same areas where the long strands are attached. Tie the ends of the twine to the second hoop. Both hoops should now be suspended in the air.
Step 5: Create a bunch of 3” straws from cardstock. Roll the beginning of the cardstock around a dowel or pencil. Apply a thin line of hot glue to maintain the straw shape. Let it cool then trim. Start with 40 straws and make more as needed.
Step 6: To make the disk flowers, stack crepe paper and cut 3” wide squares. Cut circles out of the squares. Cut out 4-5 slivers per circle to make the petals. Make a lot of these, too!
Step 7: Untie one of the long strands of twine from the hoop. Thread the twine onto a long needle and string on a cardstock straw. Next, poke the needle through the center of a pair of disk flowers. Continue to string straws and flowers, alternating between the two until the length of the twine is covered. Tie the twine back to the hoop. Repeat with the remaining strands of twine.
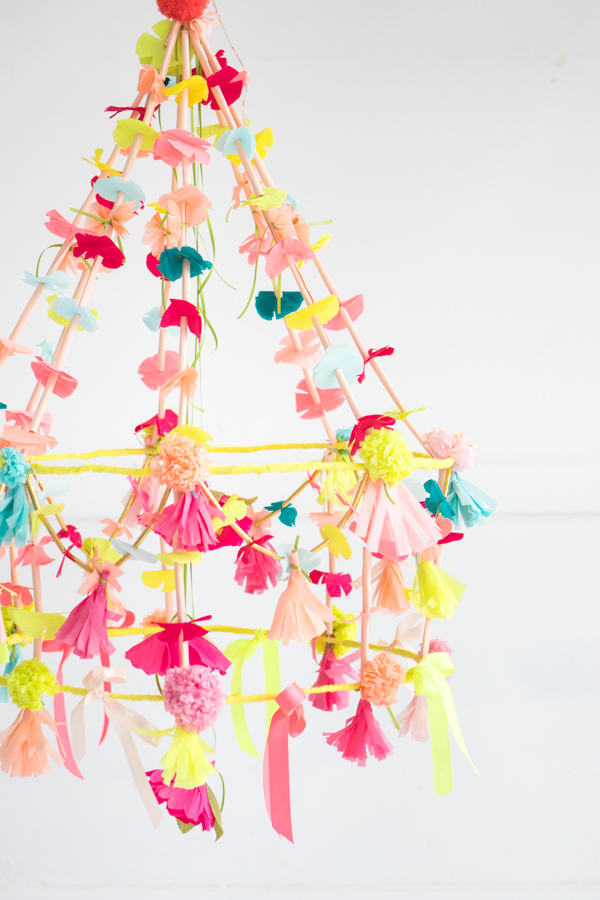
Step 5: Decorate the chandelier with tassels, pom pom flowers, ribbon, and anything else you can think of. To make tassels, cut fringe from a small stack of tissue paper, twist the top of the tassel and knot a ribbon around it to keep it together. To make pom flowers, cut a small stack of tissue, and accordion fold. Tie and knot a piece of ribbon around the middle of the folded paper. Then, cut thin fringe on both ends of the stack. Fan out the individual sheets and separate the fringe until you achieve a fluffy flower.
Step 6: Make a trio of large crepe paper flowers to hang from the center of your finished chandelier. Stack 4” pieces of pink crepe paper and cut petals out of it, with the grain of the crepe paper running from the top to the bottom of the petal. Grasp the sides of the petal and gently pull to give it more of a petal shape. To make the center of a flower, cut a 4” long strip of yellow crepe paper and cut thin fringe. Roll the fringed crepe paper into a tassel and twist to secure. Wrap with pink petals, then wrap the base with floral wire to secure. Cut two two leaf shapes out of green tissue paper and attach them to the flower.
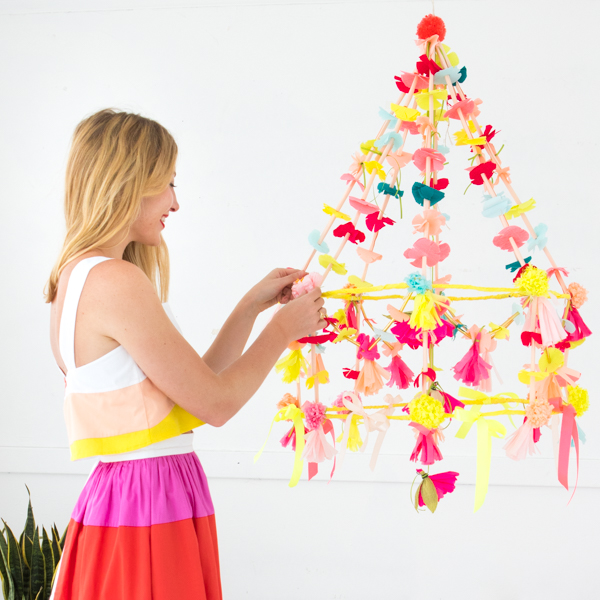
Step 7: Tie a ribbon to the topmost point of the chandelier and tie the end of the ribbon to the stem of a large crepe paper flower. Repeat with each flower, staggering their lengths. Voila! Your colorful chandelier is complete!

Photos & styling by Naomi Julia Satake
Crafting by Naomi Julia Satake, Justine Pon & Erica Kjos
Dress from Mira Mira


Am
April 7, 2017
These are really lovely.
Coincidentally, I was just reading an old book by Gertrude Jekyll and she mentioned maidens’ garlands (since garlands were originally wreaths) decorated with paper flowers that would be hung up in English churches in the 1800’s whenever a young woman passed away. They looked just like this.
Makes you wonder how the cultural overlap happened – if they spread from Eastern Europe to England or vice versa. And why they’re still popular in Poland but aren’t used for any purpose in England any more.
The Polish term for these is pajaki (“pie-yonky”) – it’s a Christmas decoration, and translates to spiderweb, which comes from a Bible story about a Jesus and a widow (google Spider and Christmas tree). Spiderwebs remain a very popular Christmas ornament in Eurpoe. The chandeliers don’t look Christmasy, especually with flowers, but folk arts like to dictate their own aesthetic, and geographicly speaking, Eastern Euopeans will put flowers on anything . 🙂 I will have to look into these Maiden Garlands (interesting!) but I can tell you the concept of paper/straw/husk flowers at young people’s funerals can be found in pockets all over the world throughout history. Something about ‘perpetual bloom’ – both sweet and sad.
Katherine
April 7, 2017
This is so cute, love the photos!
http://www.myclusterofthoughts.com/
Michelle
April 9, 2017
It’s absolutely beautiful, I love the colors!
https://www.makeandmess.com/
Vivien Cooper
April 16, 2017
I love your pajaki and I was so pleased to see how it was made. Thanks so much for sharing this, your blog is delightful.
Maria
April 19, 2017
I love the Polish influence to this adorable DIY. This version is so beautiful and the tradition has such a rich history. Thank you so much for sharing!