


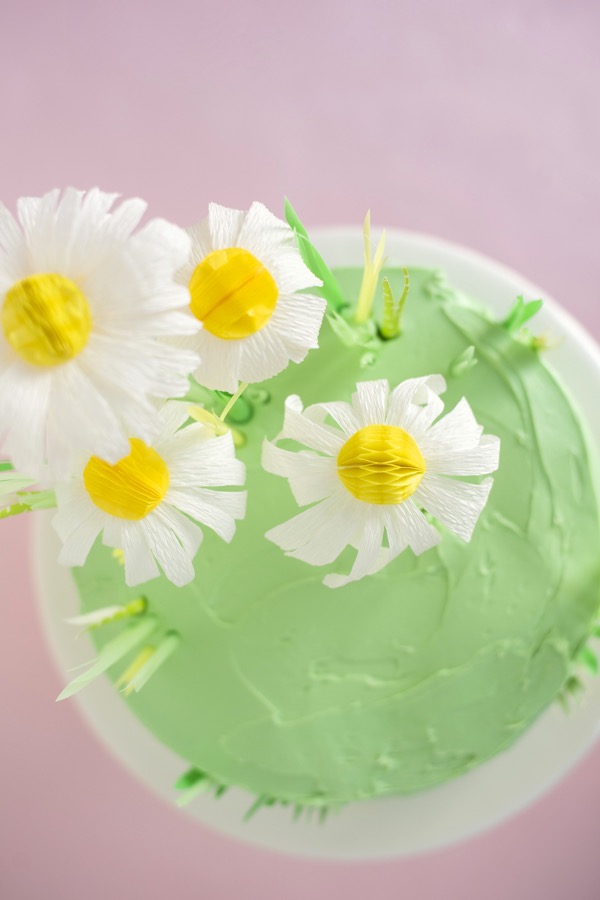
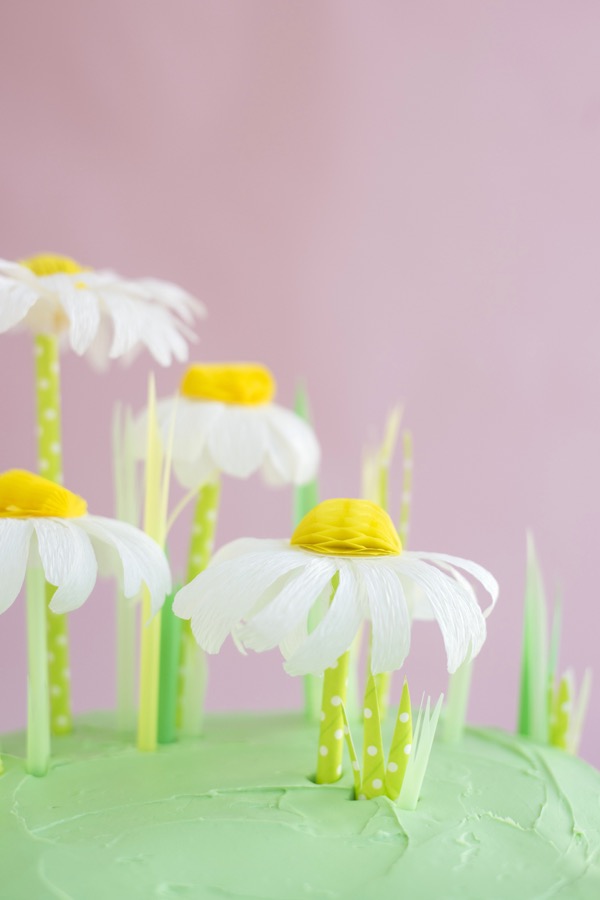
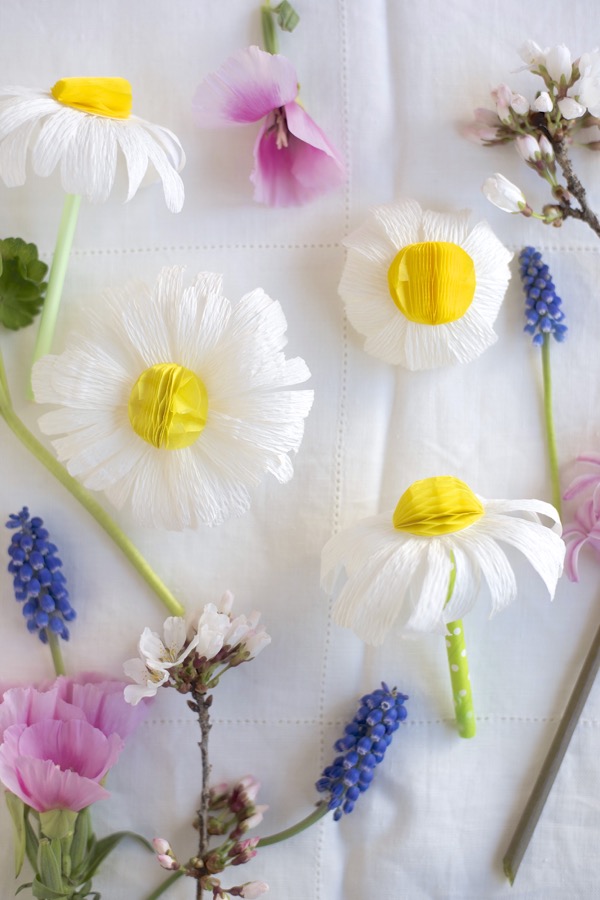
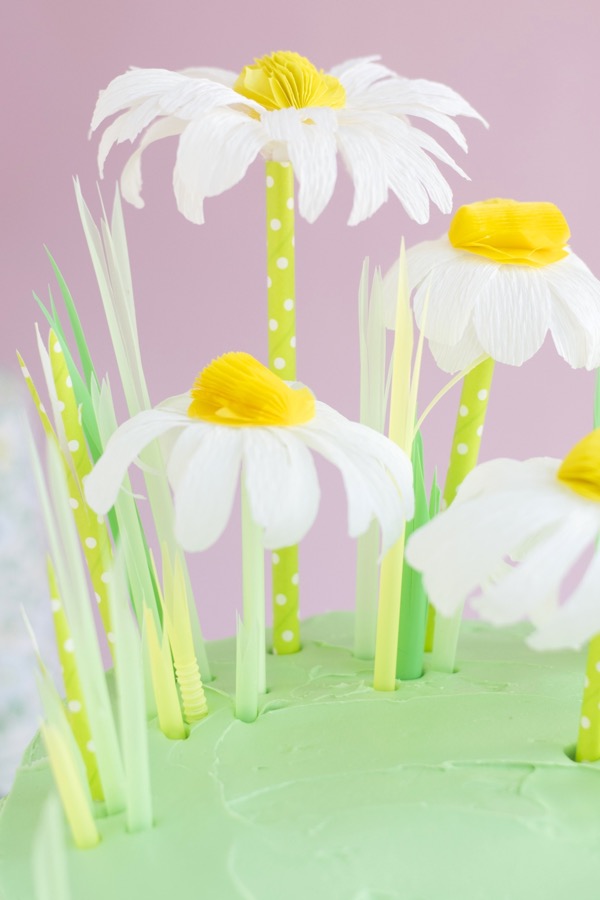
April’s flower is the daisy. Daisies stand for innocence, purity, beauty and cheerfulness. These cheerful daisies are made of crepe paper and honeycomb, and the grass growing ‘round them is made of paper and plastic drinking straws. I love taking an ordinary supply and turning it into something completely different, don’t you?!

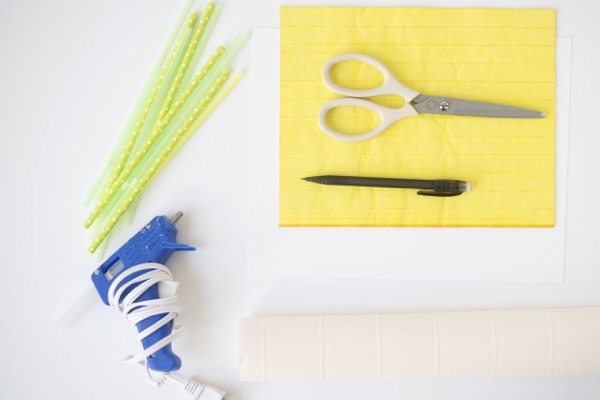
Materials needed: white crêpe paper, yellow honeycomb paper, scissors, a scrap of cardstock, pencil, a quarter, hot glue gun, assorted green straws.
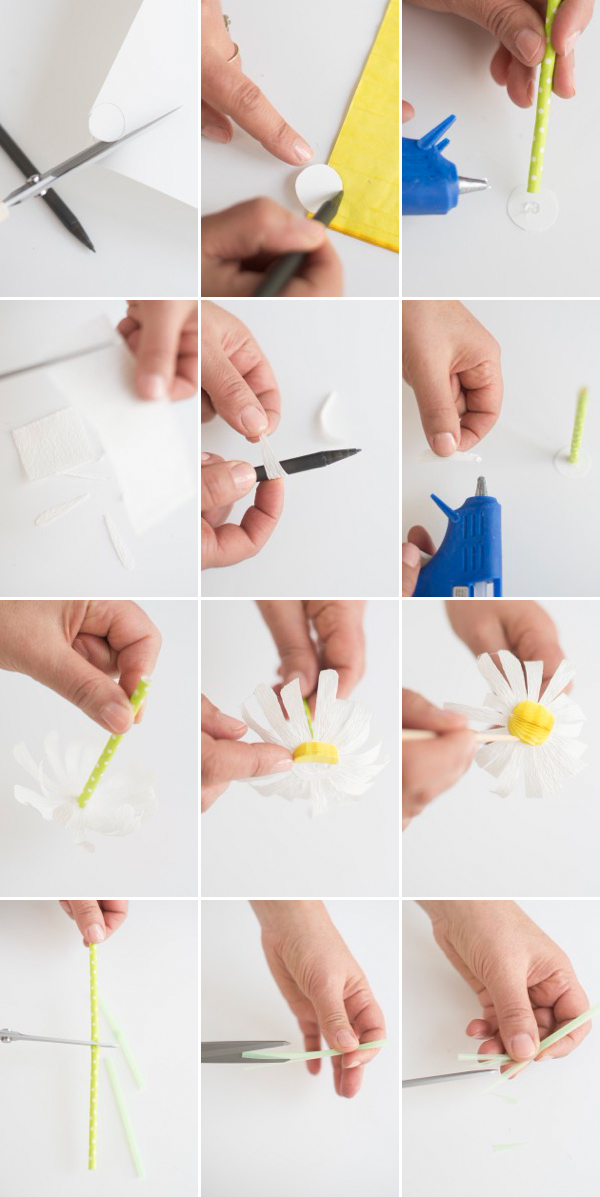
Step 1: Cut out a circle 1” in diameter out of cardstock.
Step 2: Trace half the paper circle onto a piece of yellow honeycomb. Be sure the lines of the honeycomb paper are running horizontally. Cut out and set aside.
Step 3: Using hot glue, attach a green straw to the center of the cardstock circle. Set aside.
Step 4: Cut out 12 to 16 rectangles of white crepe paper 1 ½ x 3/8 rectangles. Experiment with the size of the petals to create different variations in the flowers.
Step 5: Trim the edges of the long end of the rectagle so they are curved like a petal.
Step 6: Gently roll the petals over a pencil, to create a curve.
Step 7: Dab a bit of glue on the top side of a petal, and attach it to the bottom of the cardstock circle.
Step 8: Repeat step 6 until petals go all the way around the circle, slightly overlapping petals as you go.
Step 9: Make a circle of hot glue on the top side of the cardstock circle. Carefully attach one side of the yellow honeycomb circle to cardstock center.
Using the point of a pencil or a bamboo skewer, open the honeycomb paper, flip it over and gently press it into the hot glue. If you want, cut the top of the honeycomb dome off, which looks more like a real daisy. I did some this way, and left some round. Pull off any strands of hot glue that may be clinging to the flower.
Step 10: Cut green paper and plastic straws in halves and thirds.
Step 11: Cut into the top of the straw end five or six times.
Step 12: Cut pointy ends into the strips of straw you just cut, to create grass. Insert in between and below the daisies on the cake, and around the outside of the cake itself.
Photography by Tim Gibson


Michelle
April 4, 2016
These are adorably cute!
https://www.makeandmess.com/
Cintia
April 4, 2016
Gorgeous cake
http://soldenochedecocrochet.blogspot.com.ar/
Paige Flamm
April 4, 2016
That cake topper is so cute!
Paige
http://thehappyflammily.com
Kari
April 4, 2016
What a totally adorable way to take a cake up a notch!
Kari
http://www.sweetteasweetie.com
kloe
April 7, 2016
I love this original pastel
lollie
April 12, 2016
Where do you purchase honeycomb paper??