


This honeycomb Easter egg garland is sure to brighten up any Easter dinner. Once you make all the eggs, assembling the garland goes very fast. If you wrap these carefully in tissue paper, and store them in a safe place, you can pull them out year after year, and enjoy them for many Easters to come!


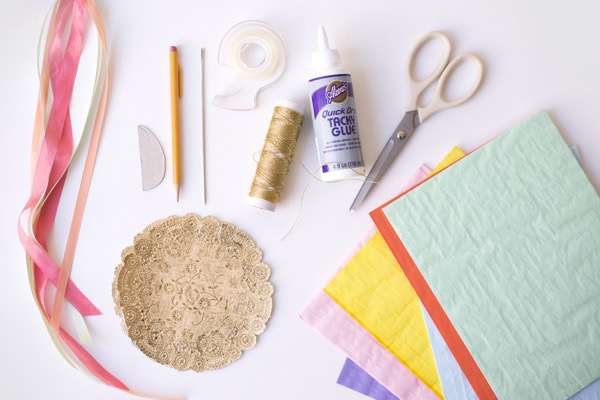
Materials needed: honeycomb paper pad, egg template, pencil, scissors, double stick tape, upholstery needle, gold string, gold doilies, ribbons.
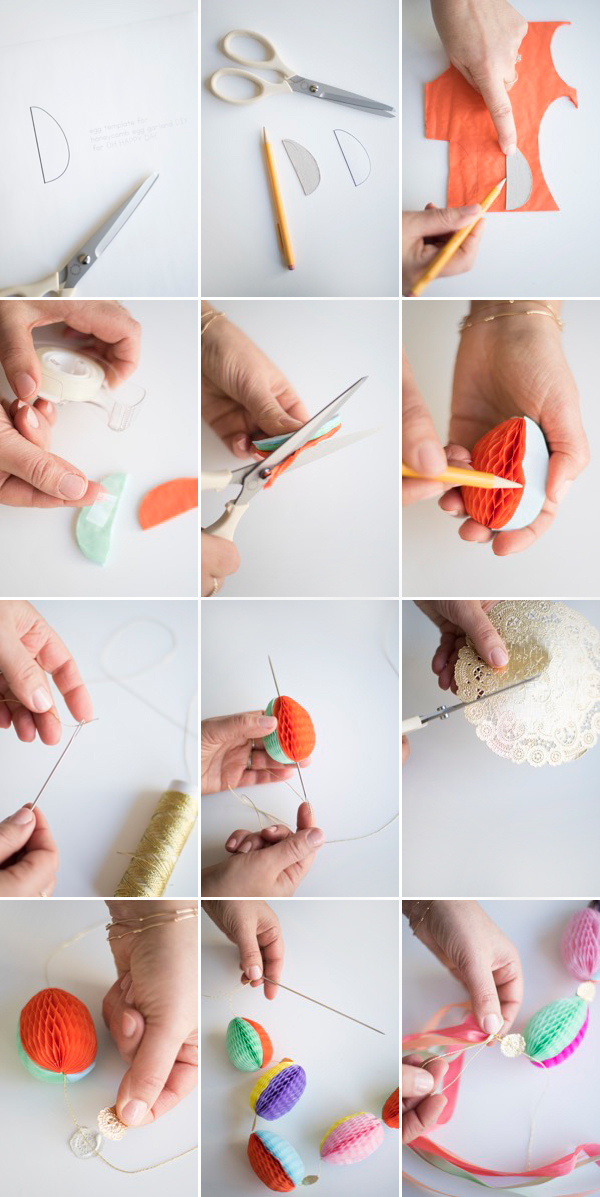
Step 1: Print out the egg template (here).
Step 2: Cut out, and trace the half egg shape onto a piece of lightweight cardboard. I recommend making the template out of cardboard because you will need three shapes for each egg. It takes about four eggs for every 1 foot of garland.
Step 3: Trace the egg onto the honeycomb paper, making sure the lines in the honeycomb paper run horizontally. You will need three different color half-eggs for each egg. Cut out half eggs.
Step 4: Stack three different colored, cut-out half eggs together. Put double stick tape in between the colors, and press hard to secure.
Step 5: Trim any excess edges so all the half egg edges are even.
Step 6: Put doublestick tape on one side. Open the egg and tape the ends together. This can be tricky and might take several attempts. Use a pencil or skewer to stick in between the honeycombs to get a good connection.
Step 7: Thread an upholstery needle with string or twine.
Step 8: Insert the needle though the egg.
Step 9: Cut out two circles out of gold doily, about ½ inch or so in size. I used one that was in the pattern of the doily.
Step 10: Glue the gold medallions between eggs.
Step 11: Repeat threading eggs and adding medallions until you have the length you want.
Step 12: Tie several different color ribbons to each end of the garland to finish it off.


Photography by Tim Gibson


Cintia - Sol de Noche {deco crochet}
March 8, 2016
Love it!
http://soldenochedecocrochet.blogspot.com.ar
Jordan
March 8, 2016
These are so cute! I love the mix of colors. The metallic decoration in between each egg is a really nice touch.
Daphne
March 8, 2016
Dear Chiara,
I didn’t knew it was possible to buy honeycomb paper to make my own shapes, such an interesting way to experiment new craft ideas, thanks.
This garland is so fresh and smells like Spring – can Winter just go away now, I think we all had enough !
Amanda
March 8, 2016
These are beautiful! Also, love your pictures.
http://www.theartfulscavenger.com/#!blog/czwt
Kari
March 8, 2016
What a colorful decoration craft!
Kari
http://www.sweetteasweetie.com
Michelle
March 9, 2016
I love it, this looks super cute and colourful!
https://www.makeandmess.com/
Lyndsay // Coco Cake Land
March 15, 2016
Aiyeee these are so perfect! They make me want to eat chocolate eggies and throw a little party. So cute, Chiara!