


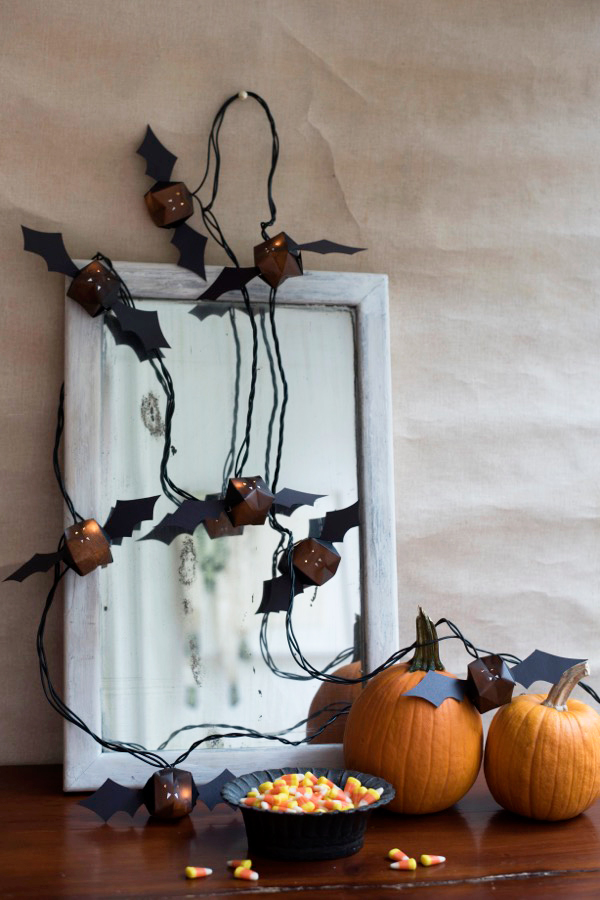
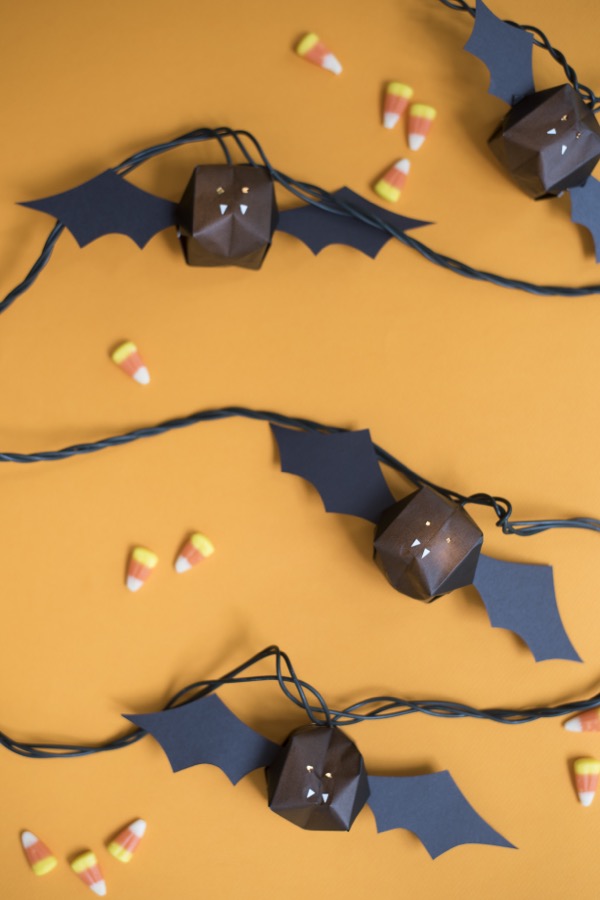
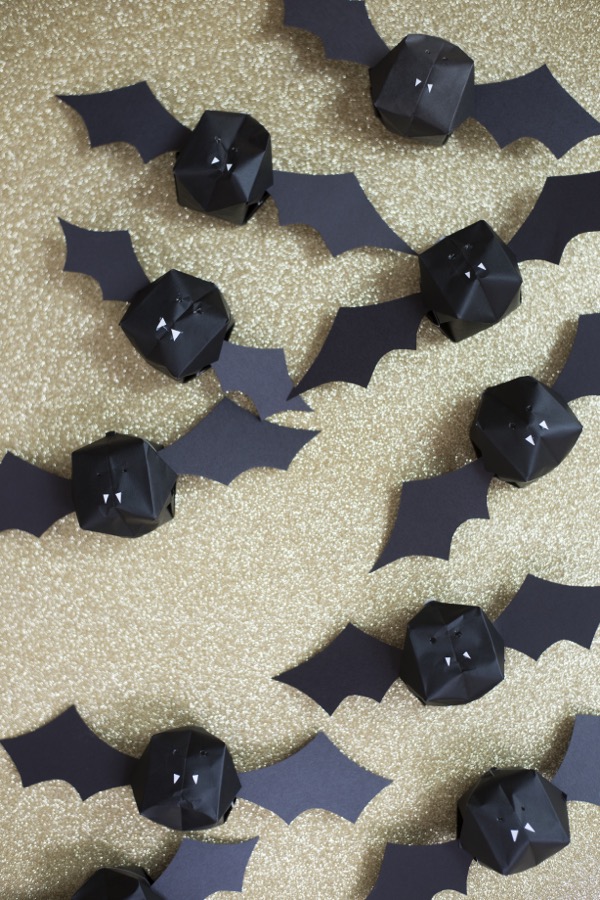
You’ll go batty for these cute bat lights. Hang them on a window, behind your sofa, on a fireplace mantel – or double your bats by draping them over a mirror. You could even hang them in the batroom – er, I mean bathroom. If you don’t want to do lights, you could hang them from a length of string (with tape or glue) for a fun garland.

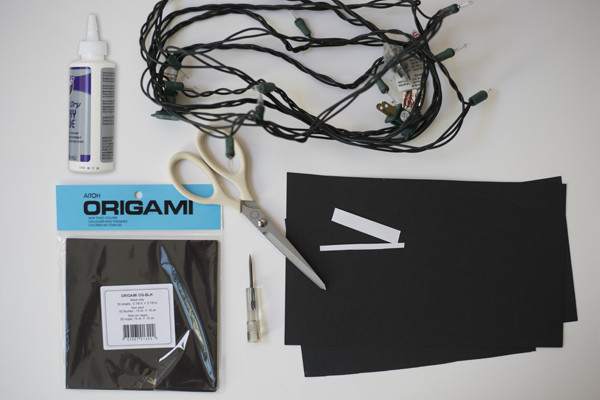
Materials needed: black 6” x 6” origami paper, black construction paper, scissors, string lights, craft glue, white paper, a sharp pointy tool.
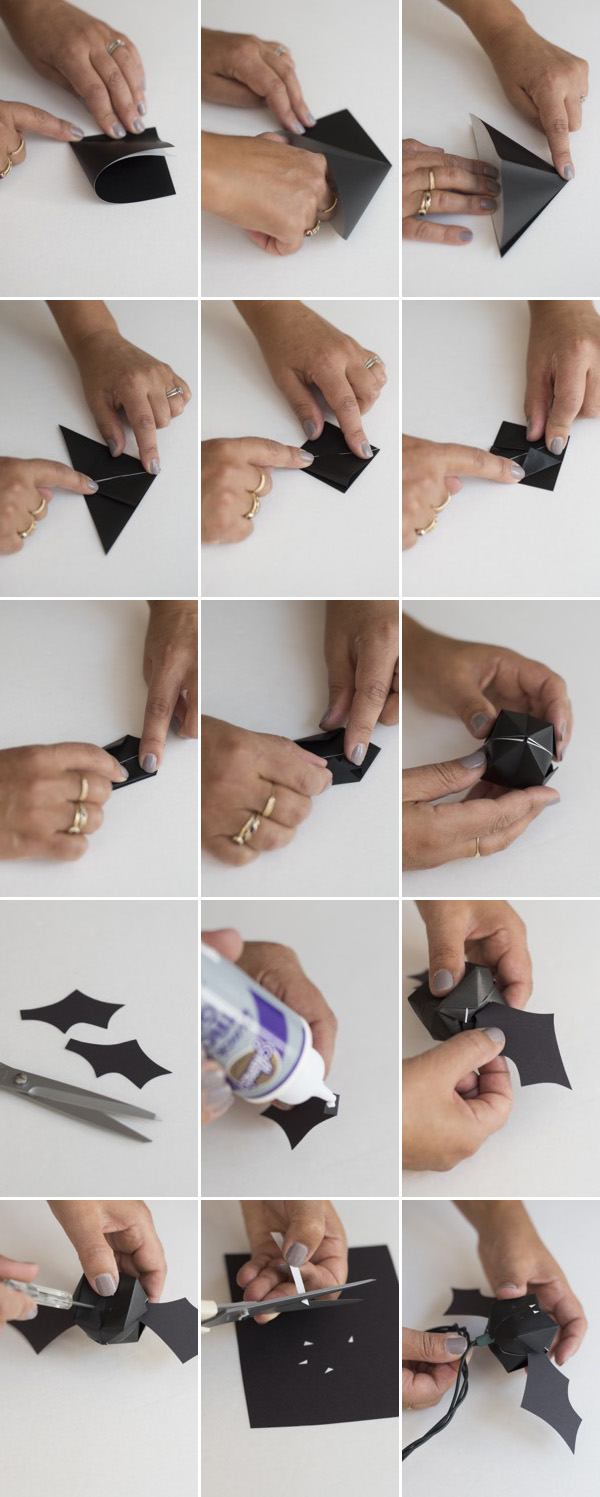
Step 1: Create a balloon origami shape – I found these instructions helpful, but I’ve tried to show the steps here too. Begin by folding the paper in half. Then fold in half again.
Step 2: Insert one finger and open the top fold, slide it to open (you may have to poke and nudge a little) and press down to flatten the triangle you just created.
Step 3: Turn paper over and repeat Step 2.
Step 4: Fold up the right and left corners – so that the lower left corner meets the top point, and the lower right corner meets the top point – to create a diamond shape.
Step 5: Turn paper over and repeat Step 4.
Step 6: Fold in each outer point of the diamond. The outer points should meet in the middle.
Step 7: Turn paper over and repeat Step 6.
Step 8: Tuck the top two triangles into the flaps below them. Flip over and repeat this step.
Step 9: Blow up the balloon where there is a little hole on the bottom.
Step 10: Cut out two 2 ½” x 1 ½” (roughly – no need to be exact) bat wings. You can use this bat wing template or just “wing it”.
Step 11: Fold a 1/8” tab on the end of the wing, and apply a dab of glue.
Step 12: Attach wings to the sides of the origami balloon by tucking into one of the folds. Let dry.
Step 13: Using a sharp tool or very sharp pencil point, poke two small holes for eyes into the front of the balloon.
Step 14: For the fangs, cut out two tiny triangles about 1/8” each from white paper. Glue under eyes.
Step 15: Repeat steps 1-14 to cover all the bare bulbs in the string light set. Attach bat to lights by popping the bulb into the hole at the top of the bat.
Photography by Tim Gibson


Anna of Analog House
September 24, 2015
These are awesome, and I love the pin!
http://theanaloghouse.blogspot.com
Michelle
September 24, 2015
These are just too adorable! And with Origami as well, I have to practice my folding skills again…thanks for this inspiration!
Kellee
September 24, 2015
These are tooooo cute!
sharon / theprincipledtype.blogspot.com
September 24, 2015
I like these up the wall and over the mirror like u show. Even if my folds don’t come out as well as yours, that will be okay – it’ll just make those bats ‘scarier! ‘ !!! Lol~
Paige
September 24, 2015
These bats are so fun and cute! We definitely need to make these in our house!
Paige
http://thehappyflammily.com
Sam
September 24, 2015
These are super cute! Perfect Halloween decoration. =^-^=
Sam | Momentarily Dreaming
Nikki
September 25, 2015
Love love love.
Nikki
September 25, 2015
Love love love. I can’t wait to try
Jessica
September 27, 2015
These are too cute! Great idea! I’d have a hard time figuring out where to hang them. 🙂
Jessica
September 27, 2015
These are too cute! What a fun idea… I’d have a hard time finding where to hang it. 🙂