


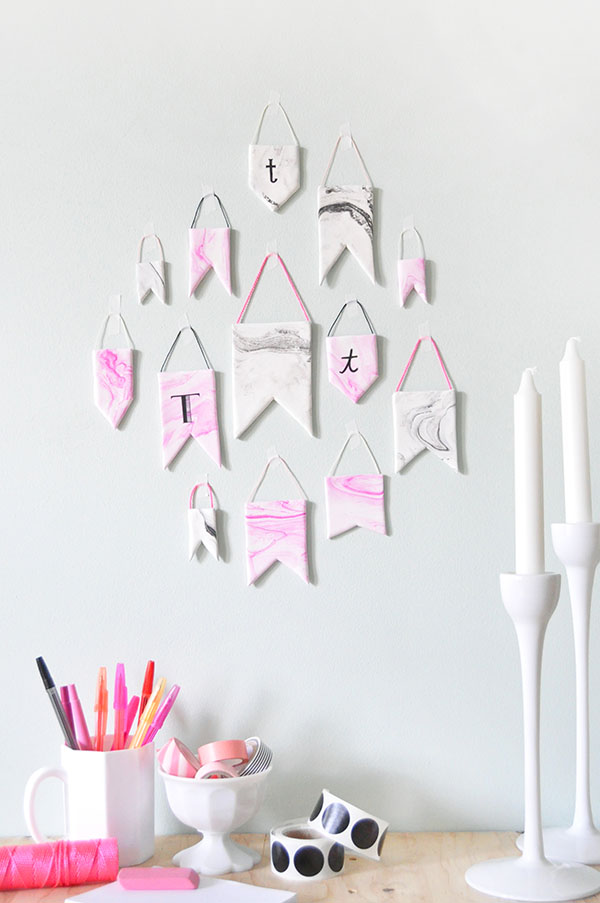
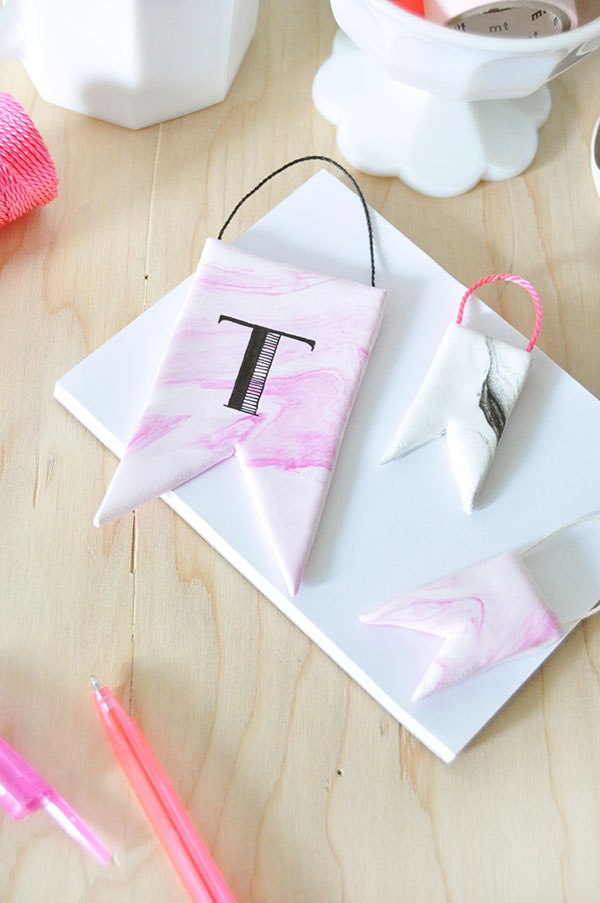
Do you love the look of marble as much as I do? I’m a little bit addicted to it – I loved the tutorial using nail polish on ribbon and party hats. These banners are made with air dry clay and paint – they’re super lightweight, so you can just use washi tape to arrange them on the wall. You can even use them as little gift tags, too!


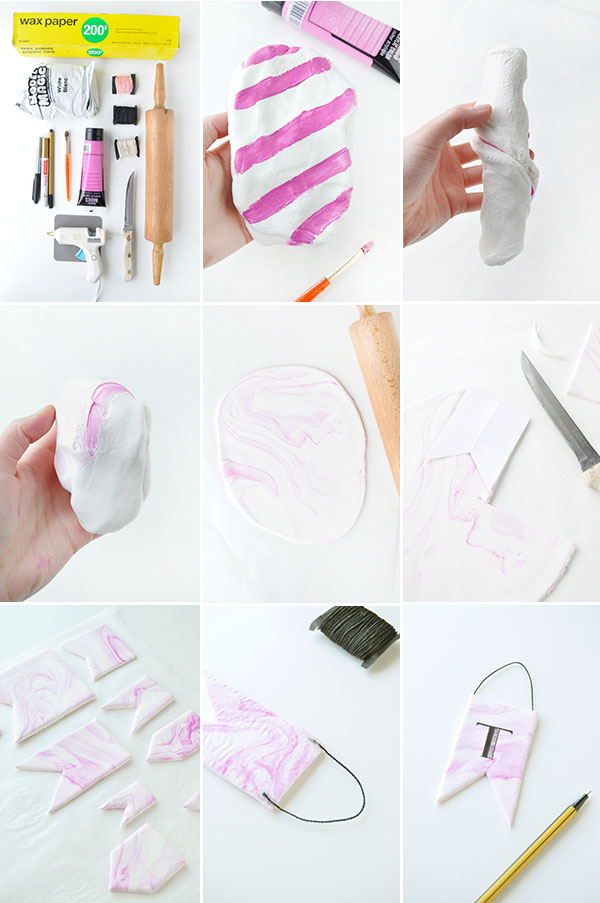
Supplies: Wax paper, white Crayola Model Magic (it’s lighter and has a more marshmallow-y texture than most clays), rolling pin, string, knife, paint, paintbrush, hot glue gun, pens/markers, scrap paper (optional)
Step 1: Put a piece of wax paper on your work surface. Grab a chunk of Model Magic (more than half the package will be hard to work with) and paint rough stripes across it. The more paint you use, the more vibrant the marbling will be.
Step 2: Twist the clay together.
Step 3: Continue twisting and kneading the clay (your hands will get messy) until you start to see the marbling throughout. If you knead for too long, the marbling will blend too much into the white clay. Experiment to see what look you like best.
Step 4: Put the clay down on the wax paper and roll with a rolling pin until about 1/4″ thick.
Step 5: Use scrap paper to make stencils of the shapes you want to use. Place on top of the rolled clay and cut around the shape with a knife. (I found that it was pretty easy to eyeball the shapes, but for the larger banners it did help to have a guide.) When cutting, pull the excess away as you cut to prevent it from sticking back together.
Step 6: Place the cut out shapes on another piece of wax paper, tidying up the edges as needed with the knife. Let dry at least overnight, 24 hours is ideal. While drying, the shapes will warp less if you’re able to flip them over every few hours.
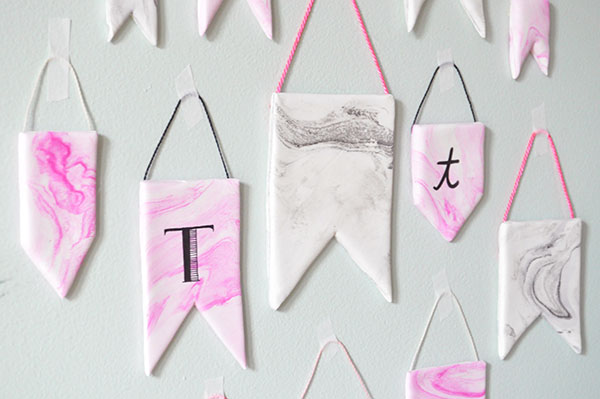
Step 7: Once dry, use the hot glue gun to attach a piece of string to the top corners of the banners.
Step 8: If desired, use a marker or pen to write letters, shapes, or small messages on the banners. Use washi tape to hang on the wall.


Kristi Craig
June 1, 2015
This is so cool! I’m loving the marble trend right now.
Kristi
beloverly.com
Renata Jernigan
June 1, 2015
I absolutely love this! I wonder if it would be possible to scale this up for faux marble surfaces?
Louise
June 1, 2015
These are just adorable! I can’t wait to do this for my kids graduation party!
Louise
Paige
June 1, 2015
These are so cute! I love how you used them as a gift tag!
Paige
http://thehappyflammily.com
Jodie Smith
June 1, 2015
Oh what a lovely idea, will definitely give this a try over the long 3 month summer break I now have!!
Jodie
http://a-textile-perspective.blogspot.co.uk
Meryl @ One Black Robin Crafts
June 1, 2015
Ahhh this is so cool! I think miniature ones with a hole stamped at the top would make great pendants.
Daisy - émoi émoi
June 2, 2015
These look great! Love the gift tag! 🙂
http://en.emoi-emoi.com/
katia
June 2, 2015
i love marble. i want a marble table top!