


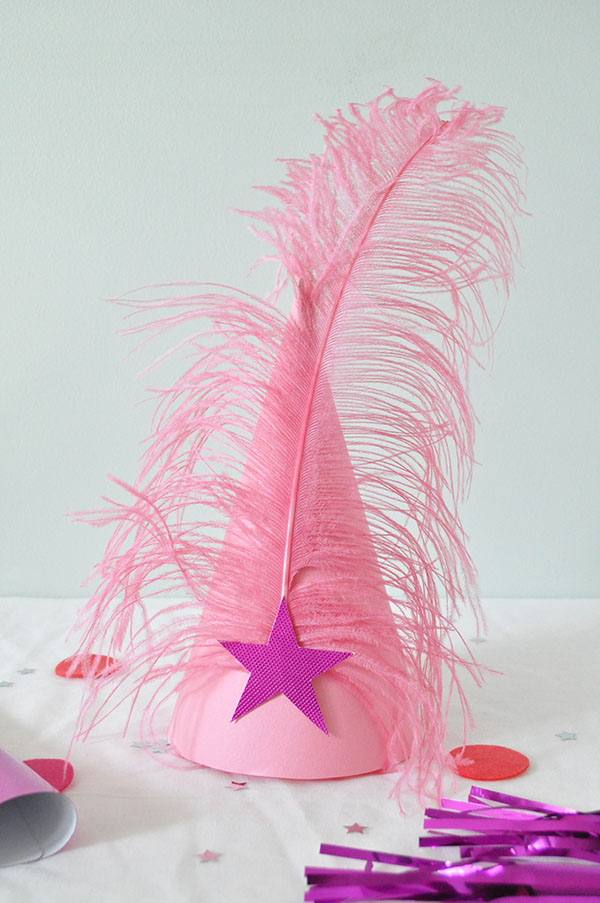
Party hats are such a fun way to liven up a party! This DIY project was inspired by marching band style hats – I made these ones pink and magenta, but you can easily change the colors to match your scheme. Wouldn’t they be cute with something like this?


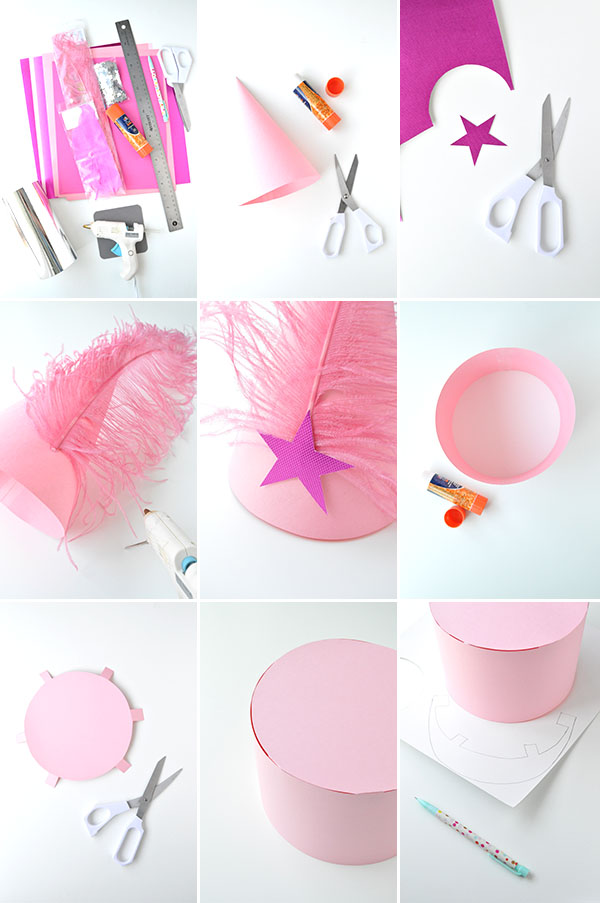
Supplies: Assorted card stock and metallic paper
, craft feathers
, metallic star confetti
, glue stick
, ruler
, scissors
, pencil, metallic contact paper
, hot glue gun
Step 1: For the pointed hat: Use paper to form a cone shape the approximate size of your wearers’ heads, using a glue stick to keep closed.
Step 2: Cut a star (about 2″ in size) out from metallic paper.
Step 3: Apply a line of hot glue onto the front of the cone hat and attach a large feather.
Step 4: Hot glue the star on top of the base of the feather.
Step 5: For the round feather hat: Use paper and a glue stick to make a tube that is about 5″ tall and 23″ around. (Or adjust these measurements to better fit the wearers.
Step 6: Cut a circle to fit the top of the circle, adding tabs along the outside. (To make the right sized circle, use a compass or carefully trace the tube.)
Step 7: Fold and apply glue to the tabs, and stick them to the inside of the tube.
Step 8: To form the brim, trace the front curve of the tube onto card stock. Draw a brim out from this line and add tabs going in, as shown.

Step 9: Cut out the brim, fold the tabs, and glue into the tube.
Step 10: For decoration, add feathers and a card stock star as before.
Step 11: For the round striped hat: Form a tube (see step 5) and cut 2″ wide strips of contact paper. Peel the backing off the strips and attach onto the tube, keeping as evenly spaced as possible and folding any excess length inside the tube.
Step 12: Use glue to attach the silver confetti stars onto the hat.
Step 13: Cut and attach lid and brim (see steps 6 to 9).


Marlan Willardson | Twink + Sis
February 16, 2015
Love!!!
Rachel
February 16, 2015
Really cute, guys. I love this!
Heather
February 16, 2015
Amazing.
Kari
February 16, 2015
These are so cute! Would be great for a circus party!
Kari
http://www.sweetteasweetie.com
Anne
February 16, 2015
These are so cool I love them! They will be great for carnival and circus themed parties!
http://annescribblesanddoodles.blogspot.com/
Beauty Follower
February 17, 2015
So pretty and easy to make!
http://beautyfollower.blogspot.gr