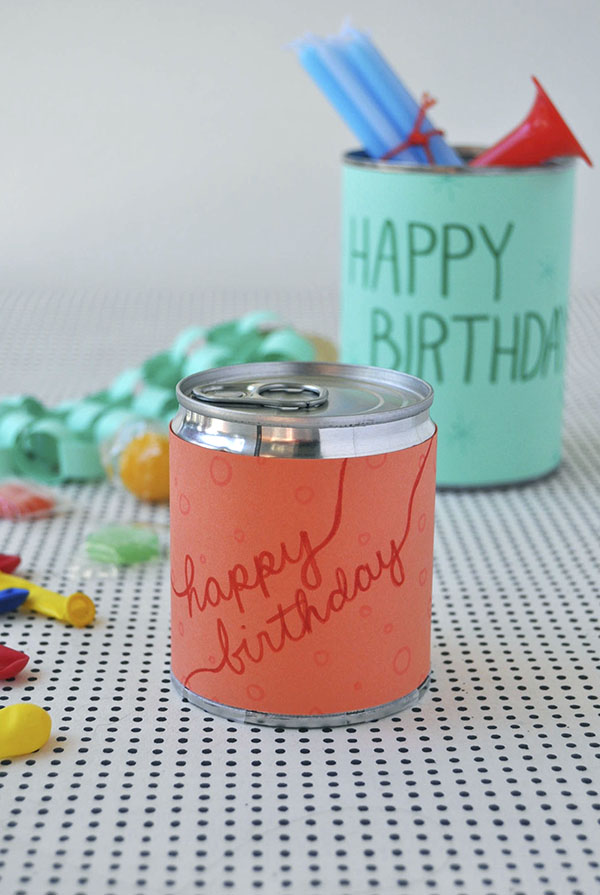
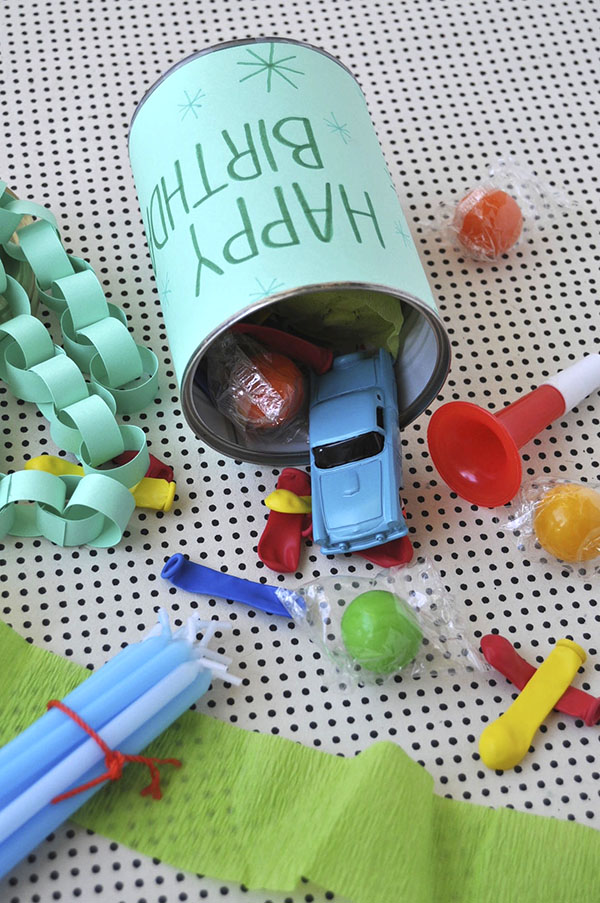
I don’t know about you, but I love a good surprise. Repurpose a regular tin can into a mini surprise for your favorite birthday boy or girl. The best part is that you can fill them with whatever you like, ensuring the receiver gets a totally custom birthday treat.
Materials: Tin can with pull tab top, clear tape, washi tape
, can opener
, scissors, hot glue gun
, colored paper, markers
, small prizes and goodies
Step 1: Pick out a tin can with a pull tab top and remove the paper label. Be sure to pick a can that doesn’t have a rounded edge on the bottom or your can opener won’t work on it.
Step 2: Use the can opener to remove the bottom of the can. Empty out the can and soak if food left an odor behind.
Step 3: Use washi tape to cover the sharp edges both on the inside of the can and on the circle you removed.
Step 4: Cut thin paper strips to make paper chain. The pieces pictured are about 1/4″ x 1 1/2″.
Step 5: Use a dab of hot glue to assemble the paper chains. Each chain is at least the height of the tin can.
Step 6: Hot glue the paper chains to the inside of the top of the can.
Step 7: Fill the can with small candies and treats.
Step 8: Once the can is filled, place the bottom back on and use clear tape to secure it in place.
Step 9: Cut a rectangle of colored paper to cover the side of the can.
Step 10: Decorate the paper with a birthday message.
Step 11: Hot glue the label onto the can.


Amicia Rai
January 6, 2014
Awwww that would be a wonderful surprise for the kids! ^_^
Jaime
January 6, 2014
SO SMART! I was wondering how you resealed the can. Genius way of doing it very simply! Can’t want to do this!
Michele
January 6, 2014
I LOVE this so much! I’m going to do this for a friend of mine. I’ll think she’ll get a kick out of it.
Jesse
January 6, 2014
so cute! and i need ideas for my son’s bday party!! thanks:)
http://semiweeklyeats.blogspot.com/2014/01/out-to-dinner.html
Rebecca
January 6, 2014
Oh my gosh, this is such a fun idea! I am going to keep this in mind for my daughter’s 4th birthday! I can’t imagine how excited she would be to open it!
Nat
January 6, 2014
love, love, love!
Michelle
January 6, 2014
If you use a Pampered Chef can opener, it will make it even easier to replace the bottom on the can and you won’t have sharp edges. It doesn’t cut the can, it breaks the seal and you can just put glue around to put the bottom back on. This is a great idea.
Nancy
January 6, 2014
Absolutely brilliant idea – can’t wait to get started on my own birthday in a can for my friends!
Erin
January 6, 2014
I’m so making these for my nephews!! They’ve been so good this year, I’ll even add extra candy! xxErin
tinajo
January 6, 2014
This is such a cute idea! 🙂
Lauren
January 6, 2014
Awww – such a fun DIY!
eversaidnever
January 6, 2014
Waaooow, great idea! I love it! Can’t wait to get one ready for my kid and nephews. You got me so puzzled before reading through your tutorial. I could not figure out how you managed to keep the pull tab untouched. Congratulations!
Wendy
January 6, 2014
Another great can opener I use for many crafts (and cooking) is the OXO Smooth Edge can opener. My guess it is similiar to the Pampered Chef one Michelle is referring to use and is probably more available to purchase. They aren’t cheap though about $22, but so worth it. I don’t worry about cutting fingers when removing can lids and feel comfortable in letting my children open cans with it.
Bella Pop
January 6, 2014
LOVE this. I’m going to do a birthday week for my husband this month and this is a great way to announce it. Super cute!
Natalia
January 6, 2014
What a fun DIY, I love the idea!
Graham @ Glazed & Confused
January 6, 2014
Such a cute idea! You always deliver!
Vinci
January 6, 2014
SO CUTE :DDDDDDD I love this idea and would be thrilled to be given such a thoughtful gift! For sure guna make this for my sis! Love this site keep up the AH MAZING work 🙂
Christina // Franny & Franky Designs
January 7, 2014
Love this! Saving for our son’s later birthdays 🙂
Anna S.
January 8, 2014
This is too cute! It’s really dificult to find creative, original crafts these days, I will deff be making this for someone!
Julia
January 12, 2014
I just completed this project and I love it!
Just be careful about which kind of can you purchase. I first purchased a Campbell’s Soup can and the bottom edges are for a lack of better word beveled or kind of 3-D around the edges. When I tried to cut into this it dented and ruined the can.
Then I bought one of diced pineapples and that worked much better. The bottom edge around the bottom of the can is flat.
I suggest comparing the bottom of your pulltab can to the top of the normal open can to make sure it will get ruined when you use the CanOpener on it
Nadia
January 12, 2014
What a fun idea!
Mifuku
January 15, 2014
Lovely idea! I love it! I will try to do it next birthday! Congratulations and thank you!
Rosi
January 15, 2014
Great idea! We have to fill jam jars with surprise treats for school for every fair they have and the children pay 50p and choose a jar. I will definitely be glueing mini paper chains inside the lids from now on!
Rosi (UK)
MamaFromPoland
January 17, 2014
Great idea:) Love it!!!