Recent Posts
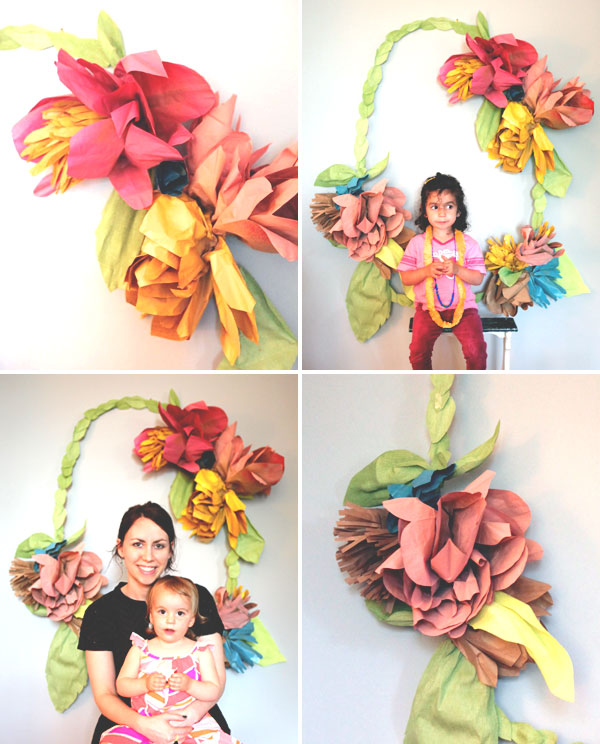
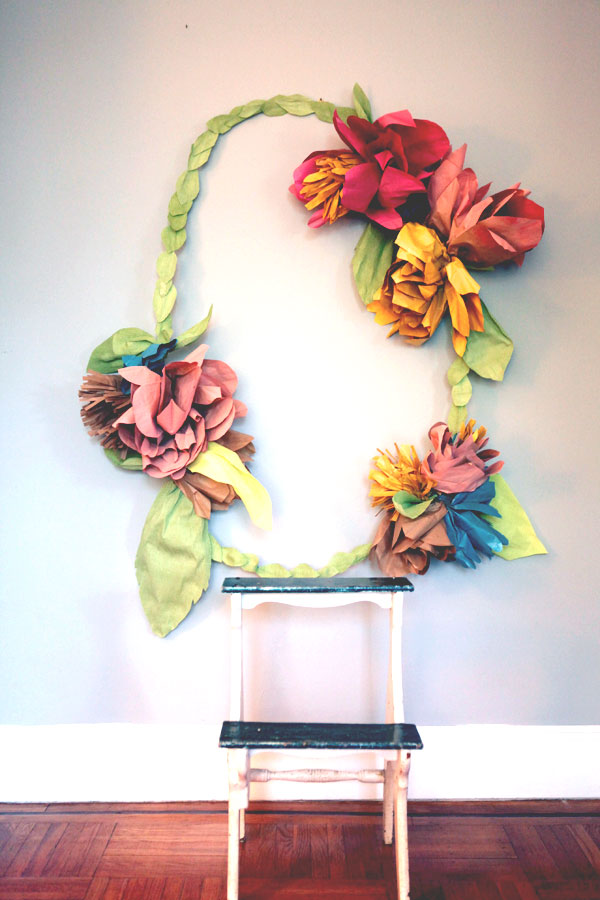
Last year, I created a Hot Air Balloon Photobooth for a sweet little girl’s birthday party. For her 2nd birthday, we wanted to continue the tradition – so we made a Floral Wreath background based loosely on her invitation. The best part – the flowers are made from brown paper lunch bags – the kind you get at the grocery store for 99¢.
Click through for full instructions
Materials: Brown paper lunch bags (about 50), scissors, stapler, hole punch, thin wire, 1/8″ aluminum wire (20 feet), wire cutters, yellow, pink, peach and teal spray paint, green crepe paper for leaves
Step 1: Cut the top off a paper bag, making scallops with your scissors.
Step 2: Flatten the paper bag, then fold it in thirds, to make a point. Staple the point and punch a hole in it.
Step 3: Repeat with 3 more bags.
Step 4: Overlap all four bags and staple the bottoms to each other so they make a long line. Gently bend them into a circle to create a flower. Fluff and manipulate the paper to give the flower some volume.
Step 5: Thread wire through the holes at the bottom. (You may have to punch more holes to secure the wire).
Step 6: Repeat this process to create 10 – 12 flowers. Experiment with different sizes and shaped petals (scalloped vs. pointed, or thin strips to create a ‘marigold’ or stamen shape).
Step 7: Spray paint some of the flowers in a ventilated space. If you are combining colors, wait til they are completely dry to assemble the flower.
Step 8: Create 10 – 12 leaves out of crepe paper. I used these directions (slide 17 of 19 for leaves – size them up to be about 12 – 14 inches).
Step 9: Form the 1/8″ aluminum wire into a giant wreath shape.
Step 10: Cover the silver wire with green tape.
Step 11: Attach bunches of flowers and leaves to the wire frame using tape and thin wire. I chose to place them in three groupings – if you wanted, you could make triple the number of flowers and cover the entire frame.
Step 12: Cover the exposed wire with 2-inch overlapping green crepe paper leaves, using tape.
Step 13: Hang and enjoy!


Lisette Wolter-McKinley
June 4, 2013
Love this big impact back drop!
Michelle @ Full Belly, Worn Soles
June 4, 2013
Such a cute idea for Easter or a spring/summer birthday celebration!
http://www.fullbellywornsoles.com/
Tanya
June 4, 2013
This is absolutely stunning – would make for beautiful permanent decor, too. LOVE IT! (Tanya @ the-wonderist.com)
rachel
June 4, 2013
This is amazing and I can’t wait to try this.
lyndsay
June 4, 2013
awww! that turned out totally awesome. great tutorial, chiara!
emily
June 4, 2013
i love the way the paint colors look a little muddy or softer on the brown paper bags. darling idea!
Emily
June 4, 2013
that looks amazing! I would never be able to take it down!
LARY@Inspiration Nook
June 4, 2013
This is adorable! What a cute idea. Love the idea of spray painting the paper bags. 🙂
Rebecca
June 5, 2013
aw this idea is so sweet!
Rebecca @ tr[i]b[e]cca
ashley
June 5, 2013
what a beautiful idea. love all the talented people on Oh Happy Day!
cynthia
June 5, 2013
beautiful flowers!
http://blanchday.blogspot.com.br/
Bikbik & Roro
June 8, 2013
Wonderfully executed — this is so lovely and festive 🙂
abigail
June 10, 2013
amazeballs