


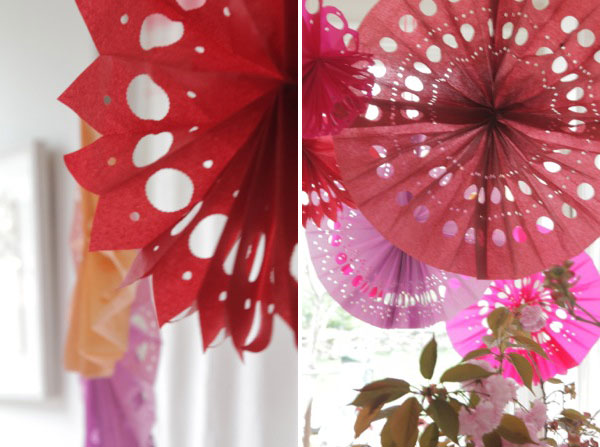
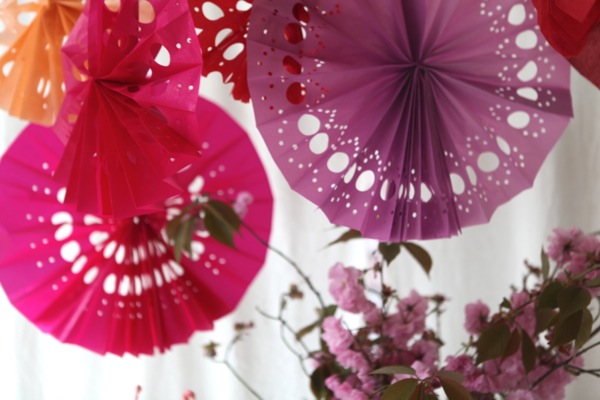
I’ve seen a lot of really beautiful paper fans used as party decoration and photo backdrops. So, I wanted to try and make a hole-punched version which really lets the light through and looks so festive and pretty. I used good quality tissue paper, and had fun trying a variety of different patterns with my hole punches. I love how the final pattern looks a little like eyelet!


Click through for instructions…
Materials needed: Tissue Paper (the heavier and stiffer, the better), Glue Stick, Stapler, Scissors, Hole Punches in Different Sizes, Scrap of Cardboard
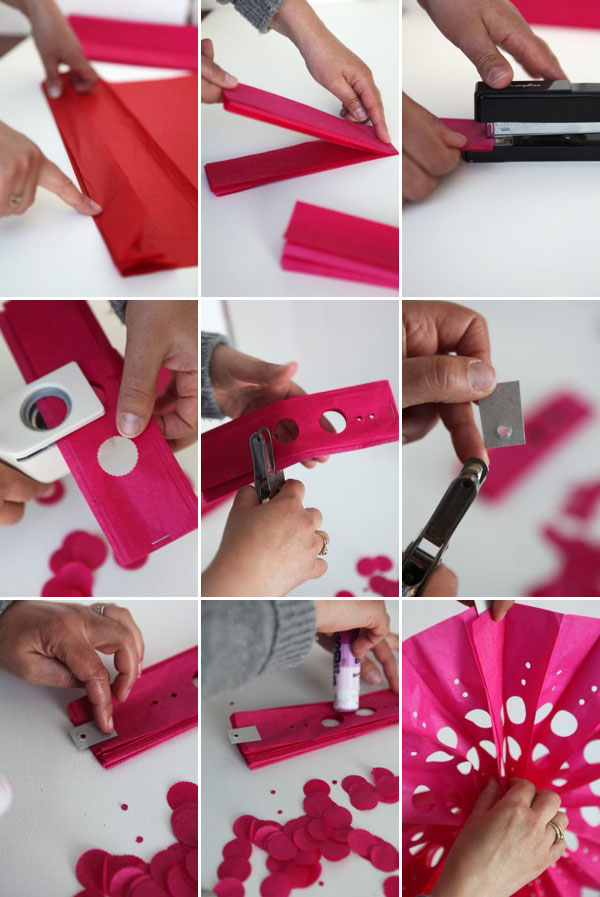
Step 1: Take two sheets of tissue paper, the same size rectangles. (I used different sizes ranging from 11″ x 16″ to 16″ x 24.”)
Step 2: Fold one sheet of tissue paper rectangle like an accordian (fold in one direction, then the other direction). Repeat with second sheet.
Step 3: Once you have your folded strips, fold them in half. Staple the folded edge to secure it.
Step 4: Punch holes in the tissue paper with various size hole punches. Experiment with different patterns and designs.
Step 5: Repeat the same pattern on your second strip of matching paper.
Step 6: Cut and punch a hole in a small piece of cardboard. This will be where your string for hanging will go.
Step 7: Glue the cardboard piece to the outer edge of the fan.
Step 8: At the same time, glue tissue paper strips together. Glue any interior folded sides that still need to be attached. I found a glue stick to work best, but I’m sure Elmer’s or craft glue would work as well.
Step 9: Gently open the fan and glue the last unattached sides together.
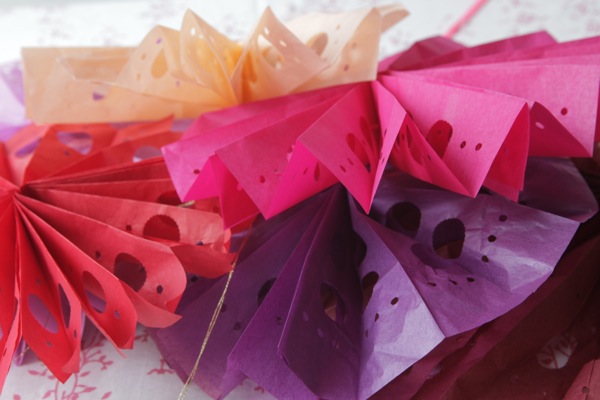
Step 10: String and hang!

PS: If you are making these at a different location than where your party will be, I would wait til you arrive at the venue to complete step 9. They are pretty fragile and I don’t think they would travel well.


Peaches
May 2, 2013
Some serious jealousy directed at those flamingo cupcakes right now. The flowers are lovely too — very paper picado!
Toni-Louise
May 2, 2013
Love how good these look! Brilliant for summer and so simple too! Thanks for sharing! 🙂 x
lemon-freckles.blogspot.co.uk
Ivana @ Macarons and Pearls
May 2, 2013
They look absolutely fantastic! Such a simple, yet genius idea 🙂 I would make some just for fun, as a part of everyday decor of my bedroom 🙂 Thank you so much for the inspiration!
xx Ivana
Macarons and Pearls
Holly @HollyPop Designs
May 2, 2013
Those are so pretty! What a beautiful decoration for spring and summer parties!
Fun Fun
May 2, 2013
They are so pretty. I love this.
uncustomary
May 2, 2013
Absolutely beautiful!
Heather
May 3, 2013
P.P.S. You can use what’s left over from punching as confetti!!!! So pretty! Xo
WB
May 3, 2013
And…look at all of the confetti that is left over!!! Brilliant!
Lisette Wolter-McKinley
May 3, 2013
So beautiful and delicate looking. Love these!
lyndsay
May 3, 2013
pretty darn cute! and smart with the hole punches… love the “eyelet” look, i can see this working for a cute little pale pastel bridal shower, white and mint green and pale yellow fans or something! (also, as said above – CONFETTI! multiuse project!)