by Chiara Alberetti Milott
My friend Kate recently celebrated her daughter Scarlet’s 1st birthday. We wanted to do a photobooth especially for kids – and she came up with this cute hot air balloon idea. After gathering supplies, we sort of winged-it and with the help of Kate’s Dad, we managed to fashion a sweet little hot air balloon for the kids to “ride in.”


Continue reading for complete instructions and more photos.
Materials needed: a laundry basket, a roll of blue paper, a 36-in balloon, helium, 36 feet of heavy yarn (or lightweight rope would work too), a scissors and tape or a staple-gun.
Step 1: Begin by inflating your balloon (make sure you will be able to get it though any doorways if you are setting it up somewhere other than your final spot!). Temporarily tie the balloon down to something heavy (we used a tea kettle positioned in the laundry basket) so you will be able to adjust and fiddle with the yarn as you tie it. Make an ‘x’ over the top of your balloon, with enough yarn to go over the ballon and down to the basket. Tie it to the basket at four corners, leaving an opening in on the front side so you will be able to see the kids’ faces as they sit in the basket.
Step 2: Take another length of yarn and begin tying knots AROUND the top third of the balloon, attaching it to the existing ‘x’.
Step 3: Repeat this step, only this time do it around the middle of the balloon. You may have to wiggle and adjust your yarn, so don’t tie your knots too tight at this point.

Step 4: Drape some yarn from the middle knots so they create some swag from knot to knot. Tighten up knots and trim any excess yarn.
Step 5: Roll out your paper floor to ceiling, and then on the floor. This is a two-person job, so grab a buddy. Depending on your floor and wall, use tape or staples to secure the paper to the surface.
Step 6: Carefully help kids in and out of the balloon basket ~ and make sure they don’t pull too hard on the yarn (very tempting for kids)! We also put two pillows in the basket to make it more cushy, and since we set this up outside and were nervous about the balloon flying up and away, we tied an extra piece of yarn from the balloon to the side of the building. We staple-gunned it to the wall and since it was directly behind the balloon, you can’t see it in the pictures.
I also enlarged, color-copied and cut out some vintage bird illustrations, and made a paper banner that read “Scarlet’s First Birthday!” I spray-glued these and stuck them on the background once everything else was in place. You could also just cut out big white paper clouds to give the illusion that the balloon is floating high in the sky.
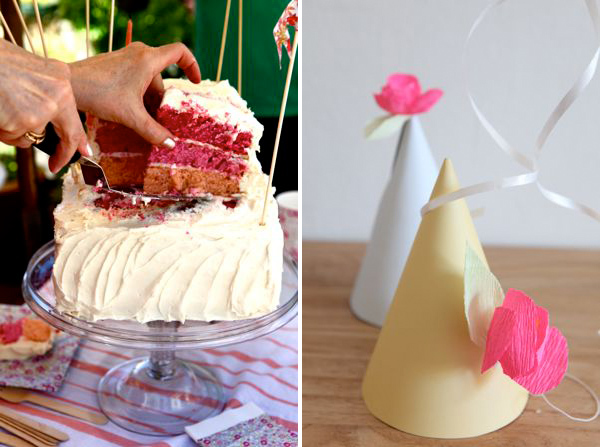
Kate also followed Jordan’s tutorial for DIY party hats, and made a gorgeous two-tiered pink ombre cake. She used Liberty-inspired paper plates, napkins and cups from IKEA, and served quiche, yogurt, granola and honey. Peonies provided the perfect pink touch.
It was all so very sweet and lovely, even the chaos that ensued when we tried to get ALL the kids in a group shot. Happy 1st Birthday, Baby Scarlet!
Top six photos by Kate Mathis.


Katie O"Keefe
June 5, 2012
This is so inspiring! Love the idea, and it doesn’t seem to complicated either!
Savanah
June 6, 2012
This is so cute!! Thank you so much for sharing! I’m seeing some really adorable hot air ballooned themed parties this summer 🙂
Gina
June 7, 2012
Positively Adorable!
Soo-Jin
June 7, 2012
this falls in my top ten photo posts i’ve ever seen!! so creative and perfectly executed!!
http://mybabykins.com
Anneliese
June 7, 2012
This is so darling! I adore he hot air balloon photo booth. So lighthearted and fun. I would love to do something like this for my youngest daughter. (And I also have a “Scarlett”) Thanks for sharing!
Rachel
June 7, 2012
What a beautiful idea.
Courtney
June 9, 2012
Is there a source for the yarn? Its fantastic!