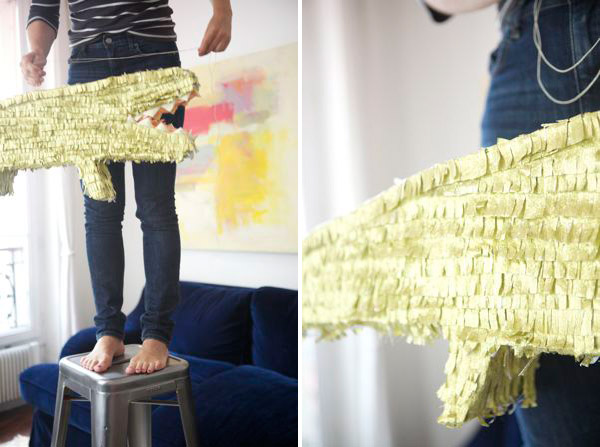
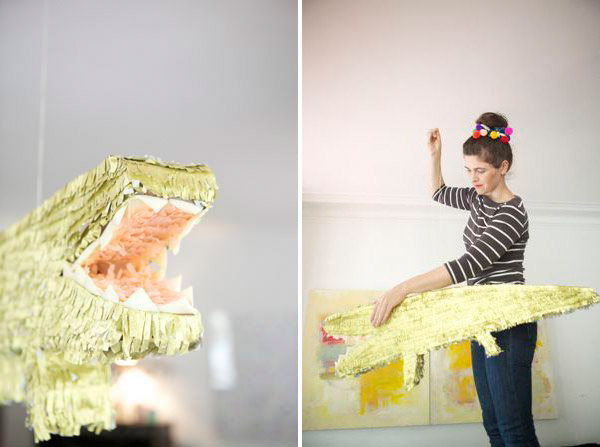
I have a really fun pinata tutorial to share today. This is the second in the Oh Happy Day pinata series (the first is right here.) This golden alligator was really fun to make and I love it so much I want to keep it forever. It took me two short evenings to make it but really it went pretty quick and cutting fringe for me is kind of therapeutic at this point since I make it so much. DIY directions below!
Materials: Metallic Gold Crepe paper in folds. White and Pink crepe paper for the mouth and teeth (I like to buy it here.) Large cardboard box, exacto knife, cutting mat, glue, packing tape, scissors.
Step 1. Layer two layers of cardboard over a cutting mat. Draw an alligator. Cut it out with an exacto knife then cut out long 4″ wide strips to connect the two pieces.
Step 2. Using strong tape connect the alligator shape to the 4″ wide strip. Fold and crease the strip where you need to for the shape of the alligator. (If this is just for children this will be strong enough. If you are making it for adults you should add 2-3 layers of strips of paper and Elmer’s glue to reinforce it.)
Step 3: To decorate your alligator make one sided fringey garlands (which means you follow these directions but only shred one side of the strip instead of both. ) Then starting at the bottom of the alligator lay down a line of glue.
Step 4. Apply the one sided fringe to the glue.
Step 5. Before getting too far on the fringe stop to make some teeth. To make the teeth take a 5″ square piece of crepe paper and fold it in half diagonally, corner to corner.
Step 6. Then fold it in half diagonally again corner to corner.
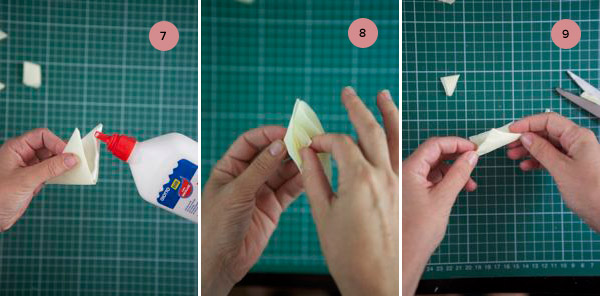
Step 7. Apply glue in the seam of the “pirate hat” and press it together to dry.
Step 8. I think the teeth look cute stuffed like a pillow so get scrap paper and stick it inside so its round.
Step 9. Fold the tooth so there is a little flap to secure the glue to. Apply the teeth to the top and the bottom of the mouth. It’s important you do this before you do the rest of the fringe so the crepe paper can cover the seams at the base of the teeth. Finish covering the rest of the alligator with fringe.
Step 10. When you get to a place where you can’t add more strips make a special piece that is “folded” at the top. You want to fold it specifically for where you are going to place it. This will cover any bare spots of fringe. Add glue.
Step 11. And then place the special strip so it covers any extra cardboard.
Step 12. Fill in the mouth with a second color of fringe (I used pink) and make some black eyeballs with crepe paper and a Sharpie. Put them on the top of the alligators head.


Danielle
September 9, 2011
I think you should keep him on the ceiling! He’s the cutest pinata I’ve ever seen! 🙂
Jane Flanagan
September 9, 2011
Awesome!
Giulia
September 9, 2011
This is so sweet. Do you use a pull string for an opening? Or do you find the cardboard breaks for the candy reveal?
marlene
September 9, 2011
He is seriously so cute! Great job 🙂
Melissa@Julia's Bookbag
September 9, 2011
This is really amazing….but what I really especially love here is the colorful pom-pom garland in your hair bun!! So darling!
Kersey
September 9, 2011
Jordan, I am in love with this! You’ve out done yourself lady!
Lexy @ The Proper Pinwheel
September 9, 2011
Holy MOLY! This is the cutest thing I’ve ever seen. I would keep it for myself too. And I love the colors. Gold and pink. He’s a classy gator, fo’ sho’.
sara w
September 9, 2011
I love this! What a great idea. You make it look so easy.
Candace {Lovestru.ck}
September 9, 2011
He’s just too cute to break!
Two Brunettes
September 9, 2011
might be the most amazing thing i have ever seen.
Ashlea Walter
September 9, 2011
Am I the only one left wondering about the candy?! Pray tell.
Sarah @http://agirlintransit.blogspot.com/
September 9, 2011
Wow, excellent job!!!! I love that he’s golden. Speaking of pinatas I actually searched your site when I made a pinata recently for my baby’s first birthday and got some ideas. It’s my most recent blog post too. I had fun making it.
– Sarah
http://agirlintransit.blogspot.com/
megwrites
September 9, 2011
“This cardboard alligator is destined for greatness.” Ha-ha. I love it.
Michelle A
September 9, 2011
Rad. Is this my birthday present this year? 😉
Connie @ Daydream In Color
September 9, 2011
He is so cute. I realized I was smiling looking at him through the whole post! I love this tutorial. It is in my future!
alexis
September 9, 2011
love this idea, so cute. and great, detailed instructions!
victoria
September 9, 2011
your kids are the luckiest kids around! adorable!
Raleigh Wedding Photographer
September 10, 2011
This alligator is awesome! My kids would love it!
Yolanda @ Milk And Freckles
September 10, 2011
a golden alligator is the best kind of alligator. love this:)
Kacie
September 10, 2011
OH my goodness! I love it! It’s so sweet and silly! Love it love it love it! Your craftiness is so inspiring!
Kacie
http://www.acollectionofpassions.com/
Tanya
September 10, 2011
This pinata is darling! I made a pinata a couple weeks ago using cardboard and packing tape for the base. After many, many hits by a bunch of 4 year olds and then the 7 year brother, there was no sign that the pinata would break open. I finally had to rip it open and shake the candy out. Any tips of making it breakable, but not too breakable?
kelly
September 11, 2011
I just love your hair-tie, did you make it? Pray tell!
marla
September 11, 2011
The coolest & cutest piñata ever!
Katie I KCANDCOBLOG
September 12, 2011
Genius!!
This girl loves to Talk
September 12, 2011
I’ve made many a pinata (usually doing the newspaper and glue thing) and I’ve made a few that didnt crack open, I like that they dont break straight away as this usually means everyone gets a hit (sometimes we go through the line a couple of times) then if it hasnt broken the big boys get a go at it. I think the kids loved it when my brother hit the pinata so hard it went flying 20 metres up in the sky! lol. I try to put wrapped candy that wont break easily (more soft things) from the repeated hitting.
Pinata
September 14, 2011
this is SUCH a cute idea!! I really love the pinata.
RebeccaPaull
September 14, 2011
I just finished your last Pinata! Can’t wait for an excuse to start making animals.
(see it here: http://rebeccapaull.com/blog/2011/09/14/pinata-pinata-pinata/)
It was a LONG project, but a total hit at the party.
Thanks!
angie
September 16, 2011
love this diy, jordan!
Sarah from WIDLoveSP
September 20, 2011
JUST ADORABLE!! I CAN’T WAIT TO HAVE KIDS!! hahaha
I wrote a post about this project on my blog 🙂
Just wanted to tell you, you’re an inspiration to me!
Love your work, EVERYTHING!!
WIDLove,
SP
Ridgely's Radar
September 20, 2011
Looks great! What a fun idea!