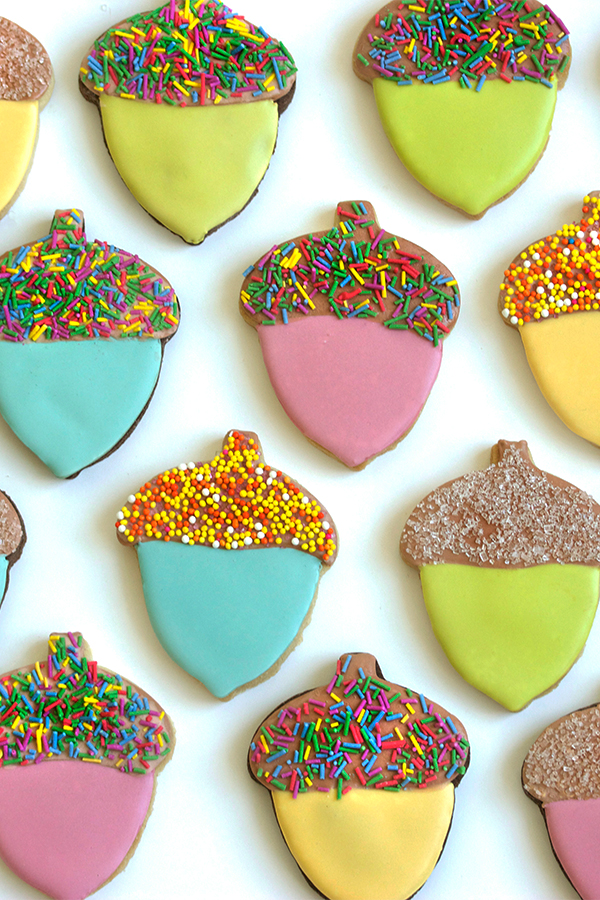
Thanksgiving dessert may be all about the pies, but cookies can add a festive colorful decorative element to the table. These sweet little acorns are quick and easy to make and don’t require a lot of fancy decorating. Use any assortment of sprinkles or sanding sugar you like to create a fun texture for the caps. You can even try making them into place cards for your guests!
And don’t forget that acorns are considered to be an emblem of luck, and prosperity!!
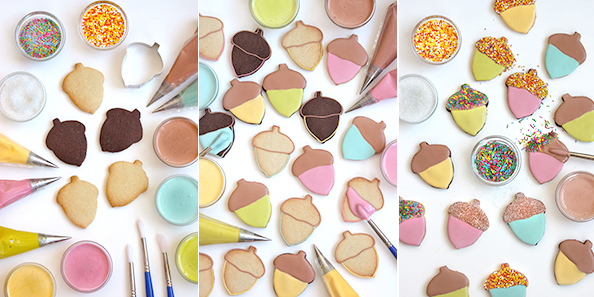
Materials needed: small acorn cookie cutter, sugar cookie dough (I use this recipe) or your favorite chocolate dough, prepared, chilled and rolled out, royal icing in various colors (see my favorites here), pasteurized egg whites, your choice of sprinkles or sanding sugar, disposable plastic piping bags , pastry tips #1.5, medium paintbrushes, several small bowls.
Use the acorn cookie cutter to cut out shapes from the rolled out dough. Place on a parchment lined cookie sheet and bake at 350°F until the edges are slightly brown about 8 -10 minutes. Let cool completely.
Step 2: Prepare the icing and pastry tubes
Prepare small bowls of icing in the colors you wish to use. I chose pretty but muted pastels for the nut of the acorn and a soft brown for the cap. Gradually add small amounts of egg whites to each bowl of colored icing, thinning out the icing to the approximate consistency of toothpaste. Fit several pastry tube bags with metal tips. Add several spoonfuls of the colored icing to prepared pastry bags. Add some of the soft brown to another bag. Then slowly add more egg whites to the bowls of colored icing making the icings the consistency of thick maple syrup. Cover bowls with plastic wrap until ready for use so that the icing does not form a crust.
Step 3: Decorate the cookies:
Using the piping bag with the brown icing, pipea line around the edge of the top of the acorns, including the line going across the surface of the cookie to create the shape of the acorn cap. With the other color or colors you have prepared, outline the lower part of the acorn. Let the lines set for about 3 – 5 minutes.
Using a paintbrush, spread the prepared brown icing within the brown piped lines, smoothing the icing out evenly. The icing should be thick enough to cover the cookie but not so thick as to mound above the piped lines.. Repeat this on all the cookies. You can immediately proceed to painting in the lower part of the acorn with whatever colors you have prepared. Use the brush to gently push the colored icing up against the brown line of the cap so the two colors meet but do not overlap. Let the cookies set for about one hour or until the icing is not tacky to the touch.
Step 4: Apply the sprinkles or sugar
In a small bowl, mix a tablespoon of the brown icing with some pasteurized egg whites or water until it is at least as thin as cream. Gently brush a very thin layer of this mixture onto the cap area. Be careful not to add too much. It should not pool around the edges. You just need enough to get the sprinkles to stick. Holding the cookie over a bowl, using your fingers, a spoon of a shaker, let the sprinkles fall lightly onto the cookie, covering the surface of the acorn cap. Turn the cookie upside down and let the excess sprinkles fall into the bowl. Set the cookie aside and continue until all the cookies are done. Allow cookies to dry several hours or until the icing is firm.
OPTIONAL: Make stand-up place cards
Using sugar cookie dough, cut out and appropriately sized rectangles for the base of the place cards or use store bought round or square sugar cookies. Position the acorn cooke at a slight angle on the base cookie and pipe enough medium stiff royal icing behind and slightly under it so that it supports the acorn cookie. Any icing that oozes out onto the base can be scraped away with a knife.Prop the cookie up against the edge of a baking pan or anything that will support it from behind for several hours or overnight until it can stand alone. Once set the royal icing creates a very solid hold. To keep the acorn from falling to the side as it dries I insert a little wedge of cookie or tin foil for support.
Happy Thanksgiving everyone!!!


Michelle
November 16, 2016
The cookies are sooo cute!
https://www.makeandmess.com/
Tori//Gringalicious.com
November 17, 2016
Eeeeeeeeeeeeeeek! These are so, so, so, SO cute!!!!!!
Alison Palmer
November 17, 2016
These are so cool! Perfect for all Fall events.
Anne
November 17, 2016
Wow! Such great photo’s! Love how tidy and colorful you decorate those cookies.
Cintia
November 17, 2016
They look great
http://soldenochedecocrochet.blogspot.com.ar/
Kari
November 17, 2016
These are too cute!
Kari
http://www.sweetteasweetie.com
Roshani
November 20, 2016
Mmmmmm…..yum. This looks totally amazing. I’m just starring at the screen looking at how delicious they look.