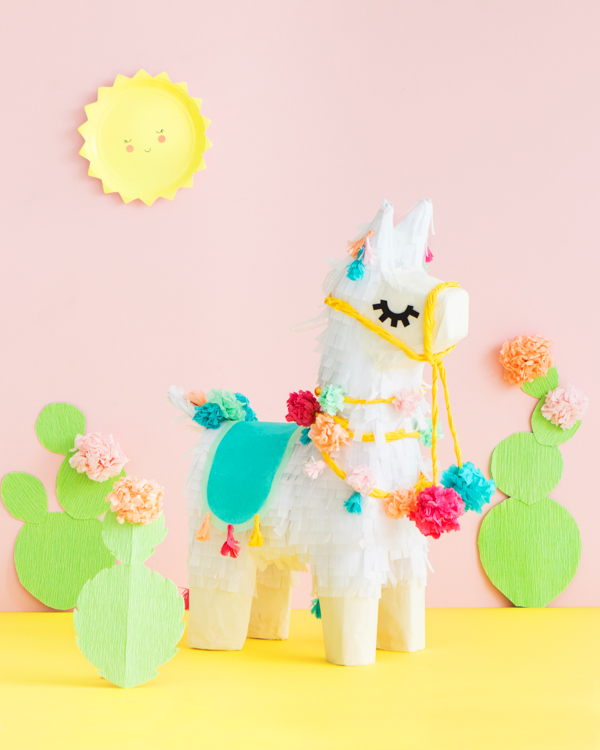
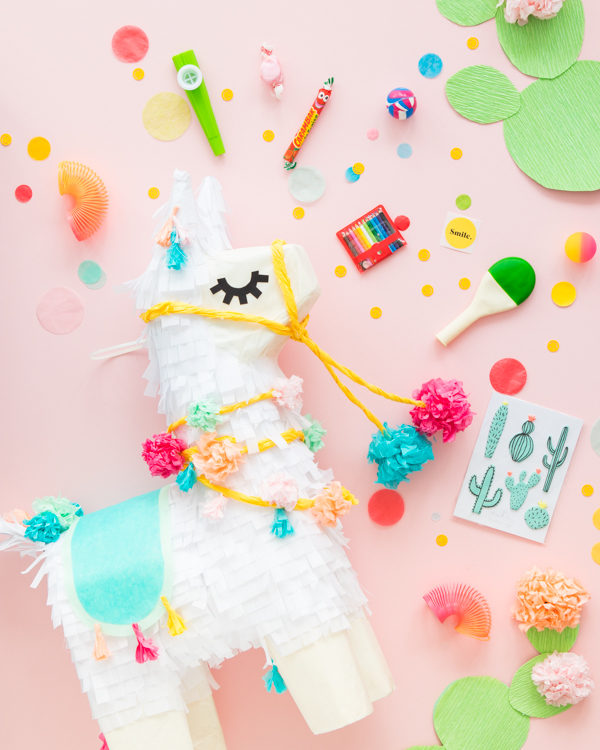
I think it can be said with little objection that llamas are adorable. For our latest piñata, we turned an everyday donkey piñata into a llama as a part of our piñata makeover series! This guy has been the cause of a lot of squealing in our studio. Keep reading to find out how we did it!
Inspired in part by this intensely kawaii Japanese card game my niece is obsessed with, we refringed the llama in all white, giving us full reign to adorn the little guy with gobs of colorful poms and tassels. Honestly, I’m a bit obsessed myself — it’s just so cute and fluffy!
Materials Needed: Donkey piñata, eyelash printable, cardboard, white spray paint, tissue paper (in cream, white, pink, honeysuckle, peach, yellow, mint, and turquoise), x-acto knife, ruler, hot glue gun, twine
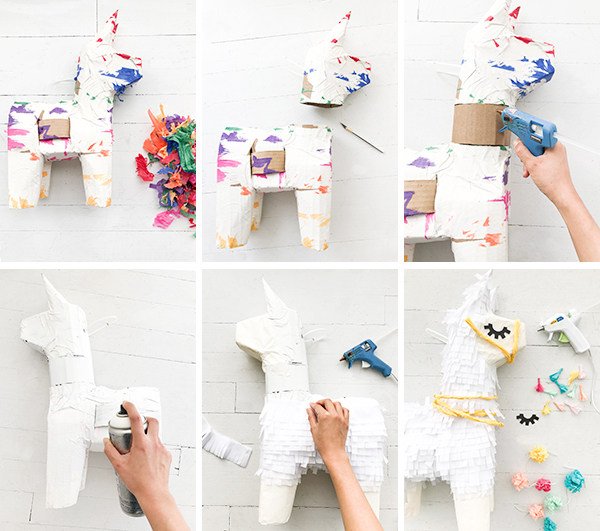
Step 1: De-fringe the piñata.
Step 2: Use an x-acto knife to separate the donkey’s head from its neck.
Step 3: To extend the llama’s neck, cut a rectangular piece of cardboard that is 4 inches tall with a width that is slightly smaller than the circumference of the original neck. Crease the cardboard so it bends easily to form a tube, then insert the tube into the opening about 1 cm down and glue to secure. Fit the head onto the elongated neck and glue to secure. Add another layer of cardboard around the neck to achieve an even surface.
Step 4: Trim off the points on the llama’s ears for rounded ears.
Step 5: For a tail, cut a 4” long rectangle and round off one edge. Fold back the straight edge to make a tab to glue onto the back of the llama.
Step 6: Spray paint the piñata base white and let dry completely.
Step 7: Cover the llama’s face, feet, and bottom half of its legs with a few layers of cream colored tissue paper and hot glue to secure.
Step 8: Use a ruler and x-acto knife to cut a bunch of fringe out of white tissue paper. Our fringe was roughly 2″ tall and 1 cm wide.
Step 9: Leaving the cream colored portions of the llama exposed, hot glue fringe to the llama, starting with the legs and working your way up. Don’t forget to fill the llama with treats!
Step 10: Print out the eyelashes printable and cut out with scissors, then hot glue to the llama.
Step 11: Time to add embellishments! Cut a long oval shape out of tissue paper, place it onto another color of tissue paper and cut out, leaving a ½” border on all sides. Hot glue the pieces together then drape over the llama’s body. Cut a long strip of tissue paper and twist together to form a rope. Wrap the tissue rope around the llama’s face and hot glue to secure to make a harness. Wrap tissue rope around the llama’s neck, layering the strands. Make tassels and pom flowers out of tissue paper and hot glue to the tissue rope and anywhere else you like.
- For tassels, cut fringe from a small stack of tissue. Roll the fringe into a paper tassel, then twist the top of the tassel to secure it.
- For pom flowers, cut a small stack of tissue and accordion fold. Tie and knot a piece of twine around the center of the folded paper. Cut two scallop shapes on both ends of the stack. Fan out the individual sheets and separate the layers until you achieve a fluffy flower.
Crafting by Justine Pon


hunnini
November 29, 2017
so beyond ridiculously cute! i am so doing this for my kids desert + llama themed nursery! you guys come up with the best ideas everrrr.
thrilled to hear you are making a llama themed nursery!
hunnini
November 29, 2017
so beyond ridiculously cute. you guys come up with the best ideas everrr. i am so making this for my baby’s desert/llama themed nursery!
Belle
November 30, 2017
I’d love a photo of him framed for the wall. He’s adorable!
http://www.thislifeisbelle.com