It’s amazing what you can create with something as simple as a brown paper bag! It’s an everyday object most people can find lying around the house on any given day. With a little creativity, we managed to transform them into 5 kids costumes that would be perfect for a budget-friendly yet cute and stylish Halloween costume this year.
Continue to see our first 3 ideas find out how to make them!
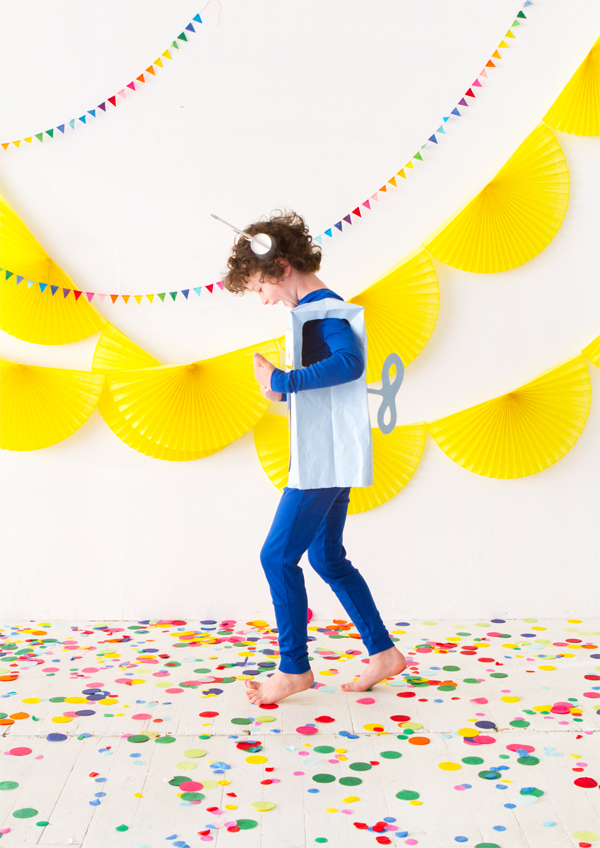
ROBOT COSTUME INSTRUCTIONS
Materials needed: Paper grocery bag, light blue spray paint, cardstock (in red, yellow, light blue, blue, dark blue, and silver), scissors, 1/2″ hole punch, 1-1/4″ hole punch, 2-1/2″ hole punch, markers, x-acto knife, Aleene’s Quick Dry Tacky Glue, hot glue gun, silver party cups, silver paper straws, plastic headband
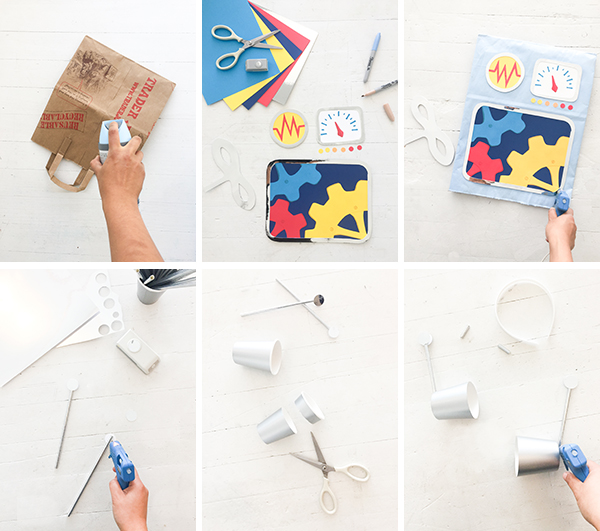
Step 1: Spray paint the paper bag blue.
Step 2: Cut out cardstock pieces for the various electrical panels, glue together, and let dry. We did a panel for an electric pulse, a gas gauge, and a window to the inner gears. Add silver cardstock framing on each panel. Then glue each panel to the face of the bag.
Step 3: Glue two pieces of silver cardstock back to back for one double-faceted piece. Let dry beneath a pile of heavy books to prevent curling. Then, cut out a winding key about 10” tall.
Step 4: Make a small incision on the back of the bag, and insert the winding key. Prop the key so it lays perpendicular to the back panel. Add a ring of hot glue to the tab in the interior and let cool completely before removing the support.
Step 5: Cut holes on the top and sides for the arms and head, using the wearer for reference.
Step 6: Now for the headpiece! Trim an inch off of two silver straws. Punch out four silver 1-1/4″ circles and glue to one end of the straws. Cut an inch off of the height of two silver cups. Glue the straws to the ends of the cups, then glue to either side of the headband.
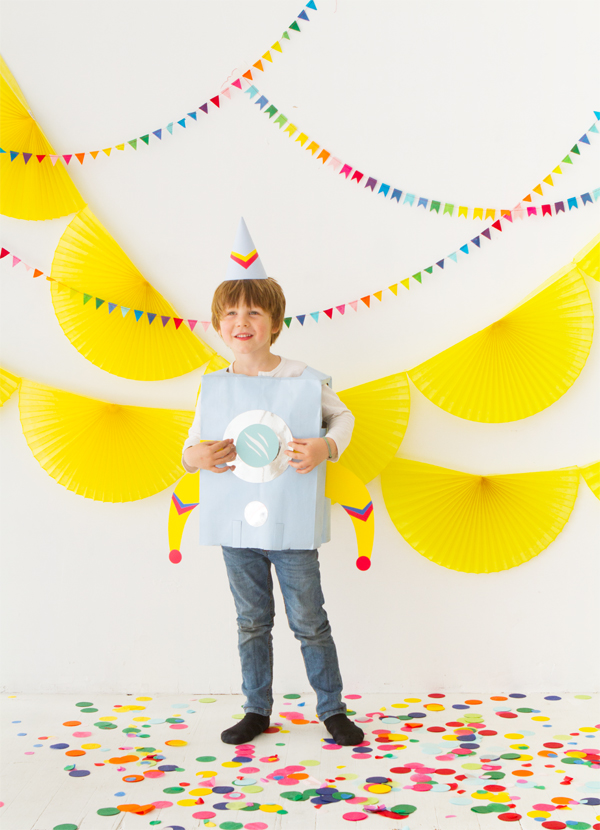
ROCKETSHIP COSTUME INSTRUCTIONS
Materials needed: Paper grocery bag, light blue spray paint, cardstock (in yellow, red, blue, light blue, white, and silver), scissors, 1-1/4″ hole punch, 2-1/2″ hole punch, Aleene’s Quick Dry Tacky Glue, x-acto knife, hot glue gun, party hat template, stapler, elastic cord
Step 1: Spray paint the paper bag blue.
Step 2: Cut out cardstock pieces for the wings and windows. Use the 2-1/2″ hole punch to cut out a set of silver circles. Glue the detailing to the larger pieces and let dry.
Step 3: Glue a line of 1” yellow cardstock through the center of the bag. Adhere the windows to face of the bag, then add the silver circles in line below it.
Step 4: Make two incisions to the sides of the bag, and insert wings. Leave a 1” tab from the wings on the interior. Prop the wings so they lay perpendicular to the side and add a ring of hot glue to the tab on the interior. Let the glue cool completely before removing the prop support.
Step 6: Cut holes on the top and sides for the arms and head, using the wearer for reference.
Step 7: Using the party hat template, make a light blue party hat. Cut out a single chevron from the yellow and red cardstock, and glue the design to the center of the hat. Attach an elastic band, and you’re all done!
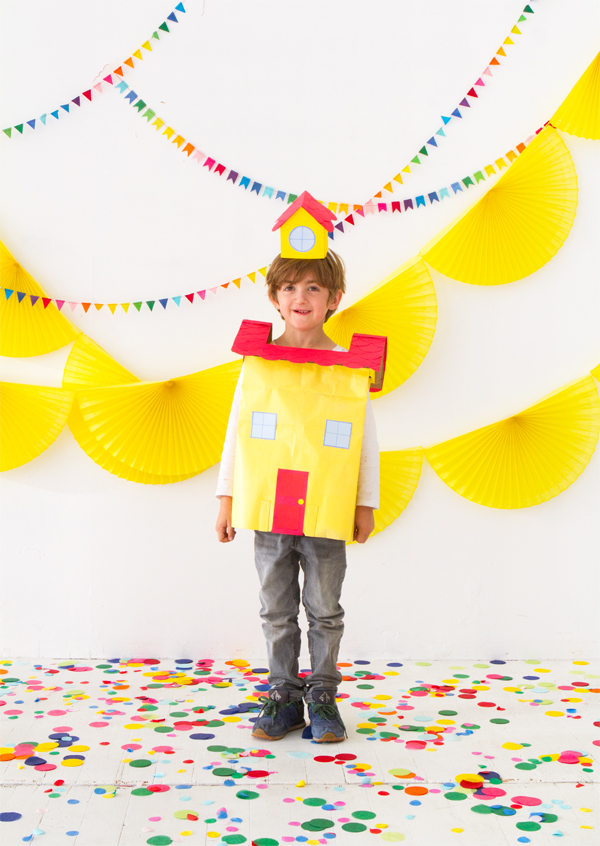
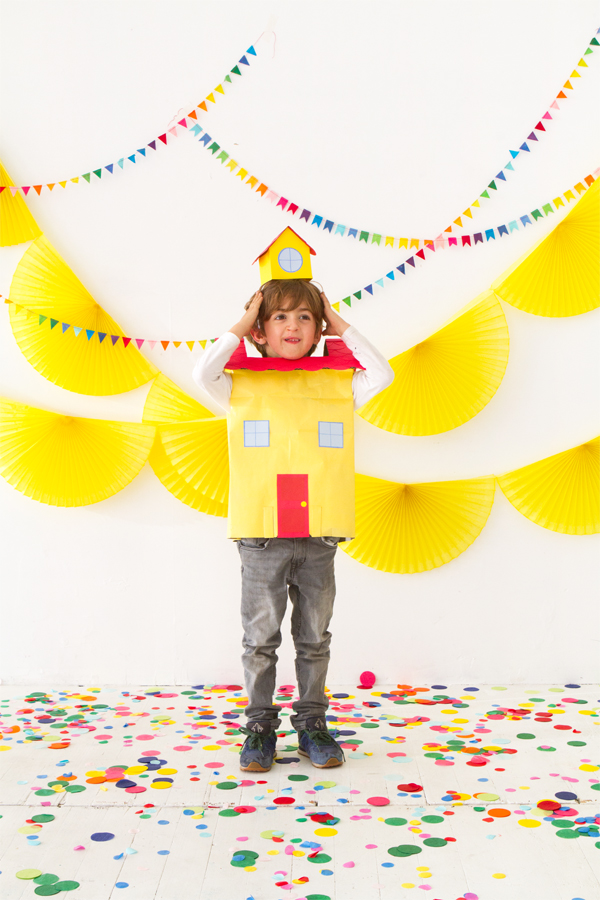
HOUSE COSTUME INSTRUCTIONS
Materials needed: Paper grocery bag, yellow spray paint, cardboard, x-acto knife, cardstock (in red, dark red, light blue, and yellow), scissors, 2-1/2″ hole punch, light blue marker, Aleene’s Quick Dry Tacky Glue, hot glue gun, pencil, ruler, plastic headband
Step 1: Spray paint the paper bag yellow.
Step 2: Cut out two cardboard rectangles 14” wide and 6” tall. Then cut out a 3” by 6” rectangle from the middle of one long edge. Hot glue the two pieces together at a right angle so that the two rectangular cut outs make one large opening in the center.
Step 3: Punch out a bunch of red circles. Glue the circles on top of one another to create a scalloped tile roof. Attach to the cardboard and trim excess.
Step 4: Cut two yellow triangle pieces the size of the angle on the roof. Glue in place, offset from the edge by about 1”.
Step 5: Cut cardstock pieces for four square windows and a red door. Glue the detailing together and let dry. Draw in window panes on the blue window squares using a light blue marker. Adhere the finished windows and door to the face of the yellow bag.
Step 6: Cut holes for the arms and head using the wearer for reference. The hole should align with the hole on the roof.
Step 7: Now for the attic hat! Measure out the walls of 4” by 4” house. Cut out the shape, fold, and glue the pieces together. Cut two round windows and draw in the window panes. Glue the window panes to the front and back of the attic.
Step 8: Cut out two 3″ by 3-1/2″ rectangles. Tile as you did with the larger rooftop, trim, and glue to the top of the attic frame. Hot glue the attic to the headband — and you’re all set!

Stay tuned for Part 2 later this week!
SHOP THIS POST: Fan Garland, Triangle Garland, Nautical Garland, Giant Confetti
Photography by Paul Ferney for Oh Happy Day
Styled by Amy Moss
Produced by Alison Piepmeyer
Crafting by Naomi Julia Satake
Thanks to little D, L and R for modeling!







Michelle
October 13, 2016
That is such a great idea, and it’s crafted so easily! I love the rocket costume!
https://www.makeandmess.com/
Lindsay
October 13, 2016
Great ideas and easy to do with things you might have around the house. Let the creativity begin! lol