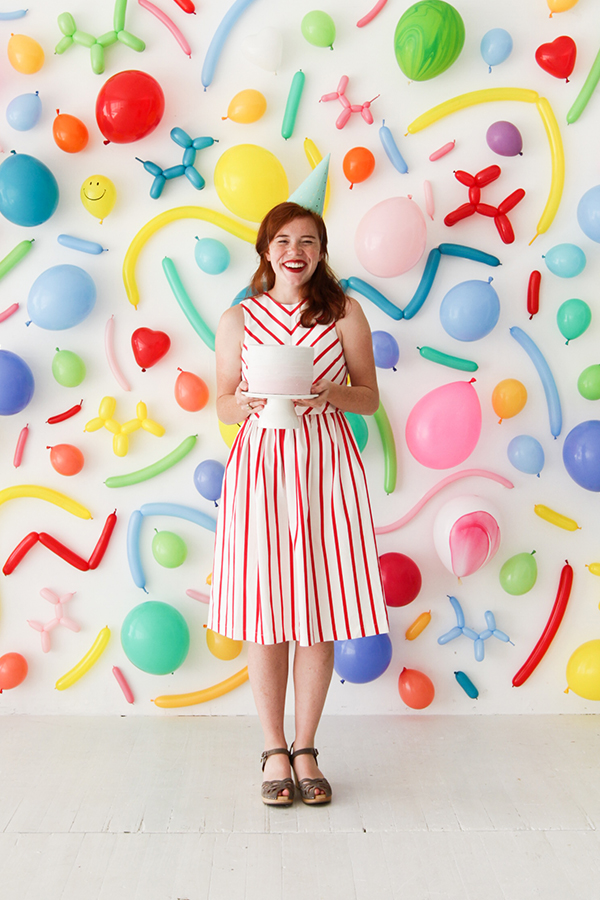
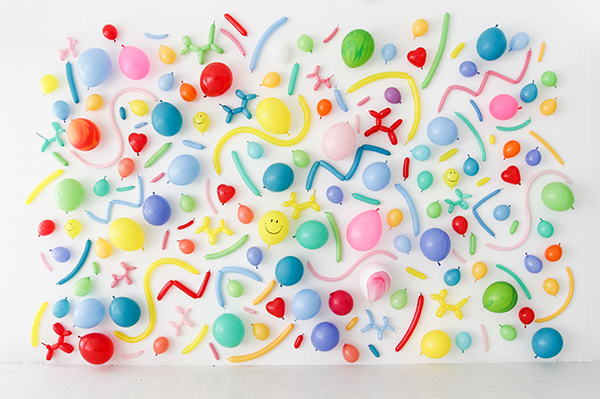
My favorite party ideas are the most simple and straightforward. This balloon wall fits that category. This would be awesome as party decor backdrop or as a photobooth! To emphasize the different shapes and sizes we blew up some balloons smaller to add variety. A few tips when you do it yourself: Make sure to use a very strong tape like Gaffers Tape (our favorite for holding strong and not ruining walls!) Balloons start to look old when exposed to light. So it’s best to install the same day as the party. If you want to get a head start blowing up balloons before your party then store them in garbage sacks in a dark closet a day in advance. Last but not least: don’t forget to buy yourself one of these to save your lungs.
I love this project because it’s affordable and simple to make! I really wanted to make this giant wall for full impact and it goes really quickly with a few people working on it. Start in the center and begin adding pieces to the wall like a puzzle. It’s great because you can do any color scheme you want, just switch up the colors.
Materials: 11” balloons (don’t forget the marble ones!), mini balloons (plus smiley faces and hearts), 260Q latex balloons, 160Q latex balloons, balloon hand pump, scissors, gaffer’s tape
Step 1: Blow up a bunch of standard balloons, mini balloons and skinny balloons in every color. Set these aside for later. You’ll want a bunch so you can grab them easily when you start taping the balloon shapes to the wall.
Step 2: Make shapes!
- For short line balloons, use 260Q or 160Q balloons and knot into varying sizes before inflating. Pump air into the first section and finish it with a knot. Then cut the inflated section off as close to the knot as possible, and repeat until you have multiple balloons.
- To create zig-zags, inflate the long balloons to almost full length. Twist the balloons into a three or four segments. (You will eventually tape the back of each segment to the wall.)
- Make some poodles (here’s a link to an easy DIY).
Step 3: Begin attaching the balloons to the wall with gaffer’s tape. We started with a “squiggle” by making three loops of gaffer’s tape and fixing the balloon to the wall in the beginning, middle, and end of an “S” shape. Start filling in balloons like a puzzle – mixing and matching until your wall is completely filled!
Photos by Alison Piepmeyer
Crafting by Naomi Julia Satake


Jessica
July 14, 2016
So colorful, I love this x
Jessica — WS Community
filicia
July 14, 2016
OHMYGOD! I LOVE LOVE LOVE THIS SO MUCH!
it must have taken some time to create this wall so well, but but omg, so so so wonderful. I wish I can make one like this someday too.
thanks for the inspiration. I still can’t get over it aaaaa~!
Julia
July 14, 2016
Wow this is such an adorable idea! It makes such a good impact for photos. Will have to keep this in mind for future parties. Thanks for sharing!
Julia – http://bunnybaubles.com/
Taylor
July 14, 2016
This is absolutely amazing!! I had a summer camp themed birthday party, and I only wish I’d seen this sooner!
Dana
July 15, 2016
I love this wall! 🙂 So colorful and full of joy 🙂
Michelle
July 15, 2016
This looks absolutely incredible, well done!
https://www.makeandmess.com/
melanie
July 15, 2016
This looks absolutely amazing, definitely thinking about doing this for my 18th birthday in September!
Kishy
July 15, 2016
OH MY GAAAHHDDD This is just soooooo cute! Would definitely try this! Wondering how it looks like when you use one color with different shades? hmm.
Harry Middleton
July 16, 2016
This is so beautiful. Smile and many striped colors 🙂 You fixed my bad day today. Thank you 🙂
upasna
July 18, 2016
OMG! Lovely, I will definitely use this photo-booth for my Kid’s birthday.
mellybrown
July 19, 2016
I LOVE the balloons…. but I also want to know where your cute model got her cute dress 🙂