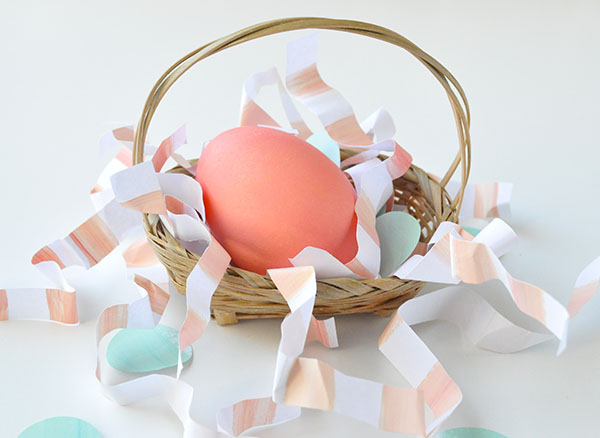
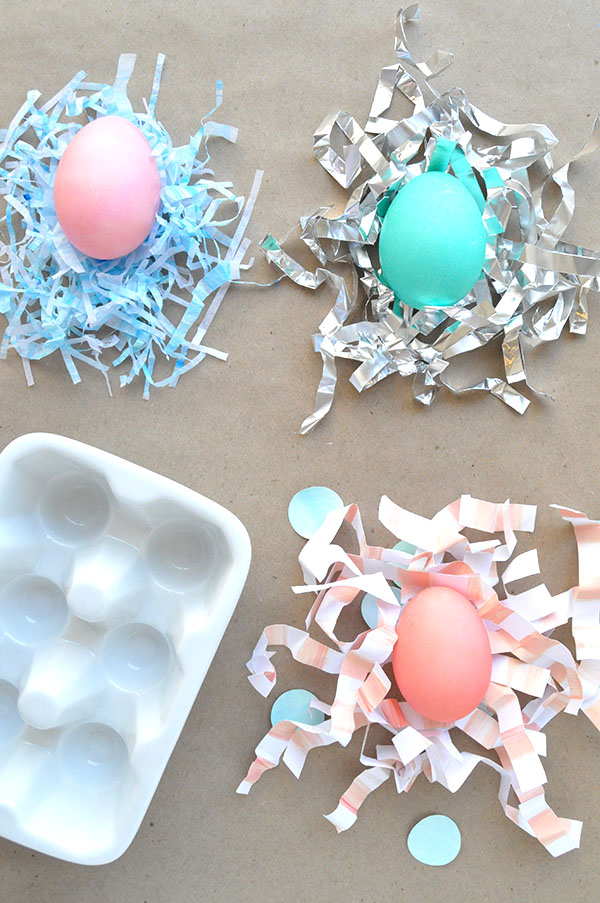
Have you dyed your Easter eggs yet? I usually dye mine on Good Friday and then set up my basket for the Easter bunny to find overnight. Plain paper nesting is available in stores of course, but why settle when you can customize your own to match your eggs and basket??
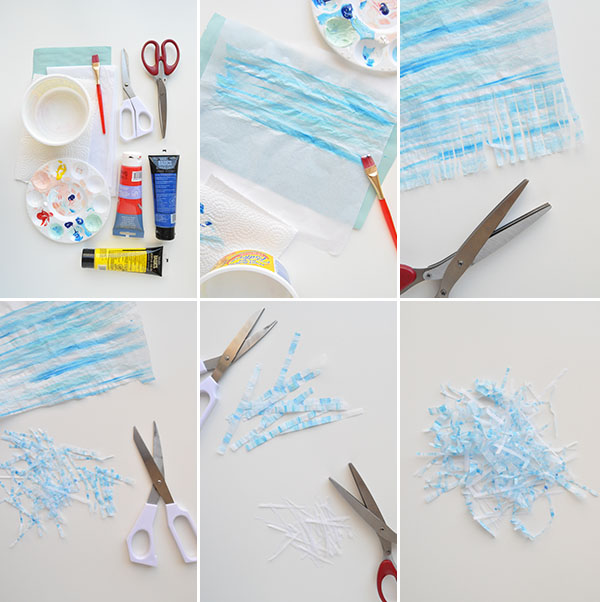
For blue water-color nesting:
Supplies: White tissue paper, scrap paper, paintbrush
, container of water, scissors
, fringing scissors
, palette, paint
, paper towel
Step 1: Cut a piece of tissue paper and place on top of the scrap paper to prevent your table from getting wet. Mix the desired paint colors on the palette. Dip your brush in the paint, and then into water, wiping some of the water off onto the paper towel. Paint long strokes on the tissue paper, alternating and blending the colors. You can blend them even more by brushing over the strokes with a wet brush.
Step 2: Let dry and cut perpendicular to the strokes with the fringing scissors.
Step 3: Use regular scissors to cut off the fringe you just made. Repeat.
Step 4: For a little more variety and contrast in the nesting, you can also cut wider strips of the watercolored tissue or use fringe scissors to cut plain white tissue.
Step 5: Gently crumple the nesting and fluff back up.
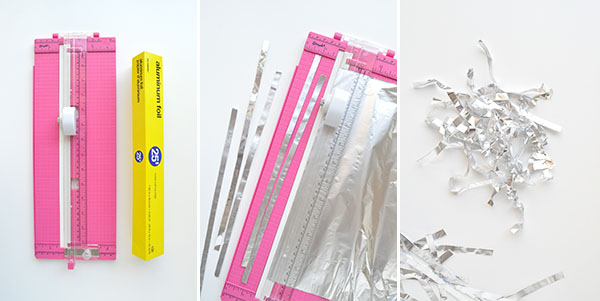
For silver nesting:
Supplies: Straight edge cutter, aluminum foil
Step 1: Cut a piece of foil that will fit into your straight edge cutter and then cut into thin strips, about 3/8″ wide. You can also cut these strips into different lengths for more variety.
Step 2: Very gently crumple the foil pieces – it doesn’t take much pressure at all.
For pastel nautical nesting:
Supplies: White paper, paint, palette, container of water, paintbrush, 1″ circle punch
, straight edge cutter
Step 1: Mix the desired color on the palette. Use the brush to apply in fairly even stripes on the paper. Use a little bit of water to do this smoothly. You can also paint subtle streaks of a slightly lighter/darker color on top of these stripes for a more painterly look.
Step 2: Mix another paint color and apply on another piece of paper. As before, you can add streaks on top for more interest.
Step 3: Once dry, use the straight edge cutter to cut the striped paper into 1/2″ strips, perpendicular to the stripes. Cut some of these strips into different lengths for more variety.
Step 4: Once dry, use the circle punch to cut 1″ circles out of the other paper.
Step 5: Crinkle the nesting and then distribute the polka dots.


Jordan at Wonder Thrills
April 14, 2014
Just darling! I love the colors!
Amanda {Planning It All}
April 14, 2014
Such a fun idea!
sara walk
April 15, 2014
this is awesome! I feel like I am so picky about my Easter nesting (ha ha Im being serious and its weird I know). So now I can make my own! love it thanks!
Ha! So glad we could help.