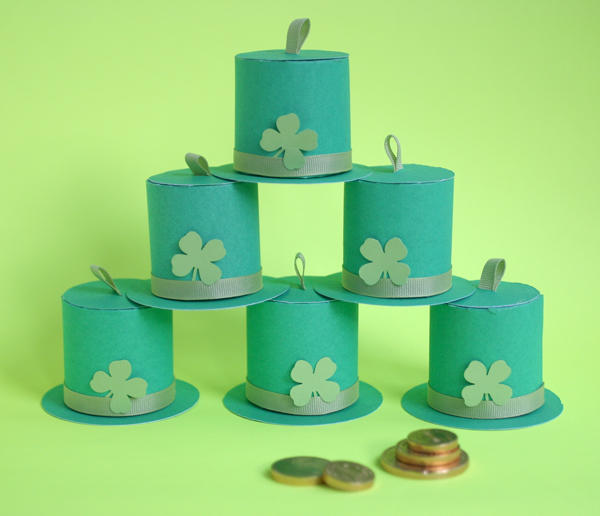
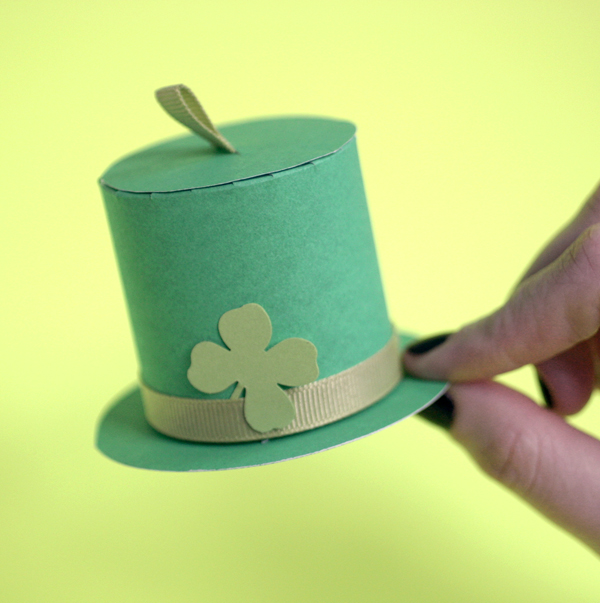
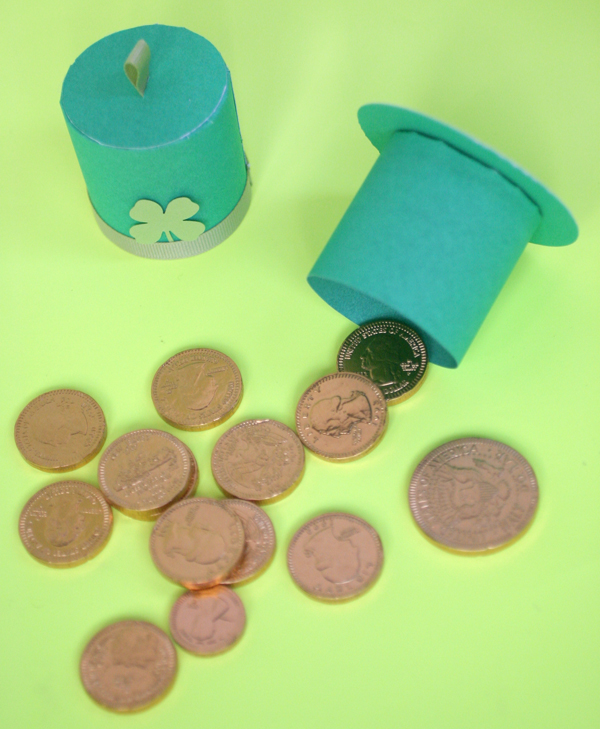
I love how you can bend paper into pretty much any shape you want. This cute leprechaun hat is just a couple of paper cylinders that fit together to make the perfect favor for St. Patrick’s day. Fill them with chocolate gold coins and pass them out on March 17th!
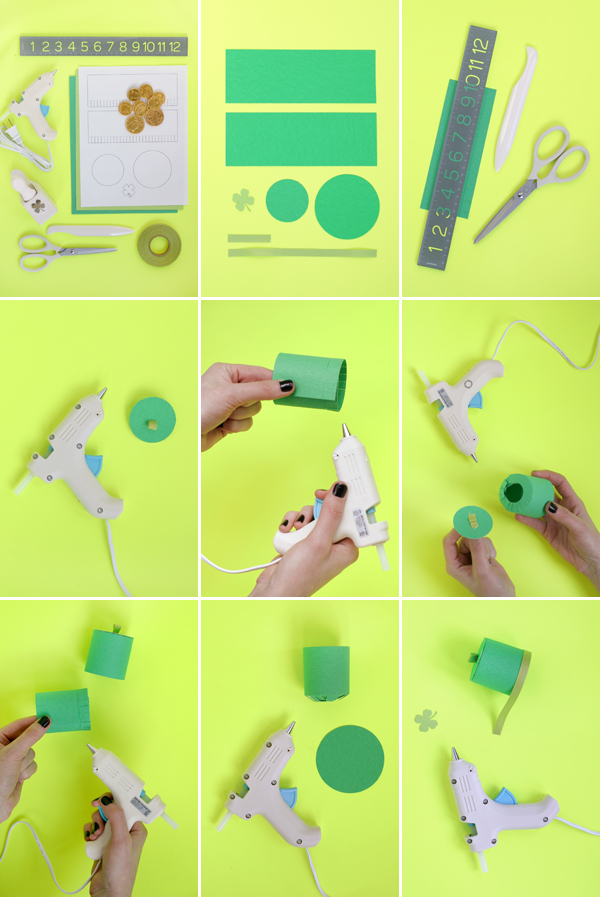
Materials needed: Leprechaun hat favor template, chocolate gold coins, green paper (a light and a dark shade), 3/8 inch green ribbon
, scissors
, bone folder
, four leaf clover punch (or you can cut out the four leaf clover on the template), glue gun
, and a ruler
Step 1: Prepare all the pieces of the hat: print out the template and cut out the rectangles and circles from the darker green paper. Cut a 7 inch and a 2 inch piece of ribbon. Punch or cut out the four leaf clover from the lighter green paper.
Step 2: Using the template as a guide, score a line 1/2 inch from the edge of one long side of each rectangle with the bone folder. Then cut slits from the edge to the scored line, spaced about 1/4 inch apart. Each rectangle should be scored and cut exactly the same.
Step 3: Cut a small slit in the middle of the smaller circle. Fold the 2 inch piece of ribbon in half and push it through the slit so that about a 1/2 inch loop pokes out. Glue down the ends of the ribbon that are sticking through to the other side of the circle.
Step 4: Curl one of the rectangles into a cylinder so that one side overlaps the other by 1/4 inch. You can use the sharp edge of a table to help curl the paper by holding the rectangle perpendicular to the edge of the table, one hand at either end, and gently pulling it across the sharp edge. Secure the cylinder with glue.
Step 5: Fold down the tabs of the cylinder, towards the inside, and lay a bead of glue around the top of the folded tabs. Glue the small circle down on top of the cylinder.
Step 6: Using the same method as in Step 4, curl the second rectangle into a cylinder so that it fits snugly inside of the one already glued. Glue it closed.
Step 7: Fold down the tabs of the second cylinder, towards the inside, and lay a bead of glue around the top of the folded tabs. Glue it to the center of the larger circle.
Step 8: Glue the longer piece of ribbon around the bottom of the outer cylinder. Tuck a four leaf clover in the ribbon band. Fill with chocolate gold coins and share on St. Patrick’s day!
Photography by Veronica Sharon






Birdy& Bambi
March 3, 2014
Those look so pretty! Awesome!
Greetings from Germany and thanks for sharing!
http://lasagnolove.blogspot.de/2014/03/bambi-meets-bambi.html
Birdy and Bambi
Rachel Follett
March 3, 2014
What a sweet and cleaver idea! Thank you for sharing! http://www.lovelyclustersblog.com
Kara
March 3, 2014
These are amazing!! I can’t wait to make these with my kids this weekend.
Jessica
March 3, 2014
OMG. Ashley, you are a genius!
Emily
March 3, 2014
Those are so crazy cute! I’ve been sitting here trying to figure out how I can incorporate them in to every holiday…
Busymaker
March 3, 2014
I don’t wanna do them, I wanna received them !! Haha =))
chloe
March 3, 2014
what a fun idea!
xox
chloe
http://popcosmo.com
Beth
March 4, 2014
What a great idea. As Emily said, I bet there’s a way to use this idea for other holidays. An elf’s hat with candy canes inside for Christmas? Love this–definitely bookmarking for future use.
Such great ideas! These would be perfect for Christmas too. 🙂
Jen
March 4, 2014
I printed the template and cut all my pieces. When I went to assemble them the smaller circle that would make the top of the hat was much bigger than the cylinder. Even with no overlapping of the cylinders edges the rectangle wasn’t big enough to fit all the way around. Any suggestions?
KATH
March 13, 2014
I’ve done this type of paper hat in black with a gold buckle for a pilgrim’s hat Thanksgiving placecard/favor and filled them with candy corn. I can’t believe I never thought of leprechauns!! These are so cute we jumped right on it, as we now have a St. Patrick’s Day birthday girl in the clan. This measurement for the circles was off, but easily tweaked. The bigger problem we ran into, then as well as now, was the weight of the candy. When you grab the hat by the little ribbon, or even with thumb and fingers on the sides, the cylinder lifts right off. This usually resulted in spilling the candy, so the solution I came up with was to thread a long piece of 1/4″ ribbon thru 2 slits in the bottom circle, fill the bottom cylinder with candy then run both ends out thru the hole in the top of the hat. Slide that cylinder down over the bottom, tug the ribbons up as far as they’ll go, then slip a pony bead down over the ribbon tails to the top of the hat. No glue, no bows or knots are required- there’s enough tension created by the bead to keep the hat together, & it slides off easily enough that littles can do it. Fun,fun,fun!