This post is sponsored by Dreyer’s/Edy’s® Slow Churned Light Ice Cream: all the taste of regular ice cream, but with half the fat and 1/3 fewer calories. Now that’s a reason to smile. Give a smile here: http://on.fb.me/L3wSQf
Today Alexis Birkmeyer made these wonderful acrylic mini ice cream stands. This project is so so simple. Sometimes power tools or unfamiliar materials can intimidate people to not try a project but this one is so easy! The acrylic stands can be used over and over. They are great not just for ice cream cones but any sort of food served in a cone. If you have a creme brulee torch at home the only things you would need to pick up are the pieces of acrylic and the special drill bit. The heat gun is preferable but if you only have a kitchen torch it will work just fine. I would love these for a kids party or even a bridal or baby shower. The mini ice cream cones can be prepped in advance and you can put the stand and prepped cones in the freezer right before the party starts. When it is time to eat you just pull them out and serve. Find all the directions and more photos below!
Continue reading after the jump.
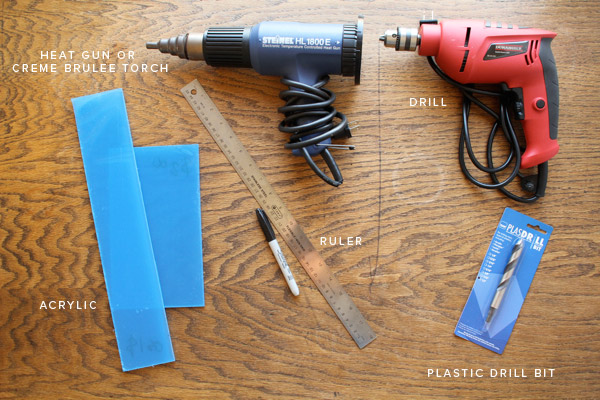
Materials Needed: Acrylic (you can purchase at Ace Hardware or a Plastic store like TAP plastic for about $5.) Heat gun or Creme Brulee torch, Drill, 1/2″ Plastic drill bit (about $15), Ruler, and Marker.
Step 1: Cut acrylic to desired size if necessary. Our two pieces were 16″ x 3″ and 9.25″ x 5.25″. It’s easiest to have this done when you buy it, but if you score the plastic 15-20 times with a utility knife and ruler, you should be able to snap it cleanly.
Step 2: Mark the location for the holes. We spaced ours at about 2″ apart, either in a line or grid. Mark the spots where you’ll bend the legs down. We made our legs 2″ tall.
Step 3: Using a 1/2″ plastic drill bit, drill the premarked spots. Leave the plastic protector on for this step so you don’t scratch the plastic.
Step 4: Peel off the protector once all your holes have been drilled. Carefully line the plastic up so the spot you intend to bend is lined up with the edge of a table or counter top. (Note: We did this on a wood table and didn’t have any problems with the table scorching, but be careful. And if you aren’t sure, try using a metal cake pan rather than a table edge.)
Step 5: With a heat gun on a medium high setting, pass back and forth over the spot you’re trying to bend. Keep the heat gun moving to avoid creating little air bubbles in the plastic. After about 30 or 45 seconds, the plastic will start to sag. Keep going til it’s very pliable and sagging to about 45°.
Step 6: Being careful not to burn yourself, bend the plastic over the edge of the table or cake pan, making sure to keep the bottom edge and the bend parallel. Hold it in place til the plastic cools. We found you’ll have about 10 seconds of working time til the plastic gets too stiff to work. If necessary, reheat it.
Step 7: Repeat the heating process for the other side. When you bend the second leg, have the stand on a flat surface to make sure both legs end up flush and the stand sits nicely.
Note: Make sure to do this in a well ventilated area. With lots of windows open, we didn’t notice any fumes from the plastic, but make sure to take proper precautions.
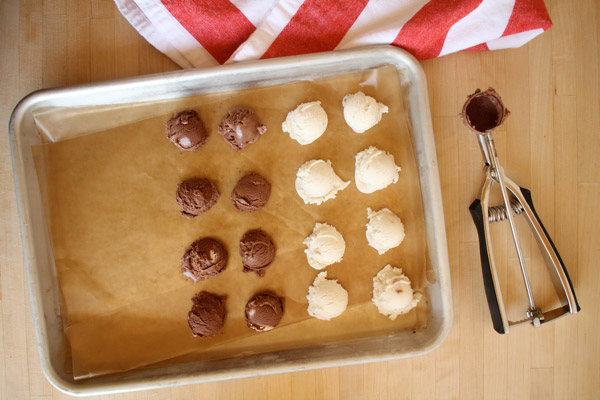
Serving is easy. For the cones we got regular sugar cones and cut off the tops so that they are little and petit. We added the ice cream scoops and then placed the whole thing back in the freezer until it was time to serve.
Photos and Concept by Alexis Birkmeyer for Oh Happy Day


Evani G
July 12, 2012
I need to get tool-savvy so I can join in on this acrylic party! I just don’t know how to work a power tool for the life of me…
Great idea though, fantastic really!
Evani
http://www.simp[yevani.com
how2home
July 12, 2012
I’ve never worked with acrylics before…can i find this type of material at Michaels or arts craft store/home depot? Is it easy to manage?
Elaine - Visual Meringue
July 12, 2012
I love this! And I had to laugh as I literally just posted about an ice cream cone clown that I made with my three year old last night. If I had this holder we could have made a whole circus! Thanks for the great idea 🙂
http://visualmeringue.blogspot.ca/2012/07/clowning-around.html
Gina
July 12, 2012
this is all too perfect. Love it!
http://www.eatblogpray.blogspot.com
xo
Erica { EricaDHouse.com }
July 12, 2012
I’m also a little to inept to use power tools successively but this does look scrumptious!
Julia [Chris Loves Julia]
July 12, 2012
So sweet. In all ways. 🙂
Samira
July 12, 2012
nice!! love this!!
Amber
July 12, 2012
I just can’t believe the DIYs you tackle! I would’ve never looked at those acrylic trays in Martha Stewart Living and thought I could do that!
Stefania @ Revitalize with Stefania
July 12, 2012
wow, that impresses and intimidates me all at once.
Lindsay - ShopEllaLou
July 12, 2012
Wow – I want to host a party and use all of your recent acrylic tray tutorials. Ice cream cones, cotton candy… they all look to festive to pass up!
liondragoncustom
July 12, 2012
This summer,I want to have an ice cream store,so thanks for your ideas.
thecircleofit
July 13, 2012
i love love ice cream and this to me is heaven!!!!! love it!!!!!!!!
Mrs Average Bride
July 13, 2012
This is really cute, but what do you do with the rest of the cones??
cat
July 16, 2012
This is SO adorable! By the way, I love the font you use on your pictures. Do you mind sharing what kind of font that is?
Cat
Sophia
July 18, 2012
I just bought a friend acrylic push pops and have been looking for a stand to go with them! GREAT idea!
Tara @Creative Hobbies
July 20, 2012
Wow, thanks so much! This just opened up a whole new door for me. The ones out there cost mucho dinero.