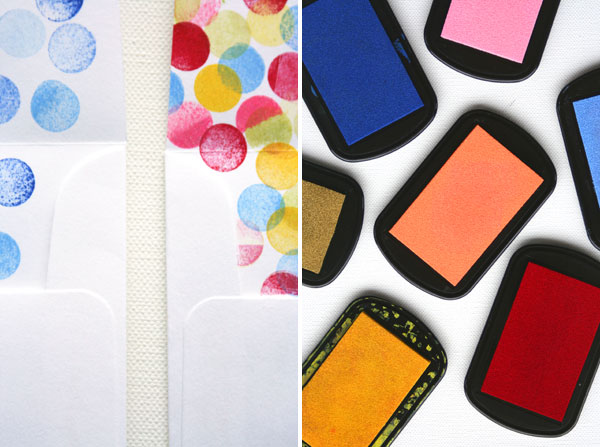
If you have ever lined 200 envelopes, you know it’s a tough and boring job. But, an envelope that looks pretty inside and outside makes everything more fun. Stamping the insides of your envelopes is super quick and you can make them all look a little different.
And, if you are not sending it through the mail, you should stamp up the outside too!
Materials needed: stamp pads, envelopes, tape and a stamp.
Step 1: tape off the area of the envelope you don’t want to stamp (leave the glue line stamp free)
Step 2: start stamping the first color – don’t think too much of where you place it, the more color you add, the more it will come together.
Step 3: add more and more color
If you happen to have a white stamp pad, I’m sure a black envelope with white dots will look stunning!


Morgan Smith
March 15, 2012
Such a cute idea. I love liner – I DIY-ed for me wedding invites – made the invite, in my opinion! I will need to try this out!
PINK SPARKLE FUN
March 15, 2012
I am TOTALLY going to do this and write some spring happy letters to people! Happy Happy Happy!
Caitlin
March 15, 2012
This is a really cute idea, and it seems so simple but with a really nice effect. One quick question – what kind of tape did you use to tape off the un-stamped areas? I just worry about ripping the envelope when pulling the tape off.
Jack
March 15, 2012
Wouldn’t it be easier/quicker to cut out a cardboard template with a “stamp here” window—then you could just pop it on top of each envelope, stamp away, and then lift it up with no taping or un-taping? The tape things would be fine for a few envelopes, but ‘d imagine it’d get old after 200 envelopes.
Tan
March 15, 2012
Cute! May just have to do this for our wedding invites. Thanks for the DIY!
Sarah @http://agirlintransit.blogspot.com/
March 15, 2012
You are so good! I was seriously trying to think of something new and different to dot stamp and couldn’t figure it out. This is awesome!
– Sarah
http://agirlintransit.blogspot.com
joke
March 15, 2012
@CAITLIN: I used masking tape
@JACK: great idea!
LucyExpress
March 15, 2012
Great idea! Will be buying some stamps now! ^^
Lenya
March 15, 2012
Love these! Another great DIY idea.
denise
March 15, 2012
omg, you’re a genius! this is soooo cute!
my little boy will turn one in May and I’ll surely do this for his invitations’ envelopes!
thanks for the great idea. keep ’em coming 😀
http://doudouandheels.blogspot.com/
FestivePartyGirl
March 15, 2012
I love this idea. I am a sucker for printed envelopes and even pick my stamps based on the letters I am sending so these are so up my alley. Thanks for sharing.
Lot
March 15, 2012
Wow, what a great idea. I would never have thought of doing this. A great one top remember for a traint day with the kids.
Seriously Sassy Mama
March 15, 2012
I love polka dots!
Bekah at Laurel & Fife
March 15, 2012
I read this in my Google reader and thought “Wouldn’t it be easier to use a cardboard template?” and then came over here and Jack had already thought of it! I’ve used cardboard templates for stamping a single big square full of dots on invitations before – it worked well.
Rebecca - A Daily Something
March 16, 2012
This is fantastic, Joke!! Great job 🙂
eat my shorts
March 16, 2012
I love this idea to bits! 🙂
Liana
March 17, 2012
Such a fun idea!!
Huong Giang
March 18, 2012
Interesting idea and easy to do. I am going to try with my little daughter.
Jeanee
March 23, 2012
So easy and fun! I featured your DIY on my polka dot DIY trend blog post today.
http://blog.shopdirtylaundry.com/posts/2012/3/23/50-the-dirty.html
ENJOY!