


In all our years of designing fun Halloween Costumes, we’ve never made mermaid costume. So today we’re working with SpikedSeltzer to bring you fresh take on a mermaid costume. It’s really easy to make (almost zero sewing needed!) so anyone can whip it up last minute. Stylist and crafter, Julia, helped us come up with the concept (which has a Seapunk feel). Click through below for more details and step by step instructions!

SpikedSeltzer‘s mascot (a mermaid!) and colorful packaging was the original inspiration for this costume. From there, we tried to keep a few things in mind: we wanted it to be comfortable and warm (hello, t-shirt!) and we wanted it to be easy to walk in. We made it extra sparkly, but adding mini disco balls and holographic and metallic foil as scales. The fins are made up of pretty blue/green tulle.

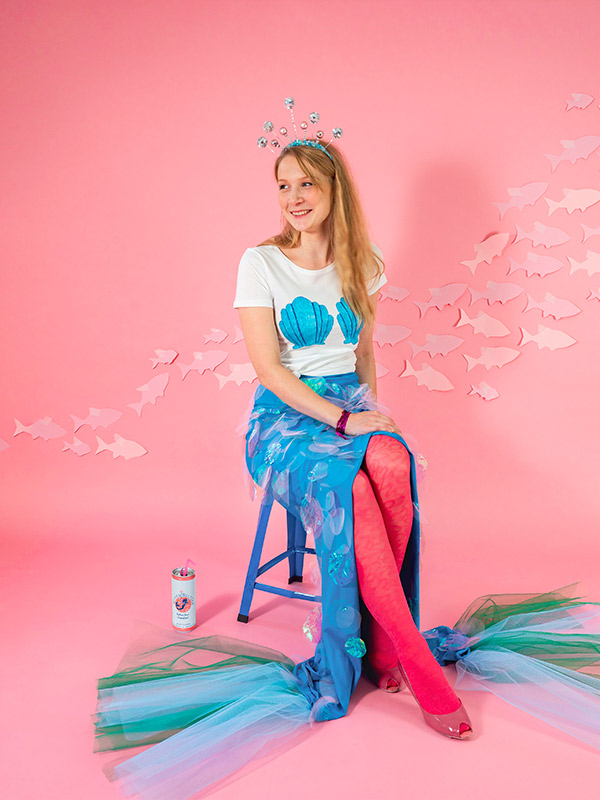

Obviously, the costume goes great with a can of SpikedSeltzer. Our team just discovered this, and now we’re all obsessed. It’s light and bubbly, so you won’t feel bloated while drinking it. It’s less sweet than wine, lighter than beer, all natural, low carb, AND gluten free. It’s a great option for Halloween this year (especially since Halloween is on a weeknight!)

Materials Needed:
- jersey fabric, approx. 48×60 inch (120cm x 150cm)
- tulle in multiple colors, 40 inch each (100cm)
- holographic (or metallic) foil
- plain white t-shirt
- textile marker
- headband
- crafting wire
- tiny disco balls and other small balls (check out the Christmas decoration area!)
- hot glue
- glitter, pearls and paillettes
- safety pins
- needle and yarn

Step 1: Prepare two seashell templates out of paper, each as big as a hand. Align them on the front of the t-shirt and transfer them with a textile marker. Color the seashells in your favourite colors.
Step 2: Wrap the jersey fabric with the longer site tight around the waste, just like a wrap shirt. Fix the ends with some safety pins. Take the lower corners of the fabric and hit them back so that the skirt falls apart nicely in front. Fix the corners with a drop of hot glue. Take the tulle and the foil and cut out lots of circles in different sizes. Put the cloth on the floor again, spread out the circles as fish scales and fix them again with small drops of hot glue. To cover the glue that pushes through, put some paillettes on it as long as it’s warm.
Step 3: For the fins, you need four pieces of tulle for each site. Each piece should be approx. 28×20 inch (70x50cm). Crimp the long side with some large needle stitches and fix them with a knot.
Step 4: Cover this end of the tulle with some hot glue and press it down at the front fringe of the skirt.
Step 5: Wrap some crafting wire tightly around the headband and let the ends protrude like spikes in different lengths. Thread some pearls on the wire and put a ball on the end of each spike. When you’re finished, cover the wrapped part of the headband with hot glue and put lots of glitter and paillettes on it.

This post is SpikedSeltzer: make this Halloween the Year of the Mermaid!
Crafting, photography & styling by Julia Tramm for Oh Happy Day
Photo processing by Paul Ferney


Alex
October 15, 2018
Very nice )))
Jackie
October 16, 2018
This is so great! I’d love to try this, looks just easy enough for me 🙂
-Jackie | Jackieomy.com
Michelle & Watson
October 17, 2018
What a beautiful, tasteful twist on a mermaid costume!! I’ve always wanted to be a mermaid but so many options seem too risqué. Really into this DIY!
Woof Xo,
Michelle & Watson
https://www.watsonandwalls.com/
Tiffany
October 18, 2018
This is INCREDIBLE!! So fun and adorable 🙂 🙂
Roma
October 23, 2018
Very pretty 🙂
zoziano
October 25, 2018
thanks