


I’m in love with Polish Chandeliers. I love when you can use decor for a party and then keep it later on for home decor. We wanted to do a series of these using different techniques. Today we made a pompom version. We used pompom trimming from a fabric store and then made our own pompoms out of yarn to add to the chandelier. I especially love these over a crib or kids bed. It is great because you can do any color for your party or home.
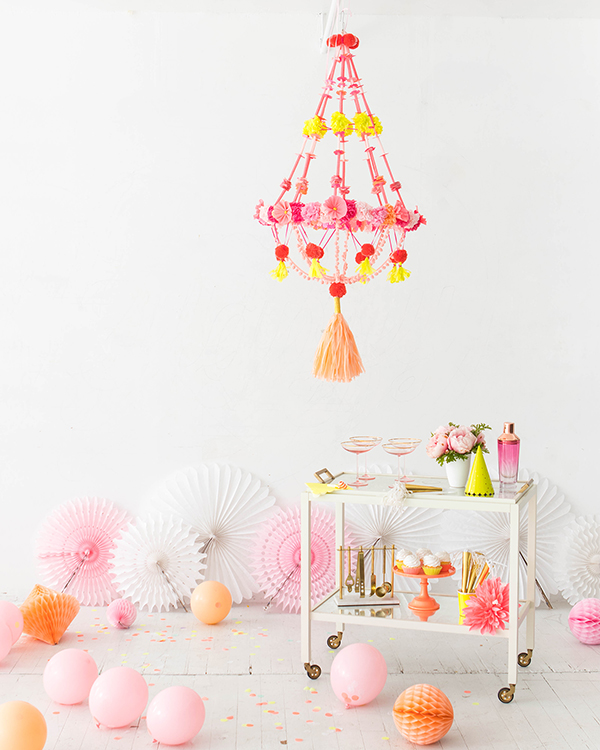
Traditionally these are made of straw and paper and have eight strings. For ours we used paper and yarn. See all the DIY instructions below. And see our other Polish chandeliers right here.


Materials needed: Wire, wire cutters, gaffers tape, crepe paper (in pinks and gold), scissors, hot glue, twine, cardstock, ⅛” hole punch, pom pom trim, tissue paper, floral paddle wire, long needle, yarn,
Step 1: Create a 20” diameter hoop out of wire. Overlap the beginning and end of the wire and secure with gaffers tape. Cut long strips of pink crepe paper and wrap until the entire hoop is covered. Hot glue to secure.
Step 2: Suspend the hoop, by attaching eight long strands evenly around the hoop, bringing them together at the top in a knot. Hang the chandelier from a doorway while you finish the assembly.
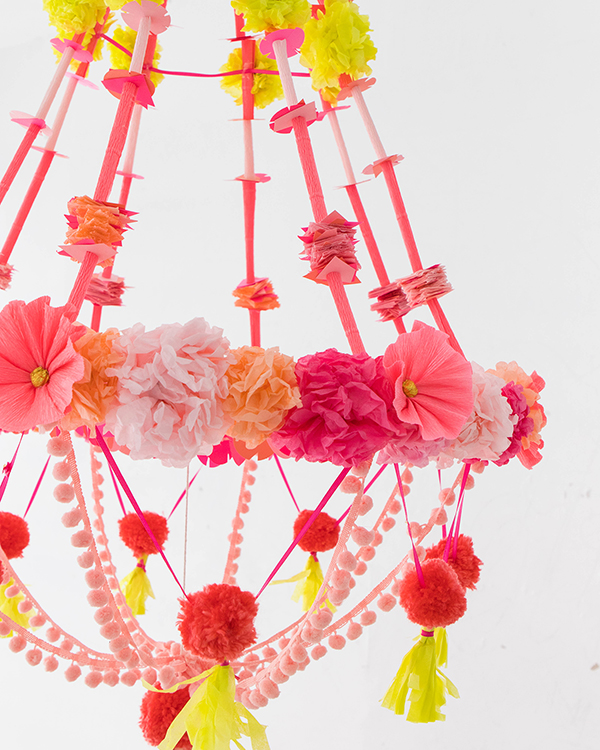
Step 3: Decorate your strands with the straws, disk flowers, and geometric shapes until the string is nearly filled. To make straws, roll crepe paper around a dowel or pencil, and apply a thin line of hot glue to maintain the straw shape. Trim to various lengths. To make the disk flowers, cut slivers from 1-½” circles of cardstock. Punch a hole at the center of the flowers and geometric shapes with a ⅛” hole punch. String the elements with a needle and twine, and repeat with remaining strands.
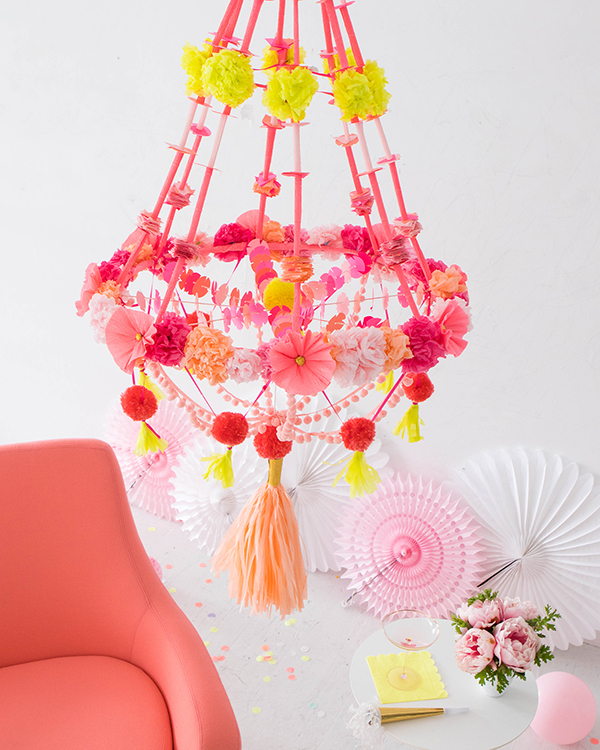
Step 4: Hot glue the pom flowers around the outside of the hoop so it is fully covered. To make pom flowers, cut a small stack of tissue, and accordion fold. Tie and knot a piece of ribbon around the middle of the folded paper. Then, cut two scallop shapes on both ends of the stack. Fan out the individual sheets and separate the fringe until you achieve a fluffy flower.
Step 5: Tie four strands of twine across the diameter of the hoop, using the same points where the supporting strands are attached. Tie a string at the center of the overlapping points, leaving approximately 10” hanging. String each strand with disk flowers and re-tie to the hoop.
Step 6: Cut eight 15” strands of pom pom trim. Hot glue the beginning of each piece to a different point on the hoop. Hot glue the end of the trim to the piece of twine hanging at the center of the hoop. You’re nearly done!
Step 7: Attach a big poppy flower to each point on the hoop. To make poppy flowers, accordion fold a rectangular piece of crepe paper, and wrap floral wire around one end of the folded crepe paper. Spread open the crepe paper to create a flower shape. Then, add a ball of gold crepe paper to the center of the flower.
Step 8: Make 5-6 yarn pom-poms. You can use our tutorial from a previous post here. Thread the string used in Step 6, through the center of the pom. Then, trim the twine so there’s about an inch left.
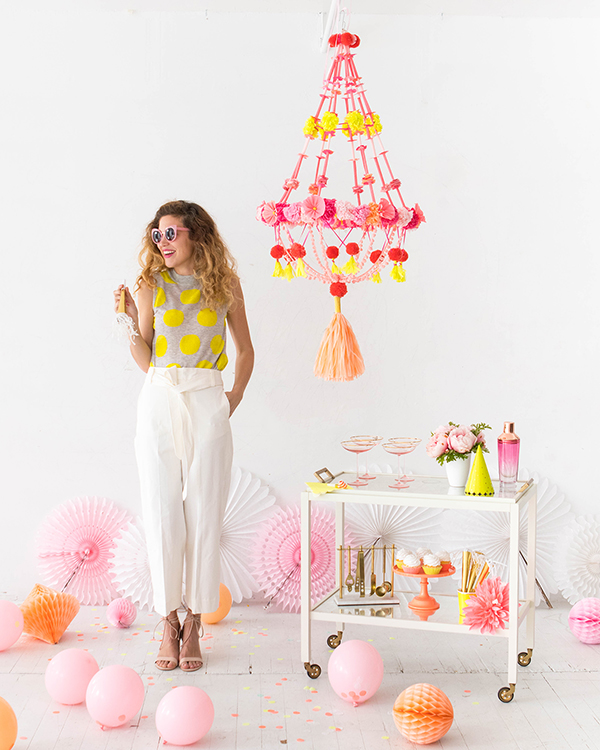
Step 9: Make one long paper tassel by cutting fringe from a stack of tissue paper 12” tall and 1 cm wide. Roll the cut fringe into a paper tassel. Twist the top of the tassel and knot a piece of ribbon around the top to keep it together. Hot glue a strip of gold crepe paper around the top. Then, hot glue the tassel to the twine remaining in Step 8.
Step 10: Create a small crown of yarn pom-poms and disc flowers and set it on the top of your chandelier. You can decorate your chandelier with additional pompoms and tassels, using a needle and ribbon to hang the pompoms and hot glue to secure the tassels. You’re all set!

Photos and styling by Sarah Price Olsen and Amy Moss
Crafting by Justine Pon and Erica Kjos
SHOP THIS POST: Trousers, Cake Stand, Party Horn, Round Honeycomb, Diamond Honeycomb, Paper Fan


What Mum Loves
May 5, 2017
Beautifully done! And I love the photos, too! x
Kate
May 6, 2017
So cute! I wish I had a place to hang one!
…maybe an idea for a nursery!
K A T E L A T E L Y || Fashion & Lifestyle Blog
http://www.katelately.co/2017/05/06/baby-name-collab/
Michelle
May 6, 2017
This is so beautiful!
https://www.makeandmess.com/
Sophie
May 6, 2017
This is amazing. I’d love to make this for a dinner party.
http://goldclutter.com
food recipes
May 6, 2017
Really creative, this is a very beautiful art, worth to be praised .. !!
The pink pineapple
May 6, 2017
So cute chandelier <3
xx
The Pink Pineapple
I wait for you
new post:http://thepinkpineappleblog.blogspot.com
Nikki Fujimoto
May 7, 2017
I always love the styling in your posts! I was wondering if you could tell me where the polka dot top that the model is wearing is from?
Chelc
May 7, 2017
Your blog is so lovely!