


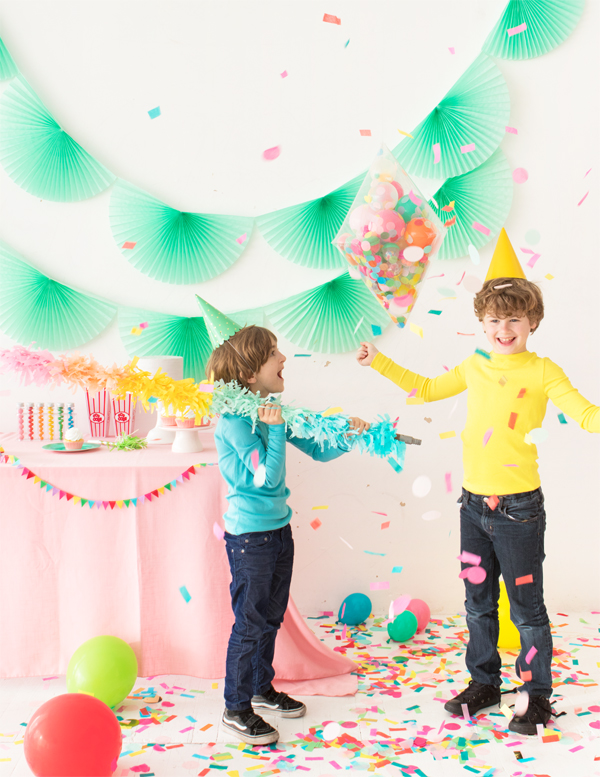
During one of our brainstorming sessions, the Oh Happy Day team came up with the CRAZY idea of a transparent piñata. We figured- wouldn’t it be super fun to see all the colorful prizes and confetti inside!? After several attempts at trying to create it, our head crafter Naomi cleverly figured it out!! Read on to find out how to make one yourself…
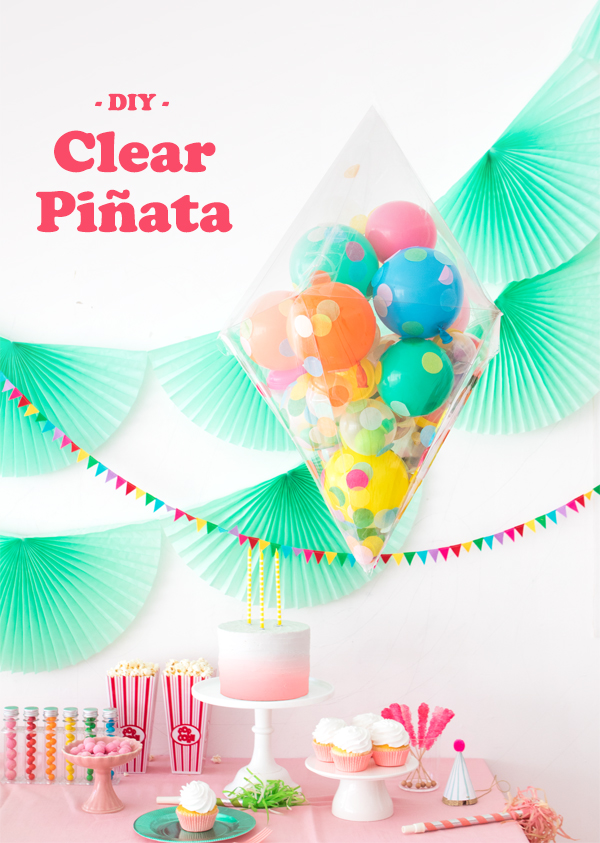
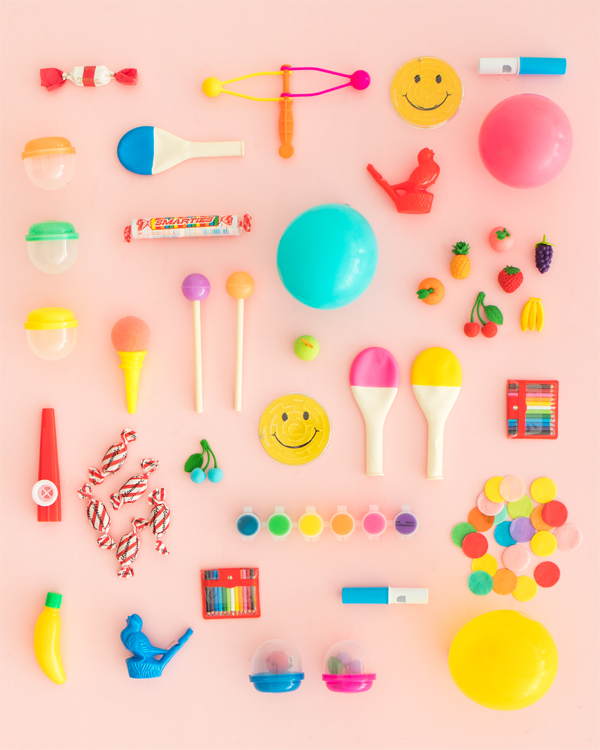
The key is to fill it to the brim with color! We’ve filled clear and colorful mini balloons with small prizes and also packed in a ton of confetti. In addition, we found these super cute vending machine capsules on Amazon which are also great for holding prizes!

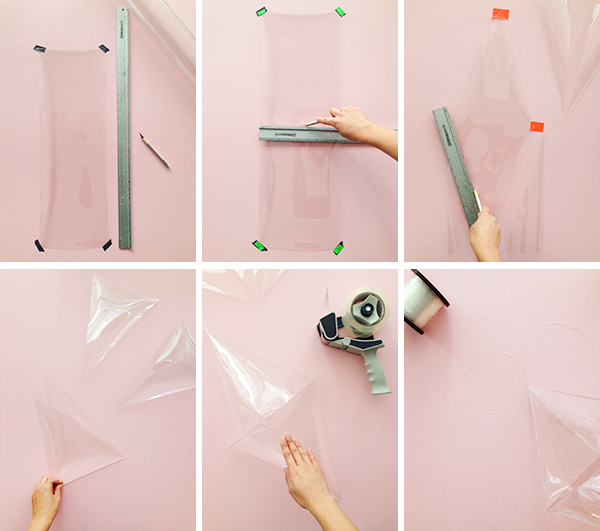
Materials needed: Banister plastic roll, gaffer’s tape, ruler, x-acto knife, packing tape, fishing line
Step 1: Tape the beginning of the roll of plastic to your work surface. This will help the plastic lie flat and prevent it from rolling up.
Step 2: Use an x-acto to cut out five rectangles 25” long and 8.5” wide. Find the midpoint of the length of the rectangle. Use a ruler and x-acto to lightly score the width of the plastic all the way across.
Step 3: Find the midpoint of the width of the rectangle. Then, use a ruler to cut the rectangle into an equilateral diamond. Repeat this step with the remaining rectangles. Bend the plastic along the scored line.
Step 4: Line up the sides of two diamond pieces and tape them together with packing tape. Attach the rest of the pieces. Leave one side untaped so you can fill your piñata.
Step 5: Cut three strands of fishing line double the length of your piñata. Tie a knot at one end of each line. Leaving the knot exposed, tape the line along an inside fold of the pinata, ending at the point. Repeat with the two other strands along other sides.
Step 6: Knot the three lines together at the top of the pinata. Then, tie another knot a few inches above the first knot to form a loop for hanging.
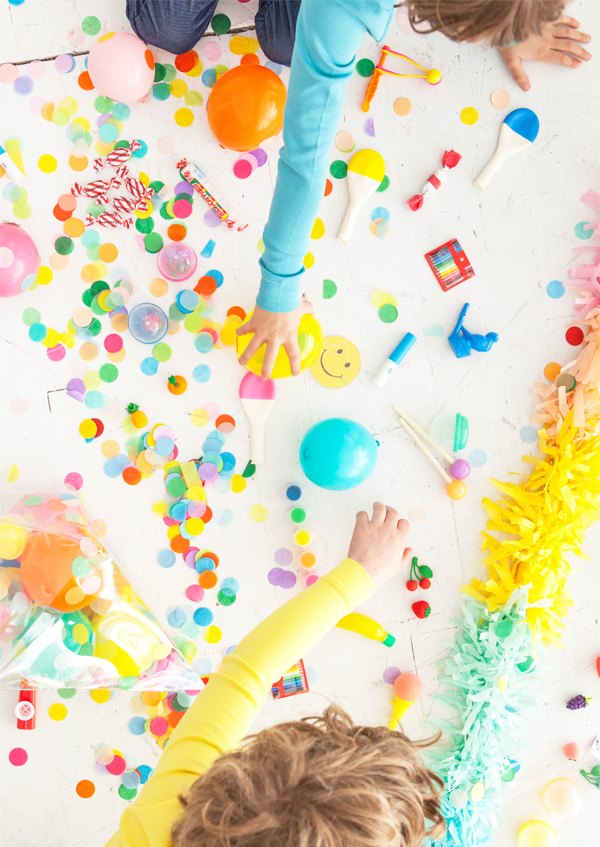
Step 7: Fill your piñata with fun surprises. We filled ours with mini balloons filled with confetti, small toys, and candy.
Step 8: Close the last side of the piñata with packing tape and hang for all to see!
Crafting by Naomi Julia Satake, Justine Pon & Mercy Favrow


Michelle
March 3, 2017
Such a cool idea, I love it!
https://www.makeandmess.com/
Maritza | Maritza Lisa
March 3, 2017
Such an awesome idea. Having the kids see what’s inside will only make it more exciting for them!
Sophie
March 3, 2017
This is amazing. I need to make this.
http://goldclutter.blogspot.com
Tabi Bee
March 3, 2017
Your blog is always so happy! I love it! This is such a clever DIY aswell! <3 😉
https://busybeeblogweb.wordpress.com
Sofia
March 3, 2017
I love the idea of a clear pinata! It makes everything much more fun!!
xo, Sofia
http://www.thecozie.co
Nina
March 3, 2017
WHAT?! A clear pinata! I can do it myself!! LOVE LOVE LOVE. That’s all I can say. You’re the best!
Charise Chavez
March 3, 2017
Always blown away by Oh Happy Day!!!! Keep it up!
XO
Indya | TheSmallAdventurer
March 3, 2017
This is such a unique idea! I love it just as a decoration – I might even make one just to fill with small balloons as a way to add a little colour to my house!
http://www.thesmalladventurer.blogspot.com.au
Tina
March 4, 2017
I love this. Is it hard to break? My niece is only two years old, but this would be the best possible birthday gift for her.
It’s actually quite easy to break – so it’s probably perfect for your niece!
Lori Edmonds
March 4, 2017
And you whack it just like a regular piñata? Do they pop the mini balloons after they retrieve them?
Yes and yes! You can whack it like a regular pinata. The mini balloons need to be popped when they fall out.
Antonella | White House Crafts
March 5, 2017
This is a really cool idea. I love it (and all the colours you used)!
Hena Tayeb
March 5, 2017
that is so cute.. and I love all the non candy options in it.
GabiDoll
March 6, 2017
Love the concept 🙂
Paige Flamm
March 6, 2017
This is an awesome party idea!
Paige
http://thehappyflammily.com
Belle
March 6, 2017
Kids will love being able to see what’s inside!! You could even gift wrap some items… So pretty too!
http://www.thislifeisbelle.com
Patti
March 14, 2017
This is truly an amazing idea. I can see it being used for a baby or bridal shower, filled with gifts for the mom to be or the future bride and the guests help get the gifts out. Thanks for sharing the tutorial.
Ashley@Ashley Uhl Interiors
March 16, 2017
This awesome!! I just might have to do this for my son’s first birthday party. How long should it take to make the piñata?
It would probably take you about 2 hours. The plastic can curl up (which is frustrating as you’re folding!) so we definitely recommend taping the sides down so it’s easier to work with.