


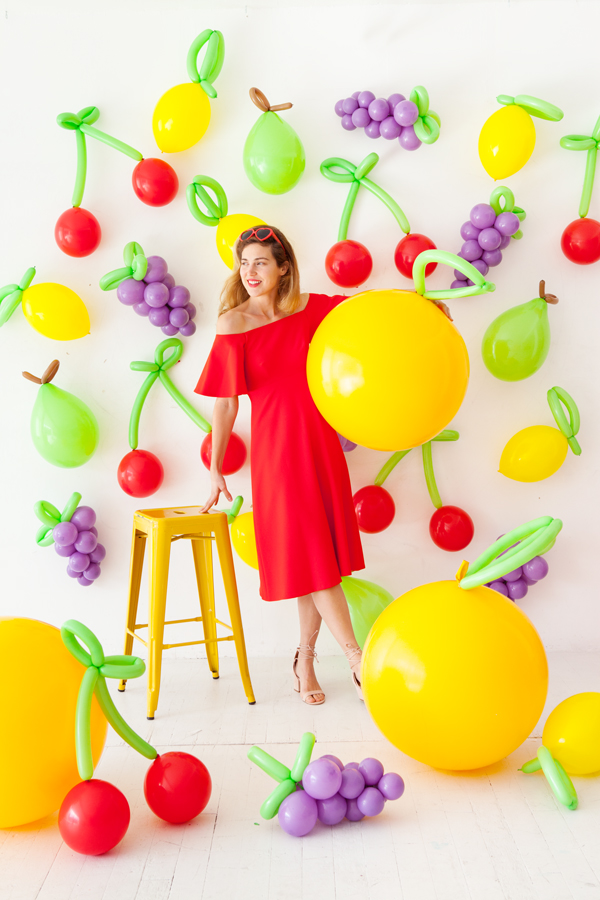
If you remain unconvinced of the supreme awesomeness that is balloons, perhaps this will change your mind. These giant fruit props are made entirely out of balloons and are so easy to create! They make super fun and kinda crazy party decorations. Read on to find out how to make them!
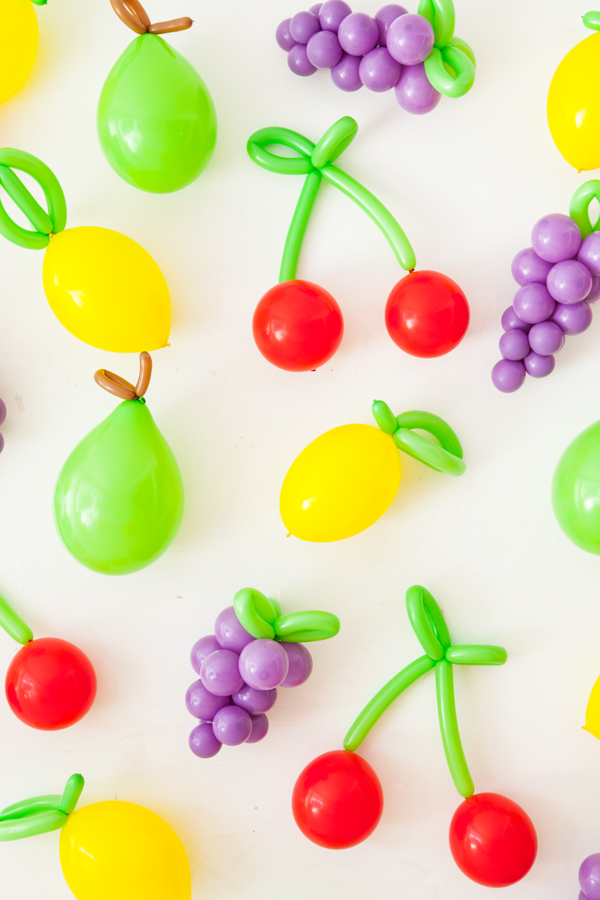


Cherry
Materials needed: Red 11″ balloon, lime green 260Q long balloons, balloon pump, scissors
Step 1: Partially inflate two red balloons, making sure to keep the round shape.
Step 2: Inflate a lime green 260Q balloon and attach it to the knot of one red balloon. With the end that isn’t attached to the red balloon, create two loops and twist. These will be the leaves on the stem.
Step 3: Inflate another lime green 260Q balloon. It should match the length of the one that is already attached to the red balloon. Secure one side to the green balloons that are acting as the leaves. Secure the other side to the other red balloon. All done!

Pear
Materials needed: Lime green 11″ balloon, brown 160Q long balloons, balloon pump, scissors
Step 1: Inflate the 11” lime green balloon until it starts to narrow toward the opening giving it a pear shape. Tie at the end.
Step 2: Inflate one brown 160Q enough to make a small loop at the top of the balloon (where the balloon is tied).
Step 3: Inflate another brown 160Q balloon to make a small stem. Attach to top of the balloon.

Orange
Materials needed: 3’ Goldenrod balloon, lime green 260Q long balloons, balloon pump, scissors
Step 1: Blow up the 3’ balloon to full size.
Step 2: Inflate a green long balloon, leaving a nub of uninflated balloon at the end. Twist the balloon at the halfway point and tie the two ends together. This will be your leaf!
Step 3: Inflate a second long balloon to add a spine to the leaf. Trim off the excess.
Step 4: Tie the leaf to the 3’ balloon to finish.

Lemon
Materials needed: 12” Yellow Quicklink balloon, lime green 260Q long balloons, balloon pump, scissors
Step 1: Blow up the yellow quicklink to full size. Tie a knot on the end of the nub, leaving a little bit deflated. Trim the excess.
Step 2: Hold both ends of the balloon and stretch them in opposing directions. Squish the center of the balloon. Repeat until the balloon resembles a lemon in shape.
Step 3: Inflate a long balloon to nearly full length, leaving a nub of uninflated balloon at the end. Starting at the knotted end, measure 10”, then twist the balloon. Measure another 10”, twist, then tie to the end. This should begin resembling a leaf.
Step 4: Add a spine to the leaf with the excess, and leave 3” of balloon for a stem. Trim the excess. Then, tie the leaf and stem to the lemon.

Grapes
Materials needed: Spring lilac 5” mini balloons, lime green 260Q long balloons, balloon pump, scissors
Step 1: Partially inflate a lilac mini balloon, making sure to maintain the round shape. Tie to a deflated long balloon.
Step 2: Inflate three lilac balloons. Tie together into a bunch. Wrap the center of the bunch into the delated lnog balloon. Repeat with four more bunches, each a little larger than the one before.
Step 3: Inflate another long balloon. Fold the balloon into a small loop and twist. Repeat two more times until you have a three leaf clover. Tie to secure, then attach to the top of the lilac bunches. Trim off the excess.

SHOP THIS POST: Red dress, Striped dress, Gingham Top, Yellow Dress
Photography Naomi Julia Satake
Assisted by Sarah Kate Price
Crafting by Mercy Favrow, Justine Pon, and Naomi Julia Satake


Karen
March 7, 2017
Omg this is the cutest thing I’ve ever seen!
Michelle
March 7, 2017
I’m in love with the cherries and grapes, they look so cool!
https://www.makeandmess.com/
Sophie
March 7, 2017
I love the grapes.
http://goldclutter.com
anna
March 7, 2017
The cherries are so fantastic! One of my best friend loves cherries and I will definitely be making this backdrop for her.
clara
March 7, 2017
Love this idea!! so colorful and creative!
Love the red dress in the first picture. Could you please share who it is by? Thanks!!
It’s from Zara!
prabha
March 7, 2017
These would be perfect for a summer party and they’re not as complicated as they look! xx
Kari
March 8, 2017
What a fun summer idea!
Kari
http://sweetteasweetie.com/