


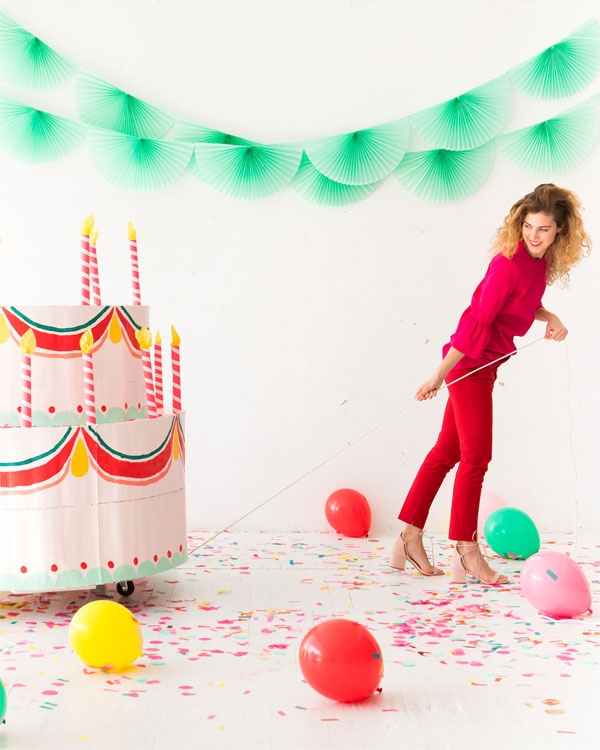
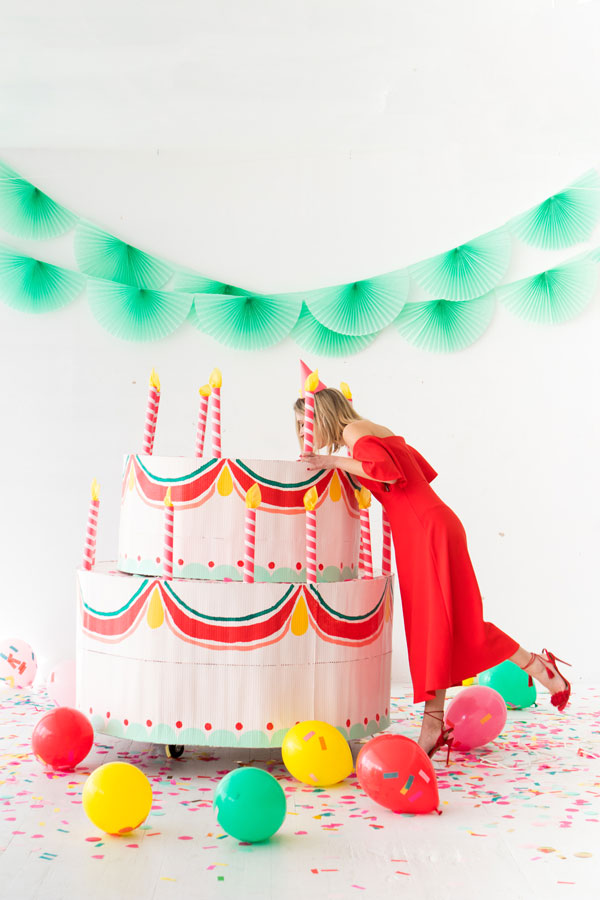
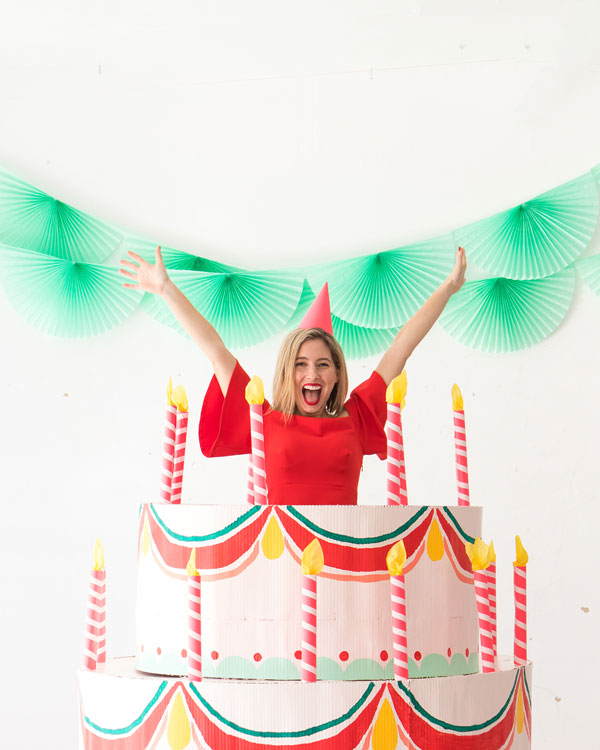
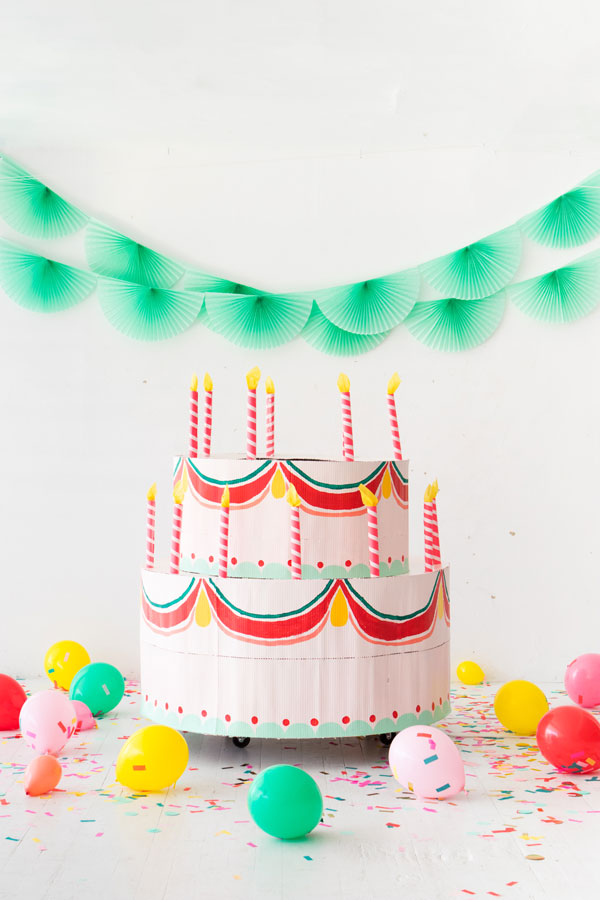
Today we’re going to show how to make a giant cake you can pop out of! I’m so excited. I’ve been wanting to make one of these for forrrrrrrever. I had a few requirements when I envisioned this in my head. I knew it had to have wheels and I wanted the top covered with tissue so you could break through it. We ended up using a furniture dolly and creating a platform that could be wheeled around. (They’re about $15 from the hardware store.) This would be perfect for a big party, or hiding a surprise guest you flew in from a few states away. I even love the idea of wheeling it into someone’s work for their birthday. Today we’ve got all the tips and tricks for making your very own giant cake.
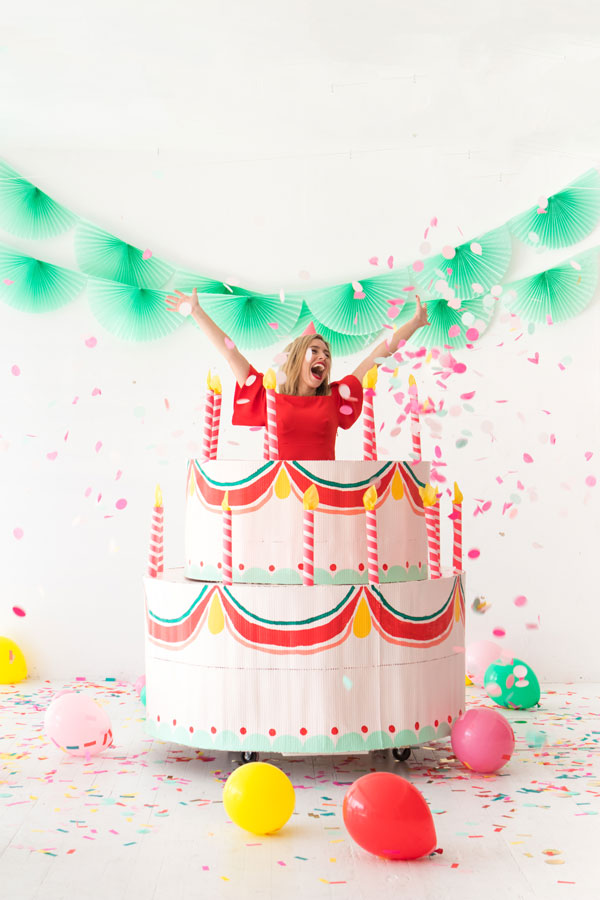
This is a big project! It took us about 8 hours to make. If you work on it for a few hours every day, its totally doable. The key to this project is getting the roll of corrugated paper, it is like cardboard that bends! Now that we made it I’m in love with it and never want to let it go. We would love to hear if you attempt one. Tag us on social media so we can see!

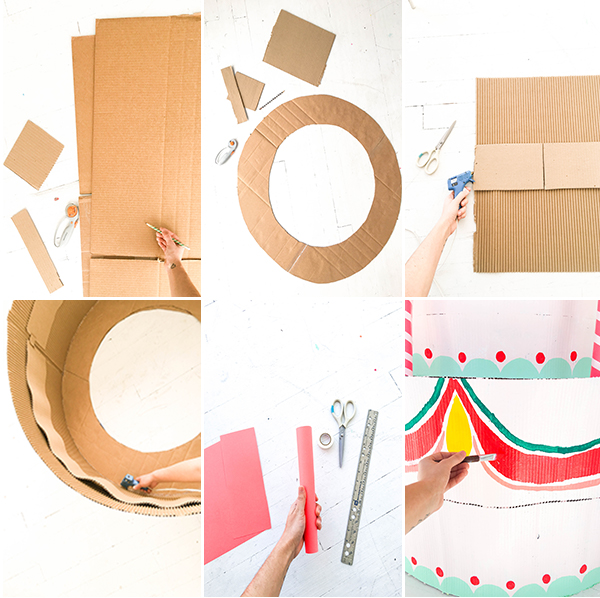
Materials: Large Pieces of Cardboard, corrugated paper, box cutter, hot glue gun, pencil, paint, cardstock, tissue paper, yardstick, scissors
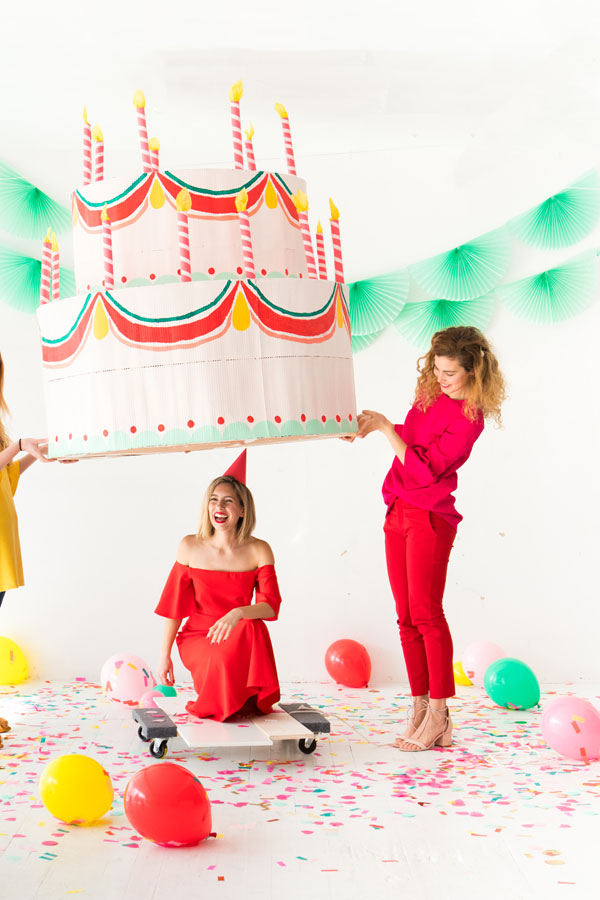
Step 1: Cut out 2 circles in the cardboard, each with a 4.5 foot diameter.
Step 2: Create a hole in the middle of each that is 18 inches in diameter.
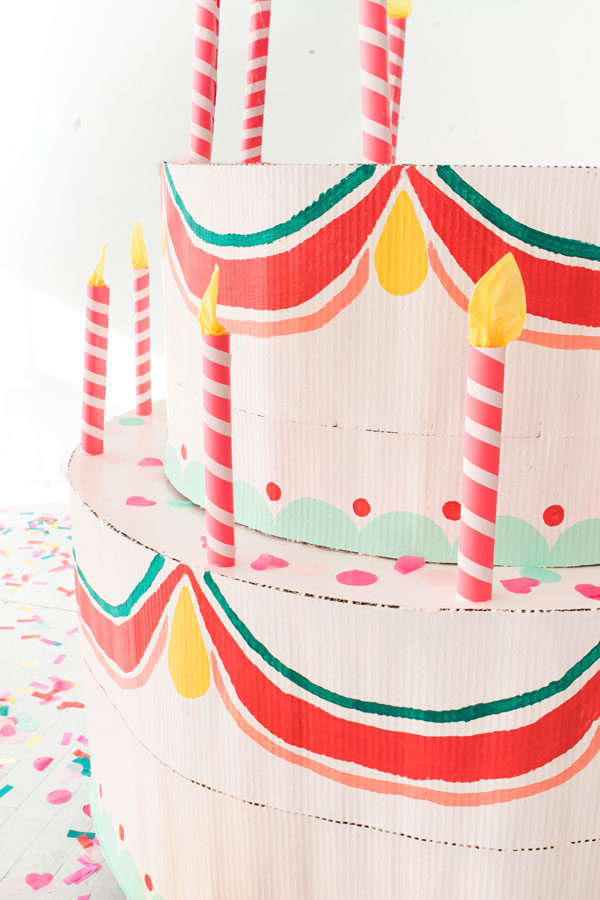
Step 3: Create an edge that is 2 feet tall. We used corrugated cardboard, which easily curves with the shape of a circle.
Step 4: Connect the two pieces of corrugated cardboard by cutting an extra strip and hot gluing it on the backside where the two pieces of cardboard meet.
Step 5: Once you are finished, you can glue the corrugated cardboard around the side of the circle you made in step one.
Step 6: Glue the other circle made in step one to the other end.
Step 7: You will repeat steps 1-6 for the second layer with the following dimensions: 3 foot diameter and 1.5 feet tall.
Step 8: After finishing the second shape, you will glue the smaller layer on top of the larger one creating the second tier of the cake.
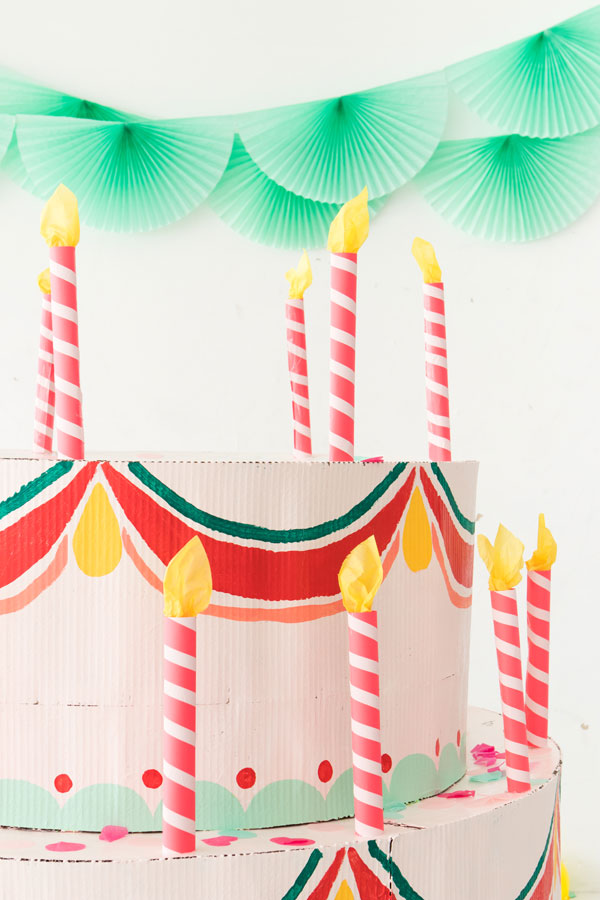
Step 9: To create the candles to put on top, we cut a piece of cardstock (hotdog style) then rolled it, and taped it in the back.
Step 10: For the flame use yellow tissue paper.
Step 11: Add extra detail by using paint.
SHOP THIS POST: Red Dress, Pink Top, Red Pants, Fan Garland
Photography by Amy Moss and Alison Piepmeyer
Styling by Amy Moss and Sarah Price Olsen
Crafting by Mercy Favrow and Jamie Lau


Sophie
February 27, 2017
I want this.
http://goldclutter.blogspot.com
Michelle
February 27, 2017
How cool is this?! Absolutely awesome idea!
https://www.makeandmess.com/
Paige
February 27, 2017
This cake is amazing! You did a fabulous job!
Paige
http://thehappyflammily.com
Lorena
February 27, 2017
Espectacular idea!!!! Esta torta gigante es increíble!! Felicitaciones!! ♥
Annie Abbey
February 27, 2017
Ahhh this is so amazing! Love how creative you are!
xx Annie
http://www.somethingswellblog.com
Indya | TheSmallAdventurer
February 28, 2017
OMG this is insane, but I absolutely love it! Totally tempted to make it just to have around the house as a quirky home decor item…
http://www.thesmalladventurer.blogspot.com.au/
Malia
February 28, 2017
Yes! I have been dreaming of giant cakes to jump out of for forever. Thank you for doing the leg work. Hubby’s 40th bday, here we come!
Sofia
March 3, 2017
This is too great! It would definitely be something fun to have a party for guests to play around with!
xo, Sofia
http://www.thecozie.co