


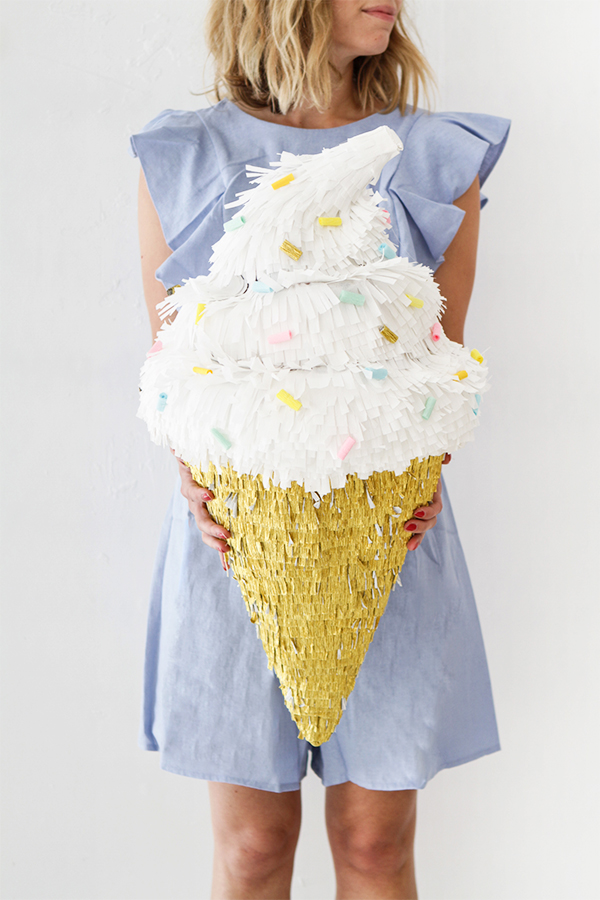
On a hot day, there’s nothing more satisfying than soft serve ice cream. It’s one of our favorite summertime treats… so of course it has to be immortalized into pinata form! Although it looks complicated to build, this pinata is actually pretty simple (you could probably finish it this weekend.) Get the full DIY below!


Materials Needed: Posterboard, twine, packing paper, bubble wrap, packing tape, newspaper, flour, water, bowl, x-acto knife, crepe paper (we used creme, gold, light pink, blue, mint green, yellow, and orange), scissors, hot glue gun
Step 1: Cut the posterboard into a semi-circle (ours had a 16” radius). Shape the posterboard into a cone and tape in place.
Step 2: Tape three long pieces of string equal distances apart on the inside of the cone. Gather and tie the string together in a knot in the center.
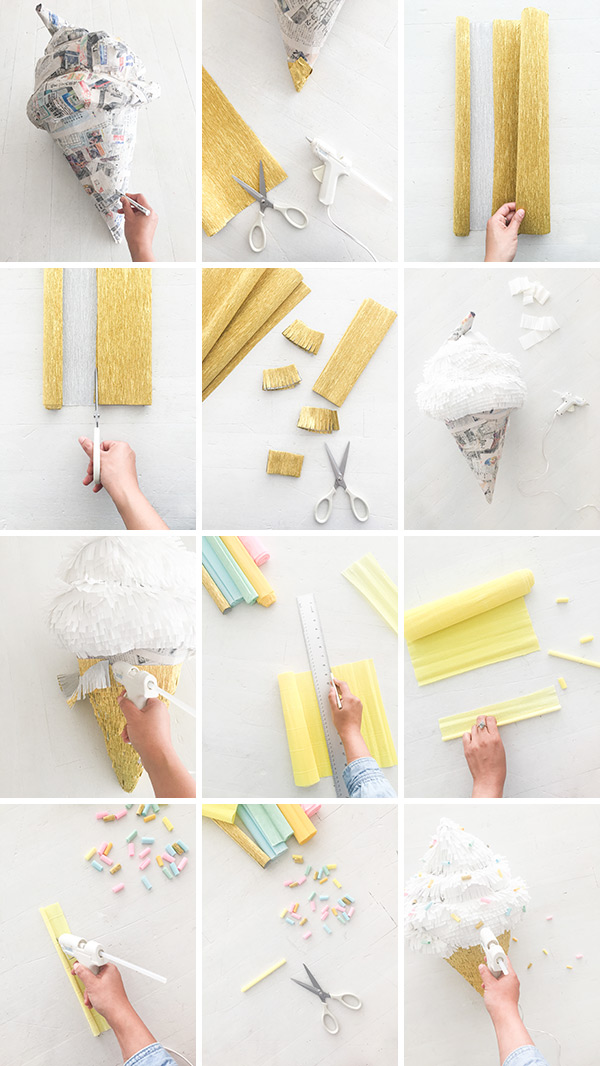
Step 3: Using packing paper and packing tape, create a long strand. Cover the strand in bubble wrap. Wrap the strand into a soft-serve swirl, 5”-6” wider than the opening of the cone. Tape the swirl in place. Make sure to thread the string from the center of the cone in through the swirl (you’ll use this later to hang the piñata!)
Step 4: Paper maché with newspaper and equal parts water and flour. We recommend doing a few layers to help keep the two parts together. Let dry completely for at least 24 hours. Once dry, carefully cut a trap door into the side of the cone with an x-acto knife (this is where you’ll put the candy!).
Step 5: Cover the two tips (top and bottom) with 3” squares of crepe paper. Hot glue in place. This helps to add color these hard to fringe places!
Step 6: Cut fringe from crepe paper for the cone and the swirl with a good pair of scissors and ruler. Our fringe was roughly 2″ tall and 1 cm wide. Glue the fringe to the piñata, starting from the bottom and moving up.
Step 7: Sprinkles! Cut strips of colorful crepe paper, 4” wide. Roll the strips into the size of a straw, and secure with a long line of glue. Snip off 1” pieces. Then, hot glue the sprinkles to the top of the pinata.
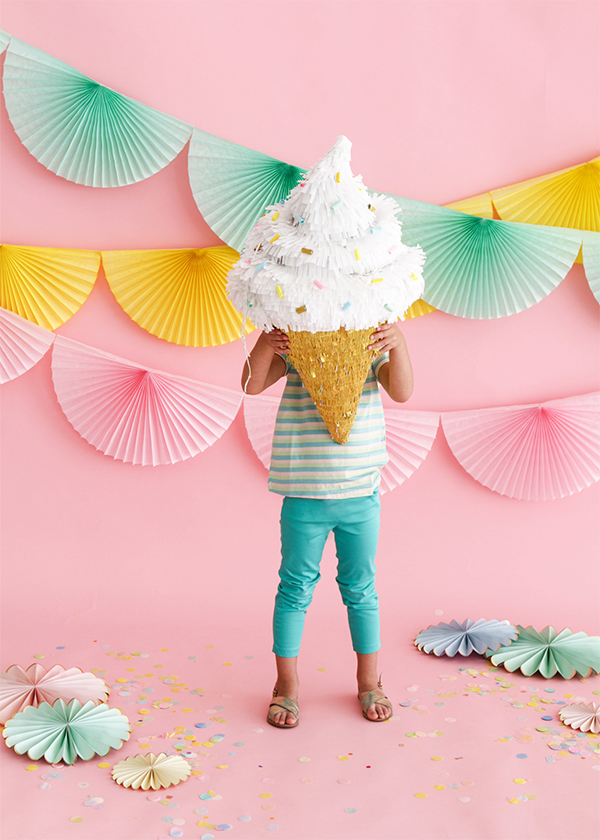
Step 8: Fill with confetti and treats, and marvel at your creation!

Pinata base built by Colleen Casper
Pinata decorating by Naomi Julia Satake


Katie Dillman
July 22, 2016
It’s too pretty to break!
Amy
July 22, 2016
This is so cute!!!
Amy | http://www.yankified.com
Kari
July 22, 2016
What a super fun pinata idea!
Kari
http://sweetteasweetie.com/ambrosia-salad/
Jessica
July 22, 2016
You guys make everything look so easy to make and the end result is always on point x
Jessica — WS Community
Michelle
July 24, 2016
This looks absolutely amazing!
https://www.makeandmess.com/