


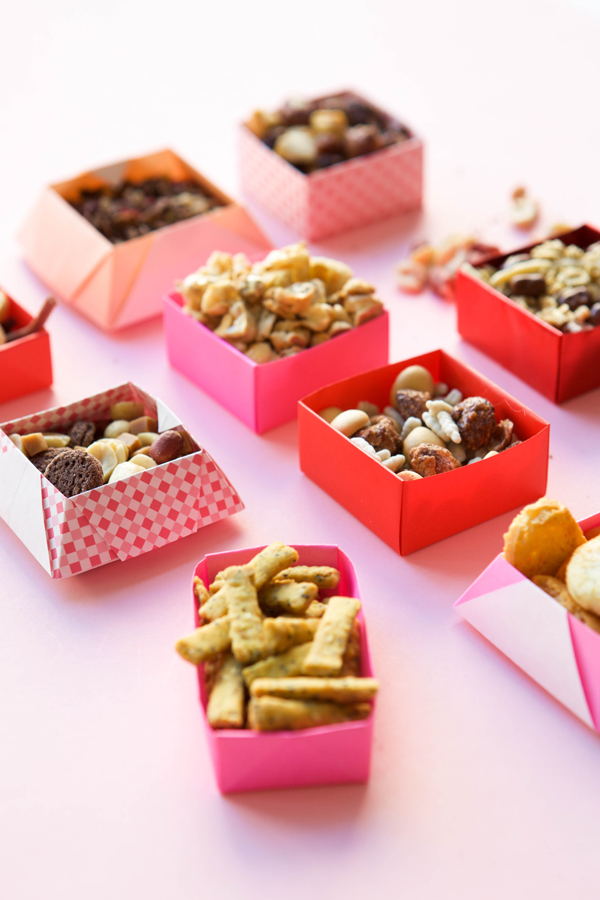
I got an origami book a few years ago and have always been obsessed with the idea of making your own dishes from paper. If you don’t have containers to match your party decor, you can easily make your own with origami paper (which comes in the best colors and patterns!) Below, we’re sharing 2 simple box DIYs that come together really quickly. You can fill them with treats and set them around the party for people to snack on while they chat. If you need some party snack ideas, we love Graze: a snack subscription service that delivers awesome treats straight to your door.

It’s hard to find snacks that are healthy and great-tasting. We really like Graze because their snacks are both. Before your first box arrives, you can choose the ingredients you like (or don’t like!) so that you’ll definitely enjoy every snack you get. You also don’t have to worry about high fructose corn syrup, trans fats, artificial flavors and colors, or genetically engineered ingredients. We love that they come already packaged in perfect portions, so you can throw them in your bag for snacking while you’re out and about.
Right now, you can try a 4-snack sampler box of graze for FREE by clicking here! And make sure you get the DIY for our snack boxes below!


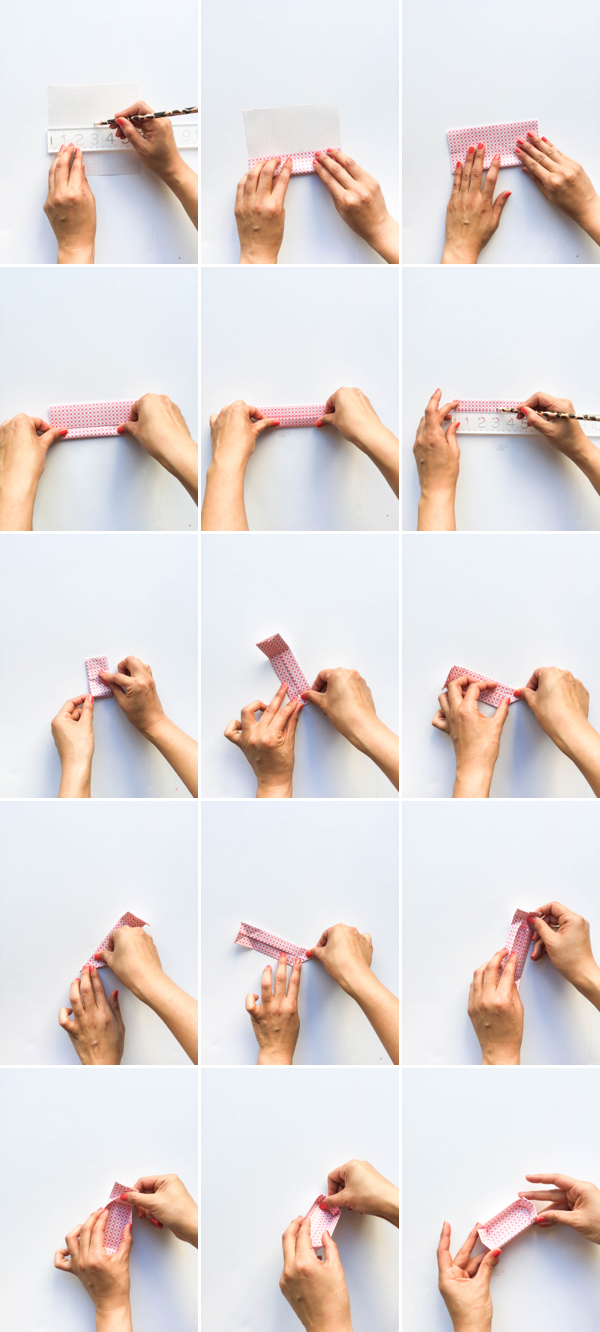
Materials: Origami Paper, Ruler, Pencil
Rectangle Box
Step 1: Mark the middle of your square origami paper.
Step 2: Fold the bottom half of the paper up until it hits the middle. Fold the top of the paper down until it meets the other side in the middle.
Step 3: Fold the bottom in half again. Repeat with the top.
Step 4: Use a ruler to mark the middle of the paper.
Step 5: Fold both sides in horizontally until they meet in the middle (where you marked.)
Step 6: Unfold. Use the creased lines as a guide to fold the horizontal half diagonally. Crease and unfold. Repeat on the other side and unfold so that on both sides there is a creased “x”.
Step 7: Slip your fingers between the slits in the middle of the paper. With 2 fingers, hold the sides open while you fold over side flaps. Repeat on the opposite side.
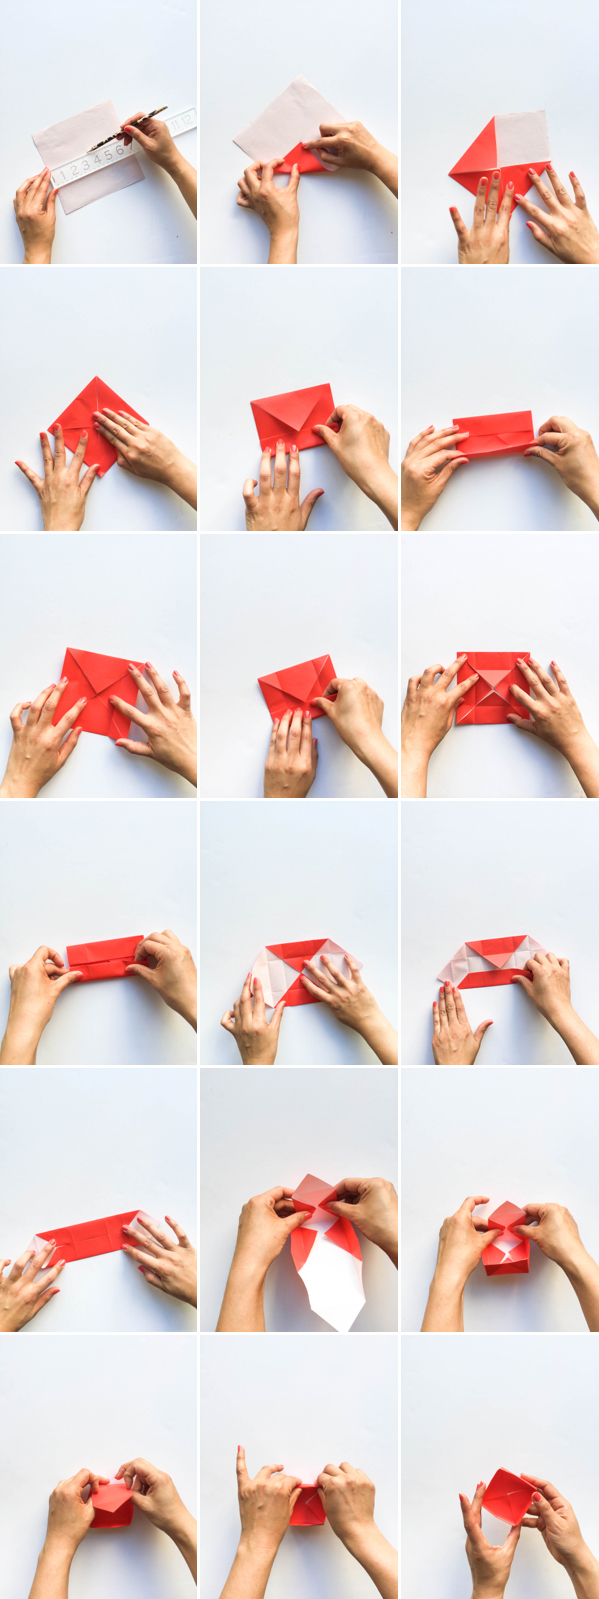
Square Box
Step 1: Mark the center of your square origami paper.
Step 2: Fold in each corner so that it reaches the mark you made in the center.
Step 3: Once all the corners are folded in, fold in one side until it hits the middle. Crease and unfold. Repeat with the 3 other sides.
Step 4: Unfold 2 of the corners.
Step 5: On the corners that are still folded in, fold the corners again so that the sides reach the middle. Crease.
Step 6: On the sides with the open corners, pinch the folds together, and fold over the corner flap so that it creates the wall of the box. Repeat on the opposite side.
Step 7: Use your fingers to crease the sides of the box so they all stay in place.

This post is sponsored by Graze.
Styling by Alison Piepmeyer
Crafting by Naomi Julia Satake


Michelle
February 10, 2016
I have learned to craft those origami boxes many years ago, and I find that they are perfect for jewellery gifts!
https://www.makeandmess.com/
Oh, what a great idea, I will do this for my birthday
http://loving-evelyn.blogspot.ro/
Cheyanne
February 10, 2016
I never thought to make my OWN boxes to serve treats in! As someone who recently moved out on my own, and who loves to entertain, I am constantly buying cute festive holiday servers….This is going to save me so much money in the future!
http://www.CheyanneFulton.com
Alexis
February 10, 2016
LOVE this idea!
Paige
February 10, 2016
These boxes are so fun and cute!
Paige
http://thehappyflammily.com
Toshi Bakes
February 10, 2016
These are fun and easy to make 🙂
Kari
February 10, 2016
These are a super fun crafty activity to do!
Kari
http://www.sweetteasweetie.com
Jessica
February 10, 2016
This is so so nice x
http://jessicawoods.fr
Dana Decals
February 10, 2016
These are cute!!! Kind of reminds us of the Marie Kondo motto of making things inviting, and a joy to hold. And, with your snacks, these are joy to look at and probably to hold as well.
Annie Abbey
February 11, 2016
These are so precious! I would love to use these for a galentine’s day party! Thanks for the inspo!
xx Annie
http://www.somethingswellblog.com/