


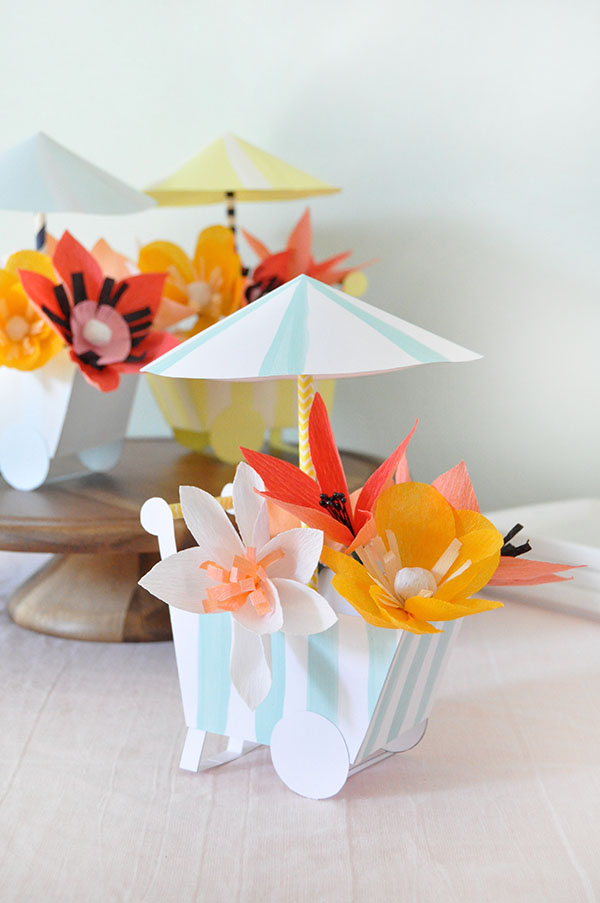
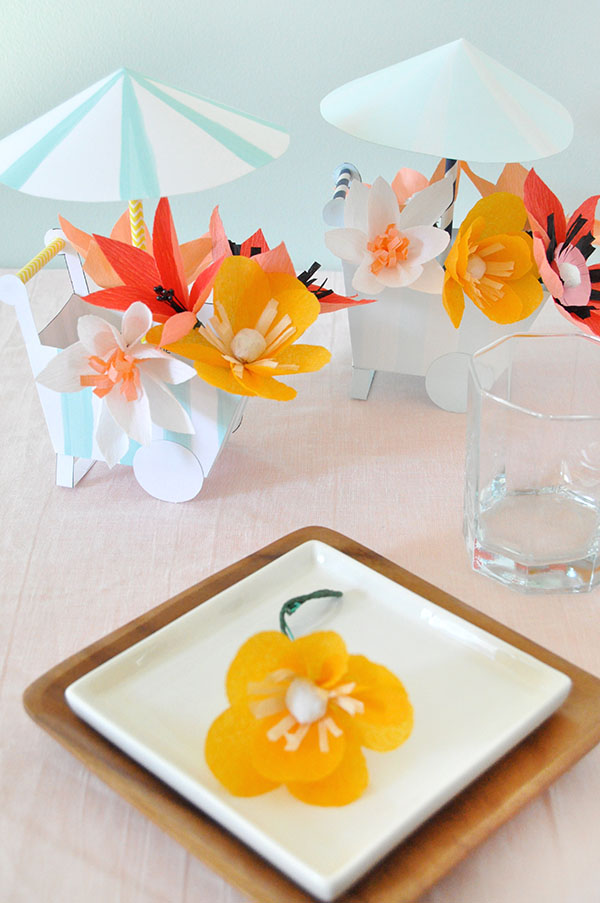
I’ve been so excited to see more and more fresh flowers become available this spring – I love having them in the house! (Have you seen Jordan’s Friday Flower Club images yet?) Crepe paper flowers are lots of fun too though – make these mini flower carts and fill them up with paper bouquets. Wouldn’t these be cute as a centerpiece this Easter?


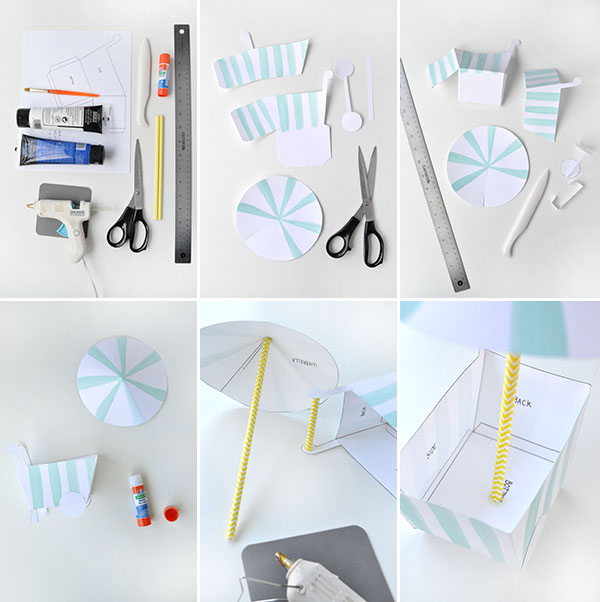
Supplies: Printable flower cart template, card stock, paint, paintbrush, hot glue gun, scissors, paper straws, bone folder, glue stick, ruler, crepe paper flowers.
Step 1: Print and cut out the template onto card stock. For best results, trace the templates onto different card stock to prevent any lines/markings from being visible. Once traced and cut out, use paint to decorate the cart and umbrella if desired. Let dry.
Step 2: Use a bone folder and ruler to crease all of the dotted lines (except on the umbrella). Fold.
Step 3: Apply glue to the tabs and attach the cart together. For the wheels, apply glue to the end halves of the circles and apply to the front end of the cart. For the back legs, apply glue to the end sections and attach to the bottom of the very back of the cart. For the umbrella, apply glue to the wedge shown on the template and form into a cone.
Step 4: Use hot glue to attach a 2 1/2″ piece of paper straw between the two arms to form a handle. Hot glue a 7″ piece of straw into the underside of the umbrella. Hold in place as it dries.
Step 5: Hot glue the bottom of the umbrella straw into the center of the cart, holding in place as it dries. Fill the finished cart with crepe paper flowers, candy, or whatever you wish!


Claire
March 25, 2015
Very fancy 🙂
Michelle
March 25, 2015
Thank you for all your DIYS. I’m loving it. The link to the template did not work. Thanks.
Hey Michelle! It’s been updated now. Thanks for catching that!
Paige
March 25, 2015
These are seriously the cutest!
Paige
http://thehappyflammily.com
Kari
March 25, 2015
These are so beautiful! So outside my ability, but really cool!
Kari
http://www.sweetteasweetie.com
Sonja Kuvik Loyd
March 25, 2015
Supper Cute,Great idea and pretty for a party too,Thank you for sharing the tutorial.
Anne
March 26, 2015
This is crazy adorable! I’m totally making these for my room. You can even put in some dainty jewelry in it. 🙂
http://annescribblesanddoodles.blogspot.com/
Monique | WritingMonique
March 26, 2015
These are really cute! I love them!
WritingMonique
Christine
March 26, 2015
These are adorable!!!
http://www.DimesandDonuts.com
evelyn
March 27, 2015
Too cute!!! Happy happy
Thank you for sharing!!!