


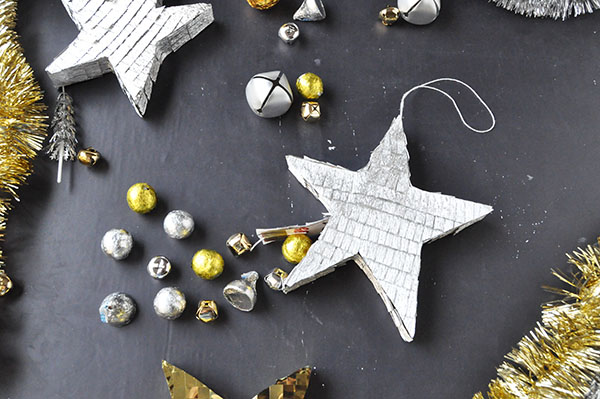
Whenever I put silver and gold together, I can’t help but think of Christmas. Make these miniature star piñatas and fill them with all the silver and gold treats you can find – they’re everywhere this time of year! Wouldn’t it be fun to make these as party favors for an all silver and gold party this winter? (P.S. Even more metallic ideas!)


Supplies: Cardboard, silver and gold mylar or crepe paper, scissors
, ruler
, glue
, string
, tape
, pencil, silver and gold treats.
Step 1: Draw a freehand star on the cardboard. Cut out and then trace and cut out an identical star. Cut strips 3/4″ wide.
Step 2: Use tape to attach the cardboard strip around one of the stars, folding the strip to fit around the stars points.
Step 3: Once the strip reaches where you started, let the strips overlap but instead of securing them together, fold and tape a small loop of string onto the flap. This will allow the piñata to be opened (instead of smashed) to release the treats inside.
Step 4: Tape on the second star and fill with silver and gold goodies. Use a small piece of tape to keep the flap closed for now.
Step 5: Cut your crepe/mylar into fringed strips about 1″ wide.
Step 6: Tape a loop of string onto the piñata to be used for hanging.
Step 7: Starting from the bottom of the star, use white glue to attach the fringe onto the cardboard.
Step 8: Cover both sides of the piñata and let dry for a few minutes.
Step 8: Carefully use scissors to cut away the overhanging fringe.
Step 9: Glue more fringe around the sides of the star being careful around the trapdoor. Let dry for a few minutes.
Step 10: Cut away the excess fringe from the sides.


Jessica
December 9, 2014
Love it this is beautiful x
http://www.wild-cherrytree.com
Cindy // CAROLE + ELLIE
December 9, 2014
I love these little guys! Definitely would make cute party favors.
Noushin
December 9, 2014
How gorgeous! Love all your posts! I literally check your blog out several times every single day! <3
Noushin
December 9, 2014
I forgot to say that I’ve linked your blog as one of my faves on mine! 🙂
Marlan Willardson | MWPR
December 9, 2014
This is perfection!!!
Celine
December 9, 2014
We don’t say “bonne Noël” but “joyeux Noël” or “bonne année” = happy new year !
Merry Christmas ! Celine
It’s been too long since I’ve been in French class! Thanks for catching this, Celine! 🙂
kernedtightly
December 9, 2014
these are so cute! and I love that they don’t need to be destroyed to open up, too!
Rebekah @ Ritzy Reba
December 9, 2014
Beautiful! This in on my Christmas decor “to make” list. Hopefully I get around to it all. Thanks for the inspiration!
Ceciel
December 9, 2014
Love it! You bring my on ideas for birthday partys!
danielle
December 13, 2014
Hi San Francisco lady artists and Oh Happy Day….. wanted to let you know that we are having our Holiday Party this weekend (female artists of San Francisco). Feel free to join our group and bring friends! I will totally be using your adorable photo booth props! Thanks so much for sharing them for free! Youre the best.
http://meetu.ps/cCH2q
Cheers,
danielle