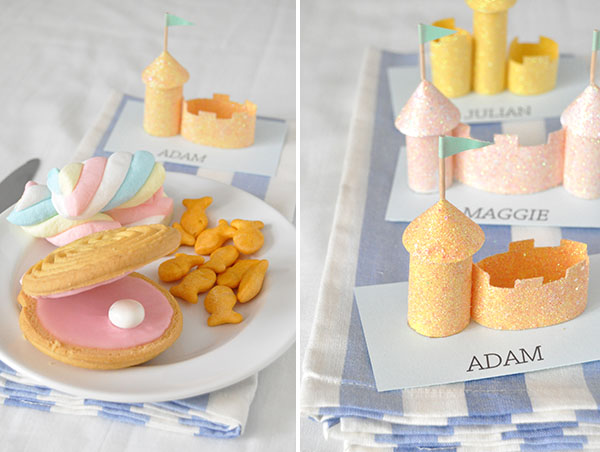
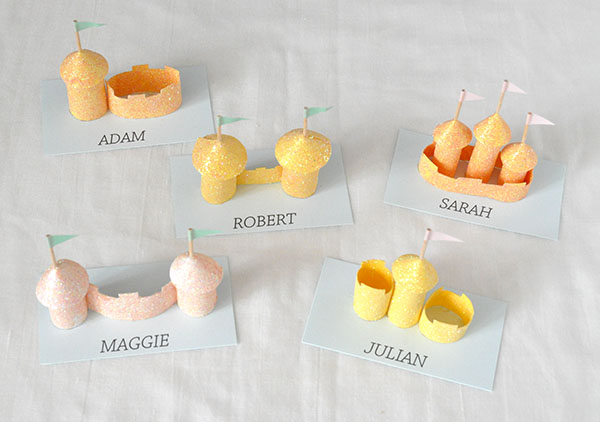
Remember the mini Putz houses that you see in the winter time? Well that’s what inspired these glittering sandcastle place cards! Eating picnic snacks was one of my favorite things about going to the beach when I was younger – if you’re not close to the water, wouldn’t it be fun to host a beach picnic party indoors? And if you’re looking for more miniature beach party supplies, try these beach cake toppers!
Supplies: Colored paper, card stock
, pencil, pen, ruler
, scissors
, hot glue gun
, glittering glue
, glitter
, anti-static glitter bag, glitter tray, toothpicks
, washi tape
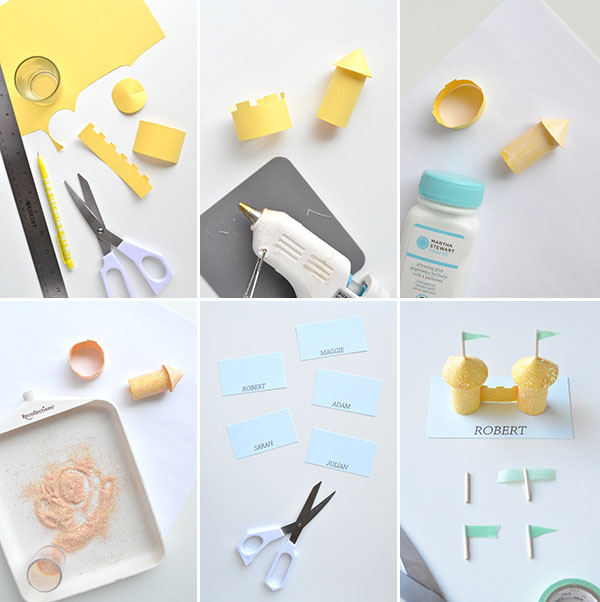
Step 1: Cut shapes to construct the sand castles. Be creative – a quick image search gives lots of inspiration. Cut and roll rectangles to form cylindrical towers (all pictured here are 2″ or less). Trace various sized circles and cut a slit to the center – these will be the conical tower roofs. Lower walls can be cut with decorative top edges.
Step 2: Use tiny dabs of hot glue to build the castles. For the towers, apply dots of glue to the top edge of the cylinder and gently attach the cones on top.
Step 3: Apply a thin even coat of glittering glue to the castles.
Step 4: Holding the castle over the glitter tray, slowly pour the glitter over the castle. The excess glitter will fall into the tray where you can carefully roll the castle to attach even more glitter. Once covered, let dry on a scrap piece of paper.
Step 5: Cut card stock into rectangles about the size of business cards (the exact size can vary depending on the sizes of the castles you built.) You can pre-print the names on the card or use a pen to write them yourself.
Step 6: Rub the anti-static glitter bag on the rectangles. Once the castles are dry, use a tiny dab of hot glue to attach them to the rectangles. If desired, cut a toothpick down to 3/4″. Fold over a thin piece of washi tape at the end of the toothpick and cut into a triangle shape to form a flag. Use a tiny dab of hot glue to attach the toothpick to the castle’s rooftop.


KrisWithaK
July 10, 2014
I want to have a beach party JUST so I can make these little castles 🙂 Adorable!
xo
K
Erica
July 10, 2014
These are so cute! I love that the glitter gives them the sand texture look. Definitely can’t wait to try these.
Jamie
July 10, 2014
These are so incredibly cute, I can’t stand it!
Leigh ann
July 10, 2014
How did you make the sea shell cookies stand up and what did you use for the pearl?
Hi Leigh! This is how I made the clam shell cookies – I used a yogurt-covered raisin for the pearl.
kristin
July 10, 2014
adorable!
Chrystin @ A Mate & a Rottweiler
July 11, 2014
Those place cards are super cute! What a fun party idea! I’ve honestly never seen anything like this before, and there’s nothing better than something unique! xx
Lil
July 11, 2014
WHAT these are so cute omg
Amanda {Planning It All}
July 11, 2014
These are so adorable! I want to throw a beachy party now!
Jacqui
July 13, 2014
That cookie looks so yummy! I love the place cards and how they sparkle! Thanks for sharing.