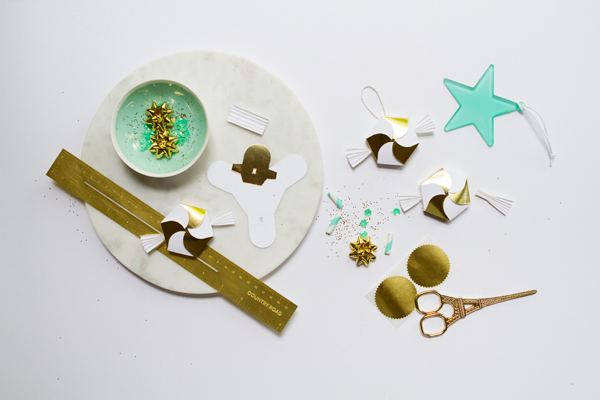
This project combines three of my favourite things: Papercraft, holiday decorating and candy! Create some really cute mini holiday decorations with these candy shaped hexagon boxes. Settle in with some festive holiday music and a glass of bubbly and get your craft on!
Here are some ideas for what you can do with these cuties!
- Attach some twine to the back to create cute hanging decorations
- I’ve used gold, but you can use any other accent color or metallic you would like. Try an assortment of candy colors! Or use red for a more traditional Christmas theme.
- Could be used as holiday gift boxes for miniature treasures or treats!
- If you wish to make gift boxes suitable for larger gifts, use a photocopier to enlarge the template to the desired size.
Materials needed: Printer, Adobe Reader (free download), PDF template (download at bottom of post), scissors, x-acto knife, ruler, cutting board, pencil, gold foil card (or any coloured card you desire), glue or double-sided tape, printable white card stock of medium thickness, twine and tape (optional- if making a hanging decoration).
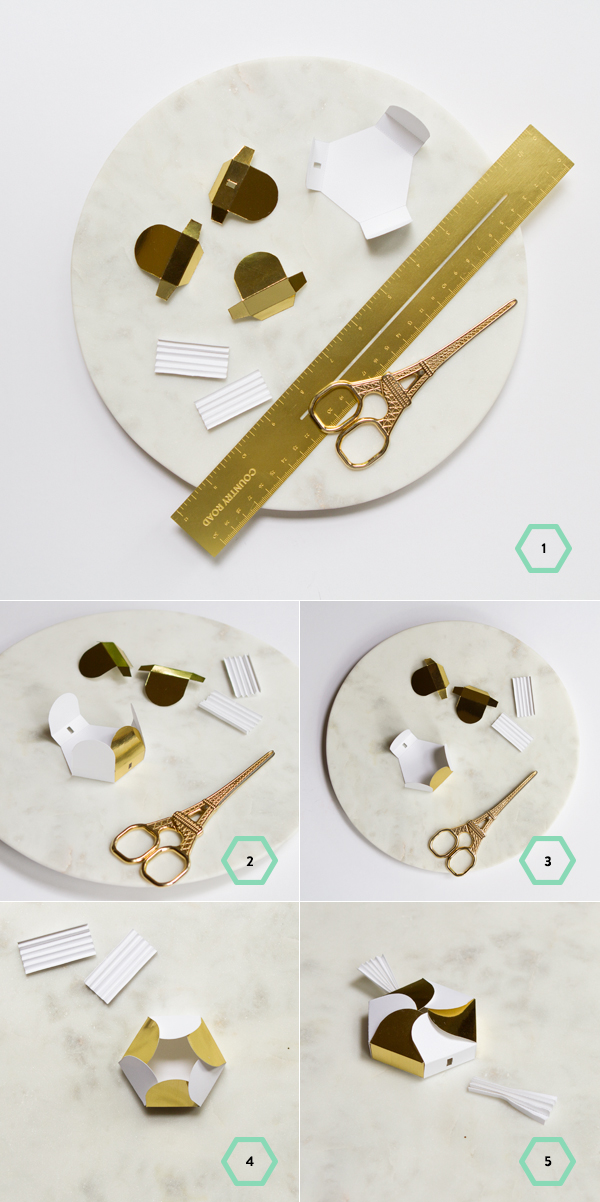
Step 1: Download the PDF at the bottom of this post and print out onto white card of medium thickness. Note: Do not use Mac Preview to view or print the PDF, as colours may come out completely wrong. Use Adobe Reader instead. Use your x-acto knife and ruler to cut out the petal template, the main body and both concertina pieces and score along dotted and dot-dash lines. (I’ve used scissors to cut the rounded edges, I find it much easier). Place the petal template on the back of a sheet of gold card and trace around with a pencil then cut out with x-acto/scissors. You need to make three gold petals- one will need to have the rectangular hole that you see in the template, the other two don’t need the hole. Fold your various pieces (Fold inward for dotted lines and outward for dot-dash lines).
Step 2: Using glue or double-sided tape on the tabs, start attaching the gold petals to the main body. Make sure that the gold petal with the hole sits opposite the white petal with the hole (on the main body).
Step 3: Once all of your petals are attached, begin folding them inward, each piece will overlap the petal on one side while sitting under the petal on the other side. Press down to close your box.
Step 4: Fold and press together your concertina pieces and slip each of them into the small rectangular holes on either side of your box. Once they’re about midway through the box, fan out the visible portion.
Finally, if you wish to make hanging decorations simply attach some twine to the back!
Happy Holiday Crafting! 🙂
xo amy


STEL STYLE
November 18, 2013
the colors combination are perfect for this DIY!!! perfect Christmas DIY!!!
http://www.thestelstyle.com
Bambi
November 18, 2013
How very lovely! Great idea!
Love from Germany and a little weekend review:
http://lasagnolove.blogspot.de/2013/11/weekend-reviewmy-army-of-fortune.html
Bambi
JAY
November 18, 2013
Love, love love! So cute that its a hexagon, and so cute with the colors! Perfect.
Karen June
November 18, 2013
Love these clever boxes / ornaments … especially with the metallic accents!
Karen June
http://littleyellowcouch.com/living-a-connected-life/
Victoria | Oh So Pretty
November 18, 2013
Ohhhh I LOVE this – so perfect for the holidays! I can’t wait to make these, thank you for sharing with us!
Melissa
November 18, 2013
Love it!! I see some of your lovely items are from your Australian trip. I have that pen and ruler too!!!
THis post is actually by Amy Moss of Eat Drink Chic, who lives in Melbourne. I wish that was my stuff!
Gigi
November 19, 2013
This is a great idea, I love it! I’m also loving the pineapple candle, where’s it from? Many thanks!
Hi Gigi- I bought the pineapple candle locally but I have seen it online here: http://www.larkstore.com.au/small-pineapple-candle-aqua.html
meg
November 19, 2013
Such a cute packaging idea!
http://happinessiscreating.com/
Valerie | Lily on Fillmore
November 19, 2013
wait! tell me more about those amazing scissors! this diy project is so cute.
xo – http://www.lilyonfillmore.com
Hey Valerie- The Eiffel Tower scissors are from Typo- http://shop.cottonon.com/shop/product/eiffel-scissors-gold/
Anthony
November 19, 2013
Good day very cool site!! Man .. Beautiful .. Superb ..
I will bookmark your blog and take the feeds additionally?
I’m happy to find so many useful information right here in the submit,
we want develop more techniques on this regard, thanks for sharing.
. . . . .