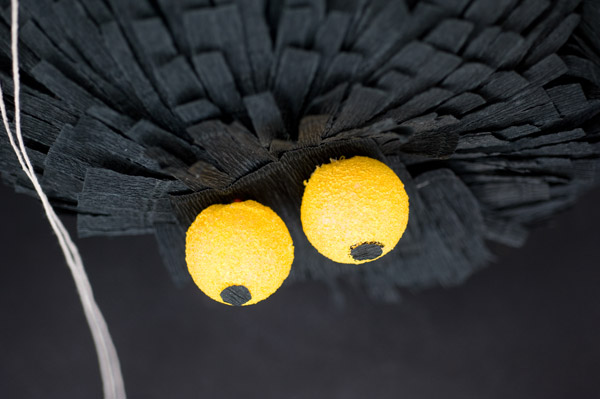
I love pinatas and hadn’t made one in a while so it was really fun to make this big spider pinata. I love how the crepe paper makes it look so creepy and hairy. We added the googley eyes to make him look a little more friendly. You have to make this guy a few days ahead of your event because the paper mache process needs a few days to dry. See full instructions and photos right here.
Click through for full instructions + photos.
Materials Needed: Flour, 36″ balloon, Stiff Paper like butcher paper, old newspaper, 4 black rolls of crepe paper (in folds) , styrofoam balls, yellow paint, tacky glue, exacto knife.
Step 1: Make the Body. Make the paper mache mixture by adding flour into a bowl. Add water little by little until it is the consistency of pancake batter, not too thick. Cut strips out of newspaper. Dip the strips of newspaper in the flour mixture and remove some of the mixture off the paper before laying it on the blown up balloon. Continue until the whole balloon is covered. Put it in a warm and room to let it dry overnight.
Step 2: When the first layer is dry repeat the process and cover the entire balloon with a second layer of paper with the paper mache mixture. Let it dry overnight. (If this is for little kids you can stop at two layers, if you are making it for adults or older kids, repeat with a third layer.) Pop the balloon and remove it from the pinata.
Step 3: Cover the Body in Crepe Paper. Cut a 3″ section of crepe paper and cut fringe on one side. Unroll the section and starting on one side of the pinata add a layer of glue and then crepe paper wrapping the paper around the body. Repeat until the entire pinata is covered.
Step 4: Make the Legs. Take a section of stiff paper and roll at an angle. Begin twisting until all the paper is rolled up then tape to secure. Take the center of the paper and twist and bend so it makes the shape of a spider leg. Wrap in crepe paper like the body with the fringe going down.
Step 5: Attach the Legs to the Body. Decide where you want the face to be on the body, then cut a whole towards the top. (If you cut the hole too low it won’t look very spider-y.) Insert leg and add glue where the leg is touching the body. Repeat with all eight legs and let glue dry.
Step 6: Cut a small hole on the side where you can put the candy inside and then glue and tape it closed. To hang the pinata cut two small holes a few inches from each other at the top and thread the string through. (Click here for our whole pinata series!)
Credits and our Talented Contributors:
All photography by Karen Cline of Pretty Simple Productions for Oh Happy Day
Art Directed by Jordan Ferney
Produced by Ashley Rose Kirschling
Styling by Irene Yu
Crafting by Caitlin Barker
I liked the last photo of us all working on stuff so I included it.


Victoria Smith
October 23, 2012
eek! and rad!
Mickey@EuroAmerican Home
October 23, 2012
That spider looks like a lot of work. It also looks just as fun as the doughnut tree 🙂
chiara
October 23, 2012
the spider looks awesome. I love the last pic too – it’s always nice to get a ‘behind-the-scenes’ peak.
Kelly @ Studio DIY
October 23, 2012
This is awesome!! Hooray for Halloween piñatas!
Erica
October 23, 2012
This is fantastic! Fringy web and all!
laure
October 23, 2012
Bonne idée !!!!
Mais… Beurk !
Chrissi Holt
October 23, 2012
How do you get these ideas ?! Super crazy but great !
LOve Chrissi xo
http://www.christianaholt.blogspot.com
Confetti Couture
October 23, 2012
You are a crepe paper genius!
Alessandra
October 23, 2012
really beautiful!!!
xxx Alessandra
Loulou
October 23, 2012
Oh my, that is fantastic! Good for you. You must feel happy to have made such a cool and interesting thing.
Erika @Sausage Jar
October 24, 2012
This is so cool! Beatifully executed!
wmbg
October 24, 2012
ewwwwwwww. it’s hairy! (genius)
mom in mendon
October 24, 2012
I wouldn’t want to let the kids destroy him, he’s SO cute.
Lisette
October 24, 2012
Super cute spider!
CAUTIOUSLY OBSESSED
October 27, 2012
This is so overwhelmingly adorable!! Such a great idea!