


This series of Movie Night Posts is sponsored by Skinny Cow.
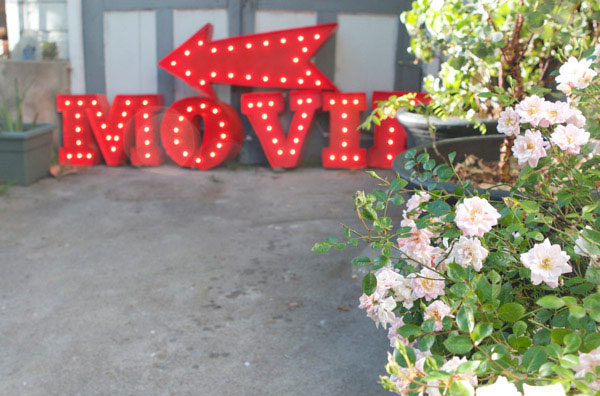
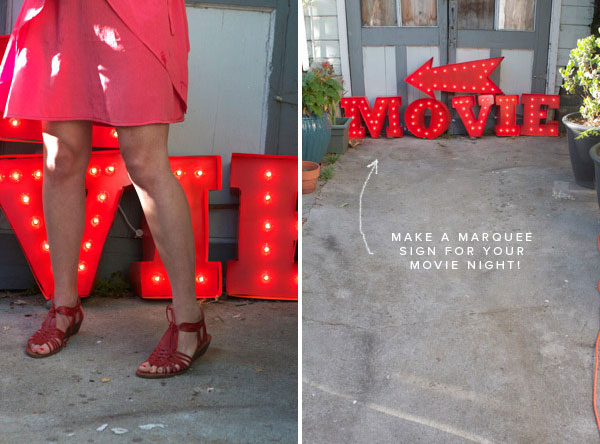
When we were brainstorming ideas for movie night decorations we kept coming back to vintage marquees and movies signs. So we put together this DIY using foam core and poster board. This would be awesome in a driveway or on the front of a house telling people where the movie night is. My friend Brooke told me about these strands of super cheap globe lights from Target, which makes the whole project really affordable. While the materials aren’t too expensive this took us a whole afternoon to make. The most time consuming part is cutting out the letters and then lining them. It took us about 45 minutes per letter. These would also be awesome in a kids room or for any event or party. Find all the instructions and printable template below. ps: See our movie night food ideas right here.


Complete instructions and dowload are after the jump.
Materials Needed: 1/8″ Foamcore, Box Cutter and Exacto, Poster Board, Free Printable template (download here), scotch tape, packing tape, ruler, string of lights (take the box apart for the circle template), spray paint.
Step 1: Download the free template It has the word “MOVIE” and an arrow. Tape the letters together and lay them on the foamcore.
Step 2: Cut out the the letter using the template as the guide. Go over the cuts until the letter is cut out.
Step 3: Turn the letter over so the backside is facing up and draw a line down the center of the letter.
Step 4: Using the box the lights came in as a template, draw the holes a few inches apart. This is where the lightbulbs will go through.
Step 5: With an exacto knife, cut out the circles.
Step 6: Cut a poster board into 5.5″ strips. These will go around each letter and will help them to stand.
Step 7: To attach the liners we used scotch tape. We liked how it looked when the face sat 2″ deep into the liner. The secret to getting good looking letters is to score the poster board before you bend it to get nice sharp creases. Once you’ve scored and bent all the folds begin taping in the foam core from behind about 2″ down the poster board. Make sure the tape is secure and reinforce it until it feels sturdy. We reinforced ours from behind with packing tape.
Step 8: Spray paint the letters your color of choice. We painted ours a nice orange-y red. Let it dry.
Step 9: Put the lightbulbs in the holes and then screw them into the sockets from behind. Make sure they are screwed in all the way or they won’t light up. We should note that if you are missing a lightbulb the other lights in the strand still work. Plug the lights in and that’s it! You have a pretty sign for your event.


by Jordan Ferney and Alexis Birkmeyer. Photos by Paul Ferney


Shannon
July 9, 2012
THIS IS BRILLIANT!
I am literally in awe sitting in my cubicle at work right now!
Great job!
Definitely am going to follow you! 🙂
Would love if you did the same!
Shannon
Fabulously Vintage
http://fabulouslyvintage.blogspot.com/