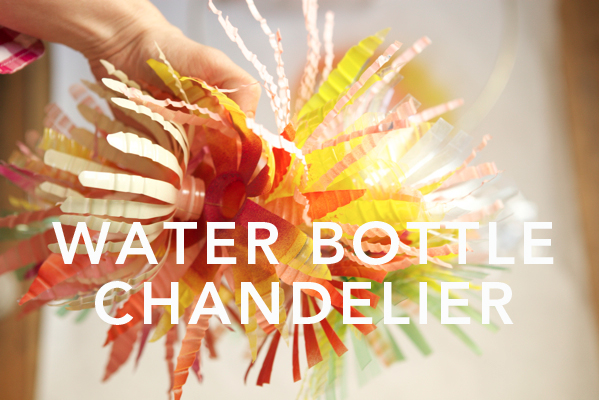
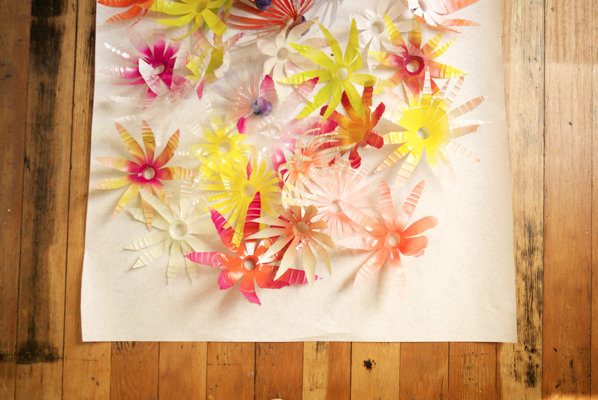
I’ve wanted to make this chandelier for a few years now so it was especially fun for me to make this project. I first saw water bottle flowers on Magpie Design Studio’s amazing chandeliers. Then I saw a display in Anthropologie a few years ago that used them. They are so easy to make and I love that you are reusing the plastic water bottles. This would be perfect for a party or even just for your living room! See full instructions and more photos after the jump.
Click through for full instructions and photos.
Materials Needed: Plastic Bottles (the cheap thin ones are easiest to work with), Spray Paint, 2 Metal Rings, Scissors + Exacto Knife, A Thin Gauge Wire.
Step 1: Cut Bottles in half and cut varying sizes and shapes of petals out of the top and the bottom.
Step 2: In a well-ventilated area spray the flowers in different colors and let dry.
Step 3: Take the flowers made from the bottom of the bottles and cut a circle in the center big enough for the top of the water bottle head to fit through.
Step 4: Take the stacked flowers and wire them on two sides to secure them to the metal ring.
Step 5: Once the flowers are wired to the rings attach the two rings using three wires hung evenly.
A special thanks to Alexis Birkmeyer and Heidi Jo for helping me!


Sarah
May 7, 2012
Wow now THIS is the definition of creativity. I love it. This is definitely getting pinned. Thanks so much for sharing =)
– Sarah
agirlintransit.blogspot.com
Mrs. Châtelaine in Paris
May 7, 2012
I love how yours look so colorful!
MOLLIE
May 7, 2012
This would be awesome porch decorations! I’m going to do this for my teeny tiny back deck. Thank you for your continuous flow of inspiration/creativity!
Dianna
May 7, 2012
What an amazing idea! I love this for my huge recylcing bin of bottles! This would be fun to decorate an outdoor party with.
Thanks!
Kristen
May 7, 2012
These are GORGEOUS! Thank you for teaching us how to do these…and thank you GLAD for sponsoring!
Malin
May 7, 2012
WOW, that´s sooo cool! Never seen anything like that before!
Caitlin
May 7, 2012
These are so fun! What a great way to upcycle 🙂
Kate
May 7, 2012
Such a clever idea! I love that they can be spray painted different colors to match any theme!
Kate
http://www.theforgetfulwife.com
Kathryn
May 7, 2012
Oh my goodness. So doing this. Love it. Might try painting the bottles to make it a little more kid friendly, as I think my daughter would love to make with me.
Mw. Ekster
May 7, 2012
I really love your DIY’s ! LOVE LOVE LOVE
Janelle
May 7, 2012
Love this! Perfect DIY just in time for summer parties!
Kelda
May 7, 2012
Such a fantastic project. My husband and I have collected a bunch of bottles that washed up on the beach…we’ve been trying to figure out a smart way to reuse them for decoration at an upcoming surf art show. Perfect!
oisforotto.blogspot.com
Maria
May 7, 2012
If this is not genius, I don’t know what is! What a great idea!!
Eleni || My Paradissi
May 7, 2012
Thank you so much for that tutorial! It’s the best and most impressive re-use of plastic bottles I’ve seen so far!
karen
May 7, 2012
So much fun!
Cindy
May 7, 2012
Amazing!!!
Leah // Freutcake
May 7, 2012
This is beyond fun and creative! I love this project Jordan.
simplemittens
May 7, 2012
I would love to make this for our next place!
Angela Marie
May 7, 2012
Aw, these ended up coming out great! Love them!
– Angela Marie @ http://sunkissedivory.blogspot.com
Marissa
May 7, 2012
Love this! Thinking about how I could incorporate tiny white lights in the design to light up the coolness that is this project.
Rachel
May 7, 2012
Genius Jordan. It is so pretty.
stacy mineart firks
May 8, 2012
Wow! We did a similar project with plastic flowers a few days ago, but we hadn’t worked out how to display them yet.
http://recreationsproject.wordpress.com/2012/05/03/upcycling-antics-and-more-fun-with-bottle-tops/
I think this is our answer. I’ll link back with the end result. Thanks so much!
Anne
May 8, 2012
Just found your blog – looking good!! 🙂
This is great idea for some summer party. Have to try this out some day!
doro K.
May 8, 2012
absolutely awesome!!!
I linked to your tutorial on my blog – thanks for sharing!
doro K.
Lianna
May 8, 2012
so pretty – what a great idea!
Kelli@über-craft
May 8, 2012
These are gorgeous! Love your color palette 🙂
Rodellee
May 8, 2012
I am so in love with this! Seems simple enough too and I constantly save so many of my plastic bottles to go recycle…but this is a much prettier option!
Thank you for sharing!
Mrs Average Bride
May 8, 2012
wow. people are so creative! Amazing idea.
thecircleofit
May 8, 2012
what a creative team you all are….what a great idea!!! i love re-using to save the planet AND doing something amazing at the same time!!!
Noelle
May 8, 2012
I’m passing this along, and I see a weekend project coming (if I can’t wait that long). Great idea and great blog.
Cheryl G.
May 8, 2012
Wow! I LOVE that!
It does look like an instant party
but would be fun to have in a room!
Anneliese
May 8, 2012
SO fabulous! I love this look and the re-use. Thanks so much for the inspiration.
KATIE
May 8, 2012
LOVE JUST LOVE!!
XOXO,KT
TheSouthernBeautyNerd
Gina
May 9, 2012
Beautiful! I love it.
Martha @ MHW Interiors
May 9, 2012
love! pinning now.
Iris
May 10, 2012
Holy Sh** Balls!!! This is brilliant!!
Samantha Hahn
May 11, 2012
beautiful!
Terri-Ann
May 12, 2012
This is such a great idea!
MandarinMoon
May 13, 2012
you can really bling out the ceners with babbles and beads . Love how beautiful and colorful these are thanks for sharing! I have got to try these.
Andrea
May 14, 2012
This is amazing! The result looks so beautiful! I love it 🙂 I recently established an upcycling post a week in my blog and I would love to feature your tutorial. I would only put 1 picture in my blog post and redirect to this page in your website. I hope it’s ok with you, I really want to share it. Great work! 😉
Lauren
May 17, 2012
This is a fantastic idea! I love the idea of turning recyclable materials into something beautiful. Thank you for the colorful inspiration.