


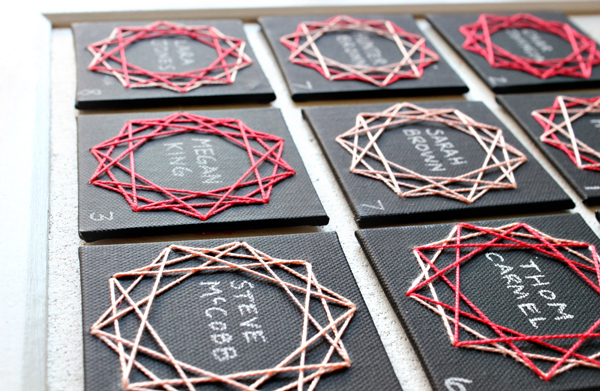
I’ve been dying to try string art. I just think it is so simple but so beautiful in it’s gorgeous symmetry. I found little black mini canvases the other day and this little idea popped in my head. I wish I knew someone getting married. Personally these little lovelies will be backed with magnets and used on the fridge.


Continue reading for more pictures and complete instructions.
You will need:
a ball hammer, a nail (regular picture hanging size), embroidery thread, a needle, some small flat cardboard canvases, some needle nosed pliers and this template.


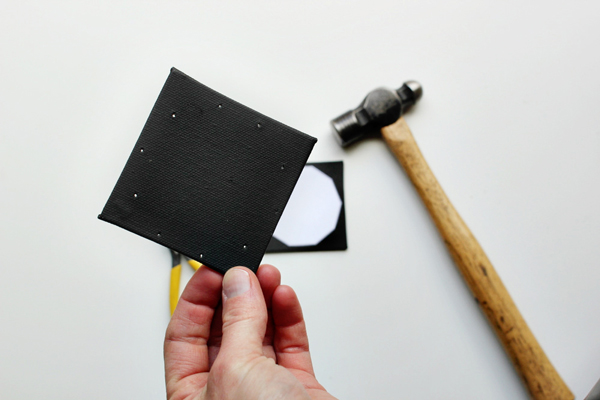

Download, Print, and cut out your template. Place it centered on a canvas. Using your hammer and nail, hammer through the canvas at each point on the template. **Do this on top of an old board, or something you don’t mind putting holes in. We are going through the canvas and it will ruin whatever is underneath it. I used a rotary cutting mat and it still went through to the table top. Live and learn, shhh, don’t tell Ed.
You can use a piece of tape to hold the template in place. Do this for all of your canvases. You should have 10 holes in each. Hint: make sure to go all the way through the canvas, flip it over and repunch with the nail any holes that seem small.
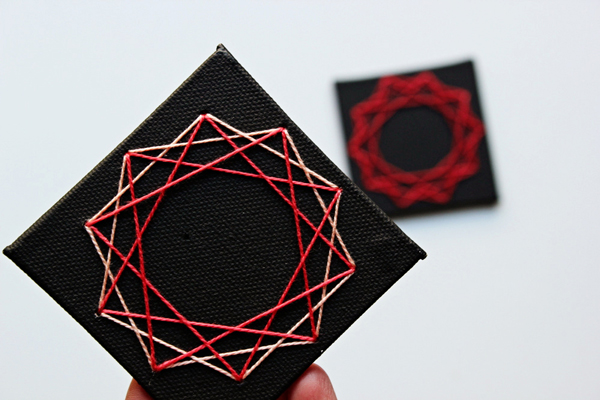
Cut two pieces of embroidery thread about 4 feet long. You could do one really long one, but it is harder to work with and tends to get knotted. Thread your needle and double knot the end of the thread. Start from the back at the top, hole number 1 and go over clockwise two holes, hole number 3 and back down. Go over one clockwise from the first hole, so hole number 2 and go down hole number 4. Continue all the way around, tie a knot to secure in back and trim your thread. Hint: Use the needle nosed pliers to pull the needle if it gets stuck, but remember away from you.

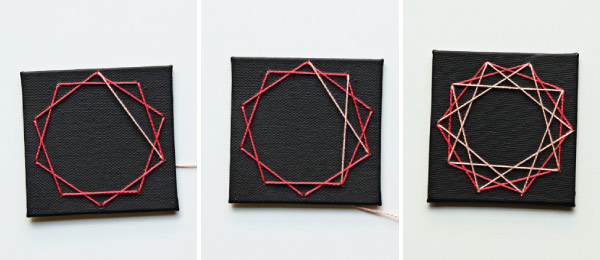
Second set. Thread the needle again and tie a knot like before. Start at hole 1, coming from the back to the front and skip two holes and go down hole number 4. Come through hole number 2 and go down hole number 5. Repeat all the way around. Tie a knot at the back and trim. You are done! Now, you can use these for fun and add a magnet to the back or your can have your calligrapher write the names on them. I just printed these with a white charcoal pencil. You can really get these done quickly and easily, just punch all the holes first and then you can sit and chat while embroidering these. Bribe some friends with cupcakes and I bet you can get these done in no time. Wouldn’t these be really cute magnets for a Save the Date? I used the pre-primed black canvas, but your could paint these any color to match your theme!


Lisa p
May 17, 2012
Love them!
Kelly
May 17, 2012
These are absolutely lovely. I adore them so much I’m inspired to make them to hang as pieces of art!
aloÿse
May 17, 2012
Thank a lot for this DIY. I haven’t “geometrical mind” and I want understand this for a long time!
Chaucee
May 17, 2012
This is so sweet! What a neat idea.
Kate
May 17, 2012
I have been loving geometric shape inspired art lately…I feel like these would look so good hanging on a wall in a set of 3 or 4! Great post!
Kate
http://www.theforgetfulwife.com
chiara
May 17, 2012
love these! I’m totally inspired to do some for my kid’s room’s wall!
April K.
May 18, 2012
Fun! Where did you get the canvases?
Ines
May 18, 2012
What a great idea! I think this would also work lovely on some picture frames…. I am eager to try this. Thank you so much for sharing!
Looona Lou
May 20, 2012
Great idea! 😉
♥Looona Lou
Hannah audin
May 21, 2012
Hi love these,
Where can you buy these small canvases from? X
Kris
May 22, 2012
Thanks for sharing this great-looking craft project. My mind is racing with all the different things you could do with this string art. I’m trying to think of a way that I can make it into some sort of memorable business card, but I’m not sure there would be enough room for all the pertinent information. Maybe if you created them on a computer first so that they were the right size and shape to slide into the middle of the strings when you’re done.
frankie
May 22, 2012
I think this is cool! can i use this for my High School fourth year class?
Trix
May 23, 2012
This reminds me of those geometric drawing sets I used to play with as a kid, love the way you’ve turned it into a crafty idea.