


This post was brought to you by T-Mobile. America’s Largest 4G Network — Now faster than ever. Click here for more details.
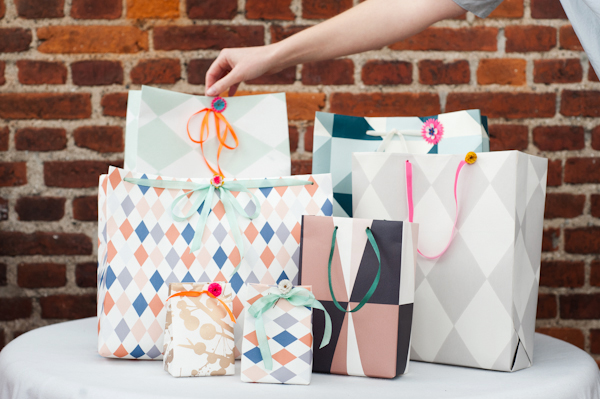
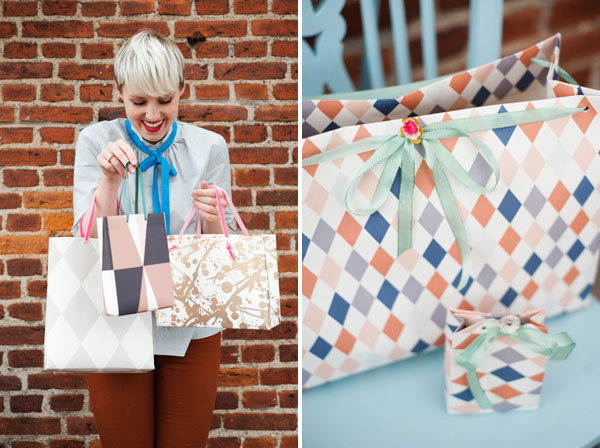
Growing up, my mom’s exuberant gift wrapping skills often received more attention than the gift itself. And for good reason–she had a way of turning ordinary materials into beautiful works of art. One of her many tricks was taking scraps of leftover wallpaper and turning them into gift bags. I teamed up with the fine folks of Ferm Living (thank you!), my fellow Copenhagen neighbors, to use their lovely graphic wallpaper line and recreate her little secret just in time for the holidays. It’s cheaper and a whole lot more fun than buying store bought, (but then again, isn’t it always?!)
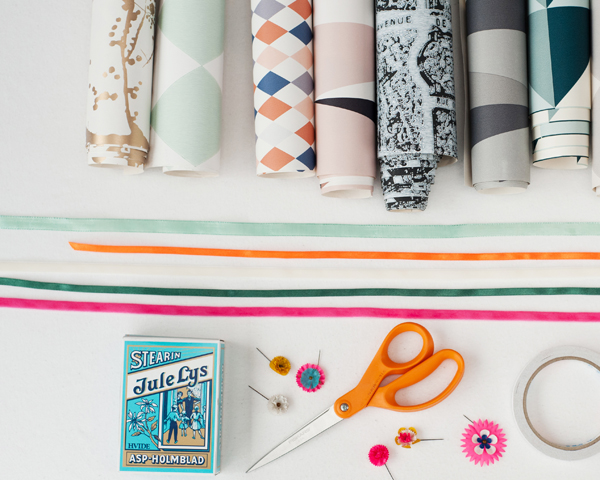
Materials Needed: box (here I use a traditional Danish Christmas candle box) to use as a form for the size of your gift, wallpaper large enough to wrap around the box, contrasting ribbon as handles, double-sided tape, scissors, whole punch, cardboard (optional)
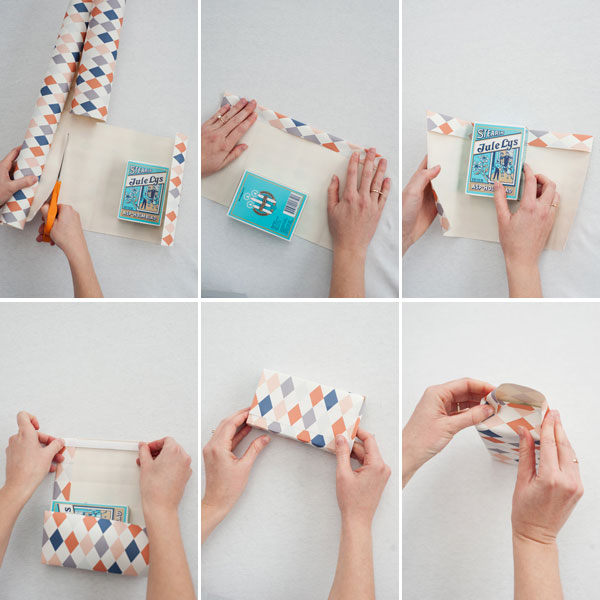
Step 1: Cut around the size of your desired box as if you were wrapping a present leaving plenty of space around.
Step 2: Fold down about 2″ on the horizontal side. This will act as the top of the bag.
Step 3: With the folded part placed at the top of the box, continue to wrap the box like a normal gift. Go back and give a good crease to each bend in the wallpaper. This will help give shape to the bag. With the double-sided tape, tape the edge down.
Step 4: Fold the bottom of one side in, but leave the other side open.
Step 5: Take the box out of the now formed wallpaper bag and squeeze the front and back together so there’s a crease on each of the sides. Again, this will give shape to the bag and make it more sturdy.
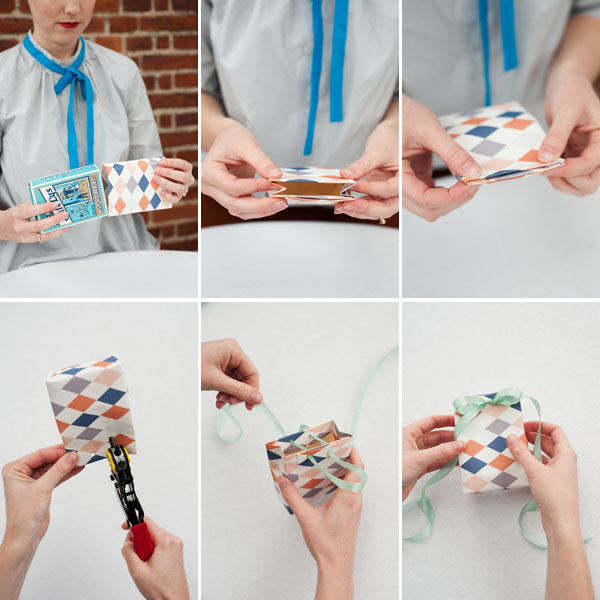
Step 6: If you want to really secure the bag’s shape, cut a piece of cardboard to the size of the bottom of the bag (not shown).
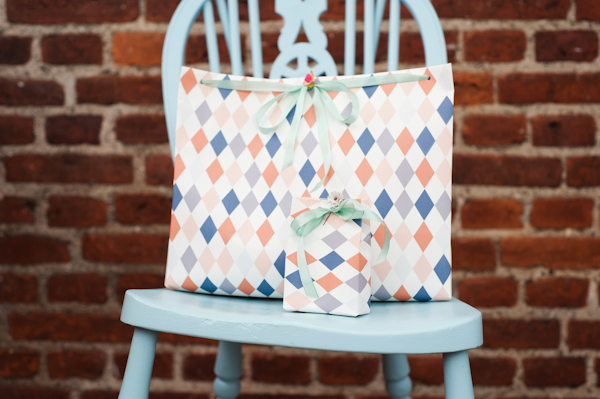
Step 7: Decide what type of ribbon formation you’d like. There’s the traditional handles with one on each side, or a central ribbon, which I show here. I punched two holes about 3/4″ apart at the top of the bag on the front and back.
Step 8: Slide the ribbon through starting on the front, going through the back and then returning to the front again. Then tie your ribbon. Voila!
Tips: For large packages, I’d recommend cereal boxes or laundry detergent boxes. For smaller shapes, I used tea boxes. For medium boxes you can use books. Try a variety of sizes to experiment with the fun shapes you can create. Enjoy!


Photos by Hilda Grahnat


Bekuh
December 19, 2011
I love this project. I have so many rolls of vintage wallpaper lying around I can’t believe I never thought of this. Thanks!
Lexy @ The Proper Pinwheel
December 19, 2011
This is so genius. And SO pretty. I have some old wallpaper that I bought on ebay. I’ve been waiting for the right project and I think we have a winner.
Thanks for sharing!
Lexy
http://www.theproperpinwheel
Hannah @ Sparrow + Spark!
December 19, 2011
Wow these are great!
Meagan
December 19, 2011
LOVE!!!!
Alexa
December 19, 2011
Oh my goodness adorable. Love the pattern actually. And shoot…they look much better than the DIY bags I just did. Ha.
Victoria@VictoryPaper
December 19, 2011
What a pretty idea! I painted my wrapping paper this year to make little works of art!
http://victorypaperdesigns.blogspot.com/2011/12/hand-painted-wrapping-paper.html
magalerie
December 19, 2011
Beautiful!
I love the pastel colors for Christmas 🙂
Amanda Jane
December 19, 2011
very clever!
Carrie
December 19, 2011
AWESOME! I love the idea of making a number of sized ones and reusing them year after year too. Eco-groovy and gorgeous.
Rebecca - A Daily Something
December 20, 2011
What a brilliant idea. And looks so fun to make!!
Jennifer
December 20, 2011
Are there any reliable sites out there in the online universe with wallpaper scraps/remnants?
Gigi
December 22, 2011
Neat idea!!!
brittany
December 23, 2011
For wallpaper remnants here in Denmark, I’ve used Retro Villa. They also have an online shop: http://retrovilla.dk/cms/index.php?slang=2
Gigi
December 27, 2011
Your tutorial is so much easier than one I read last week, thanks for the tips and for sharing!