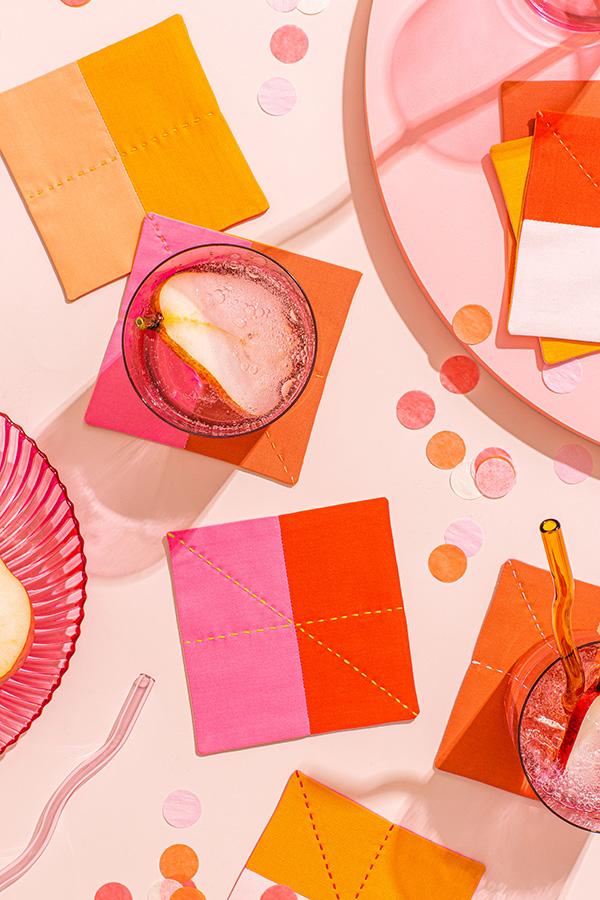
Get ready for those shorter days and cooler nights by adding a little warmth and color to your home or next gathering. We partnered with Fiskars to use their collection of fabric cutting tools to craft these modern patchwork style coasters. These require a bit of machine sewing but are super beginner friendly, and the final hand-quilted details are the perfect thing to work on while curled up on the sofa with your favorite fall flick. Once finished, set these out and serve up some seasonal drinks to kick off the season!
We are rounding up some of our favorite Fall throwbacks. This also means Halloween is around the corner and it’s time to start costume brainstorming – any suggestions? In the meantime, here are a few of our favorite DIYs to start your Fall Checklist!
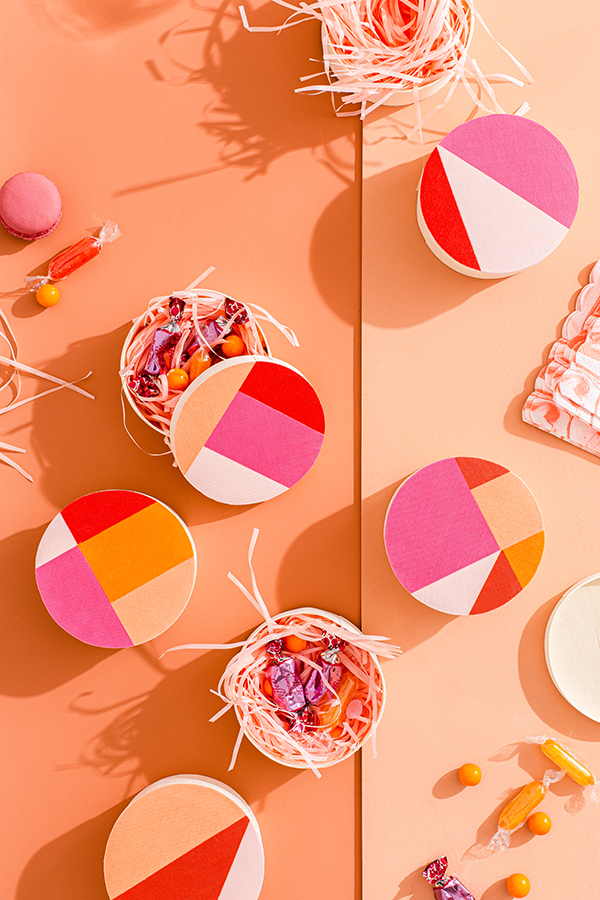
Fall is right around the corner and nothing says cozy like warm hues and patchwork quilts! We drew inspiration from both for these sweet favor boxes we created with our favorite Fiskars tools. Based on modern, geometric quilt designs these involve some precise cutting, but allow you to skip the sewing machine. Fill them with colorful treats or small school supplies (like erasers, pencil sharpeners, or stickers) for those autumn festivities you’ve got brewing.


