


Today’s post is by the talented Michaela of Blissful Fetes. This idea is so versatile and would work great with letters or numbers.

Hi readers of Oh Happy Day! I’ve been following Jordan’s blog for years and I feel so very honored and excited to be sharing this DIY project with your here today. The idea is based on Jordan’s fringey streamers – I planned to use them as decor for my daughter’s 2nd birthday parties and was looking for other decor elements to match. I’m usually all about the cute, small details, but this time I decided to go for a big impact.
Here’s what you need:
– crepe paper sheets (I used 5 full sheets for this one)
– painter’s tape or masking tape
– scissors
– paper glue
– chalk or pencil to draw the outlines
– an empty wall, preferably not covered with delicate wallpaper
Start by sketching the outlines of the number or letter onto the wall. I used brown chalk that will come off easily. A pencil would work, too – just test it before.
Cut the crepe paper into strips just like you’d do for the fringey streamers – only a bit wider. Cut into it from both sides as shown in Jordan’s tutorial.
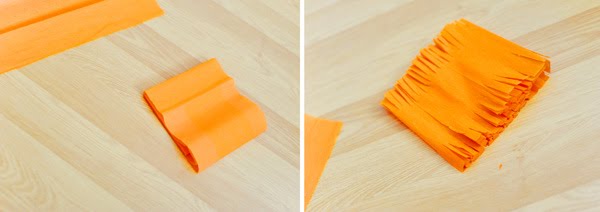
Open the crepe strip and fold it in half as shown below, leaving the lower side slightly longer than the top one. Now you can start sticking it onto the wall, into the sketched shape. Start with the very bottom of the shape. Attach it with pieces of painter’s tape – these will come off very easily when you take the decor down (to make sure, also test this before).

Around the corners, cut off overlapping parts of the crepe paper to fit the sketched shape. Layer strip after strip using the same technique.

Instead of using tape, you need to attach the top crepe paper strips with paper glue, in order to end up with a neat shape. You probably don’t want to stick the glue directly onto your wall, so stick a row of tape underneath following the outline of the sketch. Then simply attach a strip of paper to it as shown in the picture.
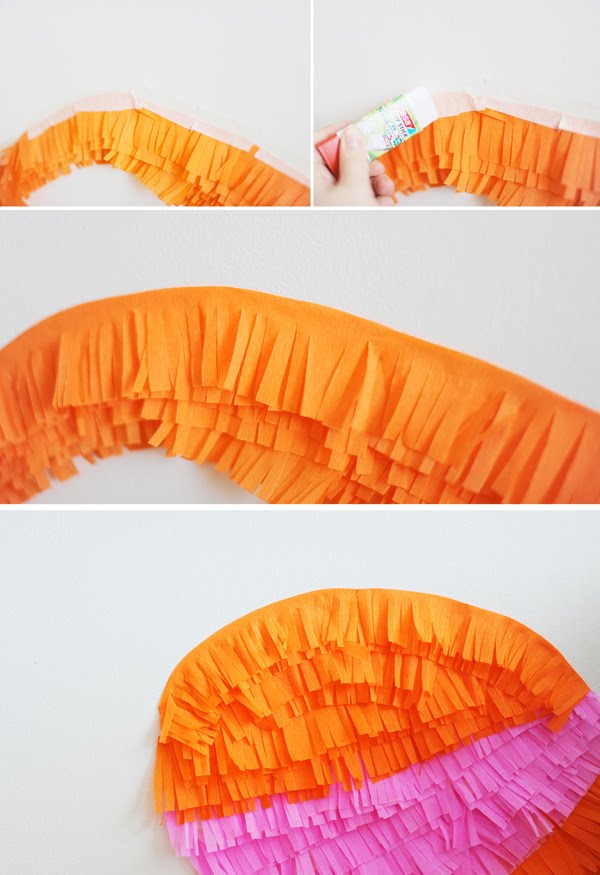
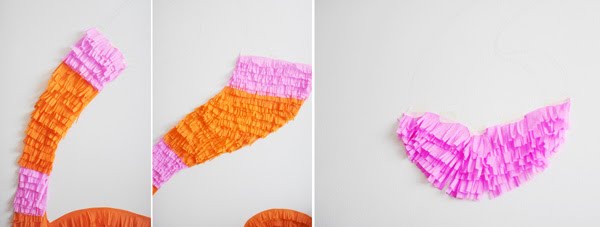
Layer strips to fill the entire shape, change the color of paper as often as you like. A rainbow colored number might look great! Remember to always start from the bottom corner.

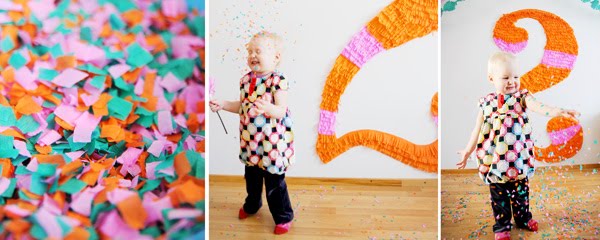
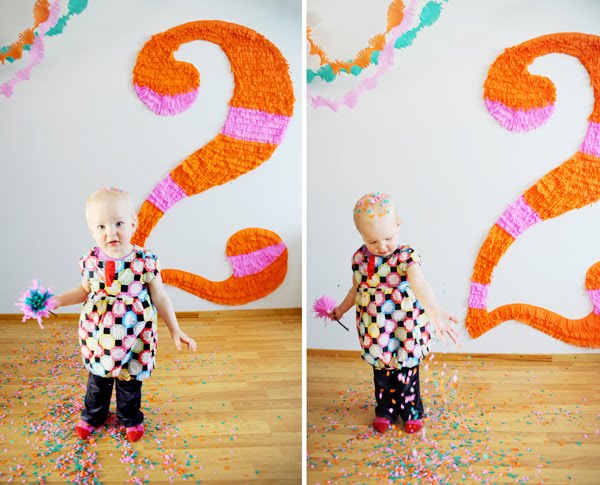
This is not a super quick project, but soon enough you’re done! This 5″10 tall number 2 took me about 1.5 hours including the time to take the pictures for this tutorial.
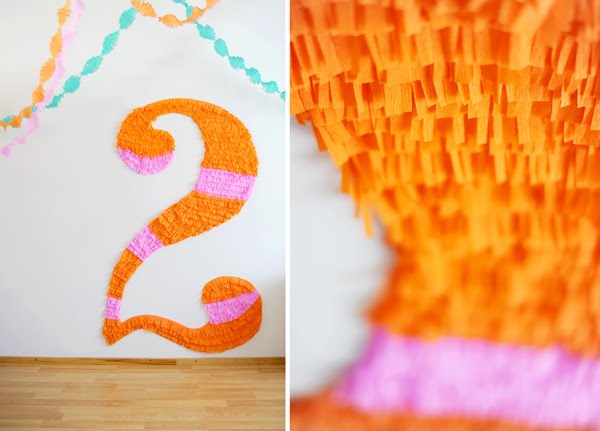
The leftover sheets you can cut into confetti. The crepe paper makes it very light and fluttery.
Ella loved the confetti mess in the living room!
All photos by Michaela for Oh Happy Day


Jessica
April 20, 2011
this is SO much fun! Even if it takes some time, it makes for amazing pictures.
Boo Hazard
April 20, 2011
oooh i like this idea even for an art installation you keep up permanently! or in a nursery it could be cool too – ideas are endless! thanks for inspiration! 🙂 -BOO
Erica
April 20, 2011
That's amazing!
Courtney {pizzazzerie}
April 20, 2011
This is SO darling!
Yolanda @ Miss Refashionista
April 20, 2011
Even if you don't have a party, I would do a birthday photoshoot with the #. So cool!
Julia | Room for Dessert
April 20, 2011
Oh my GOD! I LOVE it!!!!!!
Stephanie Sabbe
April 20, 2011
super cute!
angie
April 20, 2011
this diy is so cool. but for me, im afraid it would take up a lot of time (esp if i mess up).
EllenQ
April 20, 2011
Amazingly Cute! You could leave it up for months.
diamond rings
April 20, 2011
Very cute, looks like a lot of effort tho. Love the idea, has many uses. Thanks for the suggestion
rebecca
April 20, 2011
wow, this is wonderful!!!! thanks for the great DIY, Michaela 🙂
Gaby [The Vault Files]
April 20, 2011
This is beautiful! Love it, what a great idea!
CinnamonInk
April 20, 2011
Oooo fabulous!!! The ideas just keep coming, I love it!
the late afternoon
April 20, 2011
wow i love how crisp and clean the lines and stripes are! this is such a great party decoration!
Elisabeth
April 20, 2011
What a fantastic idea, and a beautiful tutorial–I'm sure I'd leave it up long after the party. It might be a fun statement in a child's room–maybe an initial instead? In a huge frame?
Luana M.
April 21, 2011
JOrdan, eu amo o seu blog!!! O Brasil sente sua falta…
Muito dramático esse número 2! Amei!
Beijo!
quickflowersberlin
April 21, 2011
The entire is unexplored before you. So many place to visit, so many experiences are there for taking, and you are still worrying about the right tour program? Shed off all the worries and simply rush to http://www.righttoursntravels.com today, to have a journey of your lifetime.
Pistachio
April 21, 2011
That looks so amazing. So very creative. I like that you are compelled to not only look at it but touch it too!
Alix Houghton
April 21, 2011
Love!
I am SO ADDICTED to the fringey streamers I could marry them.
Yeri
April 21, 2011
Oh these are so stinkin' cute! It would be great for any birthday at any age. Or even a wedding. LOVE!
Basudev
April 22, 2011
God has created so many things for you to experience, but without mothers you cant imagine your existence to experience that. The day you were born was the happiest day in her life, and it’s your turn to make her smile with fascinating gifts on Mother’s Day. Visit http://www.singaporeflowershop.com/MothersDay_Singapore.asp for more.
subhasree
April 22, 2011
Keep up the good work. Best of luck. From http://www.cakes2hyderabad.com/mothers_day_gifts.asp
Jackie
April 22, 2011
That is so crafty and perfect photo op!
hollie
April 24, 2011
These look great, what a brilliantly affordable but striking decoration!
Hollie
lipstick and balloons
Lisa
April 24, 2011
Love this! And just in time for birthday #3! And also, totally off topic – is that a Nova Scotia Duck Toller??? Adorable.
Alokita Bose
April 25, 2011
The visit was useful. Content was really very informative. From http://www.rakhiworldwide.com
Monica
May 11, 2011
This is GORGEOUS!!
amy
May 16, 2011
This might be my new favorite blog…
I *love* every party idea you share here, and it makes me want to host a part every single day of the week!
Thanks so much!
amy @ glass confetti
Patt
June 6, 2011
!!!The best idea every, my grandson will be 2 in Nov. i will start soon, and surprise him for his birthday!!
Thanks
First time Mimi